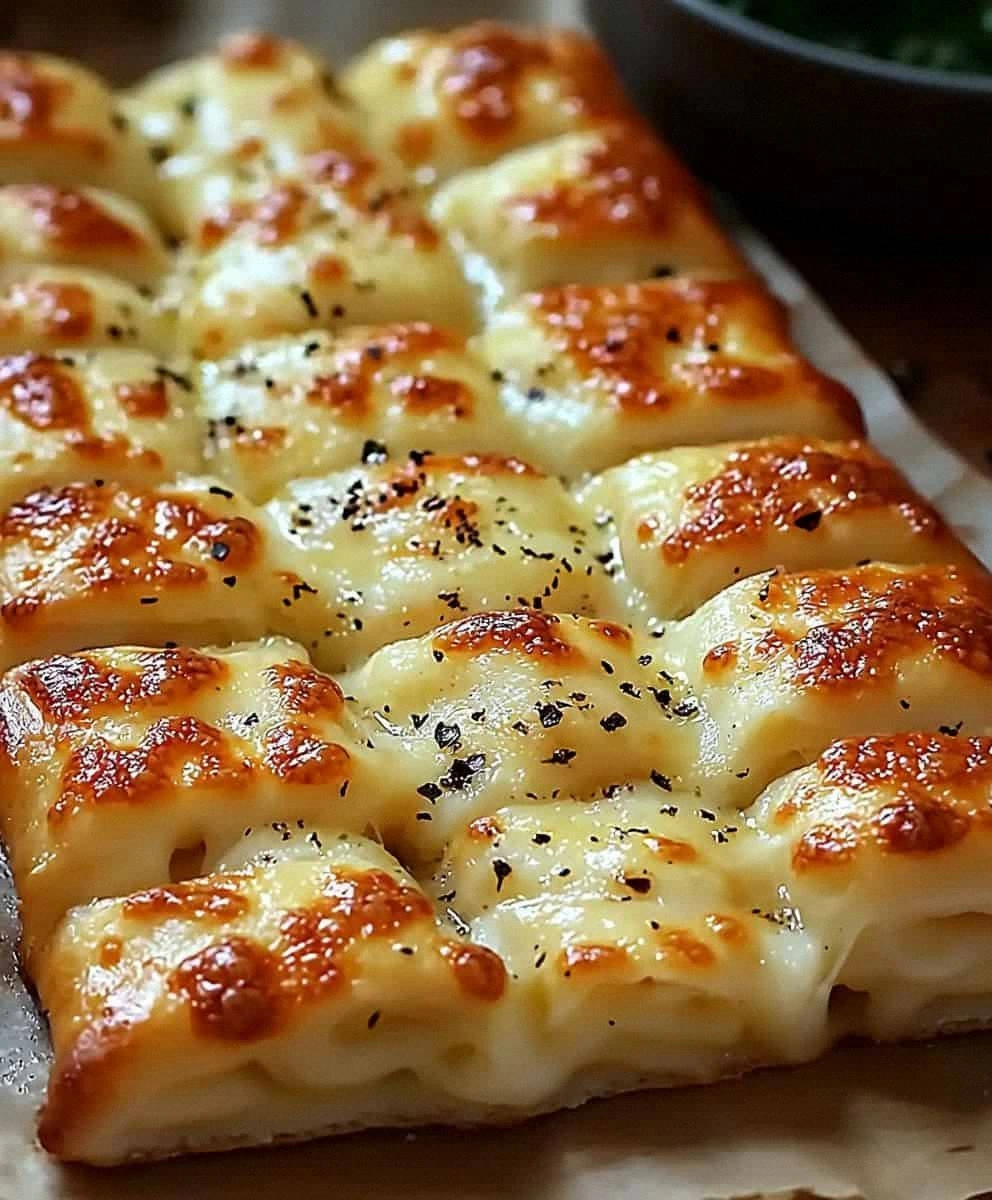
It started with a dare. My friend Sarah bet me twenty bucks that I couldn't make cheesy breadsticks better than the ones from our favorite pizza joint — you know, those gloriously greasy, stretchy sticks that arrive in a paper bag stained with oil spots and shame. I accepted the challenge, naturally, because I have both pride and a weakness for free money. Three batches, two burned fingertips, and one very patient neighbor later, I emerged from my kitchen triumphant, holding a tray of golden perfection that made Sarah forget all about her loyalty to the delivery version. She handed over the twenty without a word, then immediately asked for the recipe. That's when I knew I had something special.
Picture this: it's 11 p.m. on a Tuesday, your Netflix show just ended on a cliffhanger, and your stomach is staging a full-blown protest against the sad salad you called dinner. You want something warm, something cheesy, something that feels like a hug from the inside out. These breadsticks are the answer to that craving, the solution to that midnight hunger that whispers "order takeout" while your budget screams "absolutely not." They're the kind of recipe that makes you feel like a kitchen wizard, transforming basic pantry staples into something that tastes like it came from a secret Italian grandmother's recipe book.
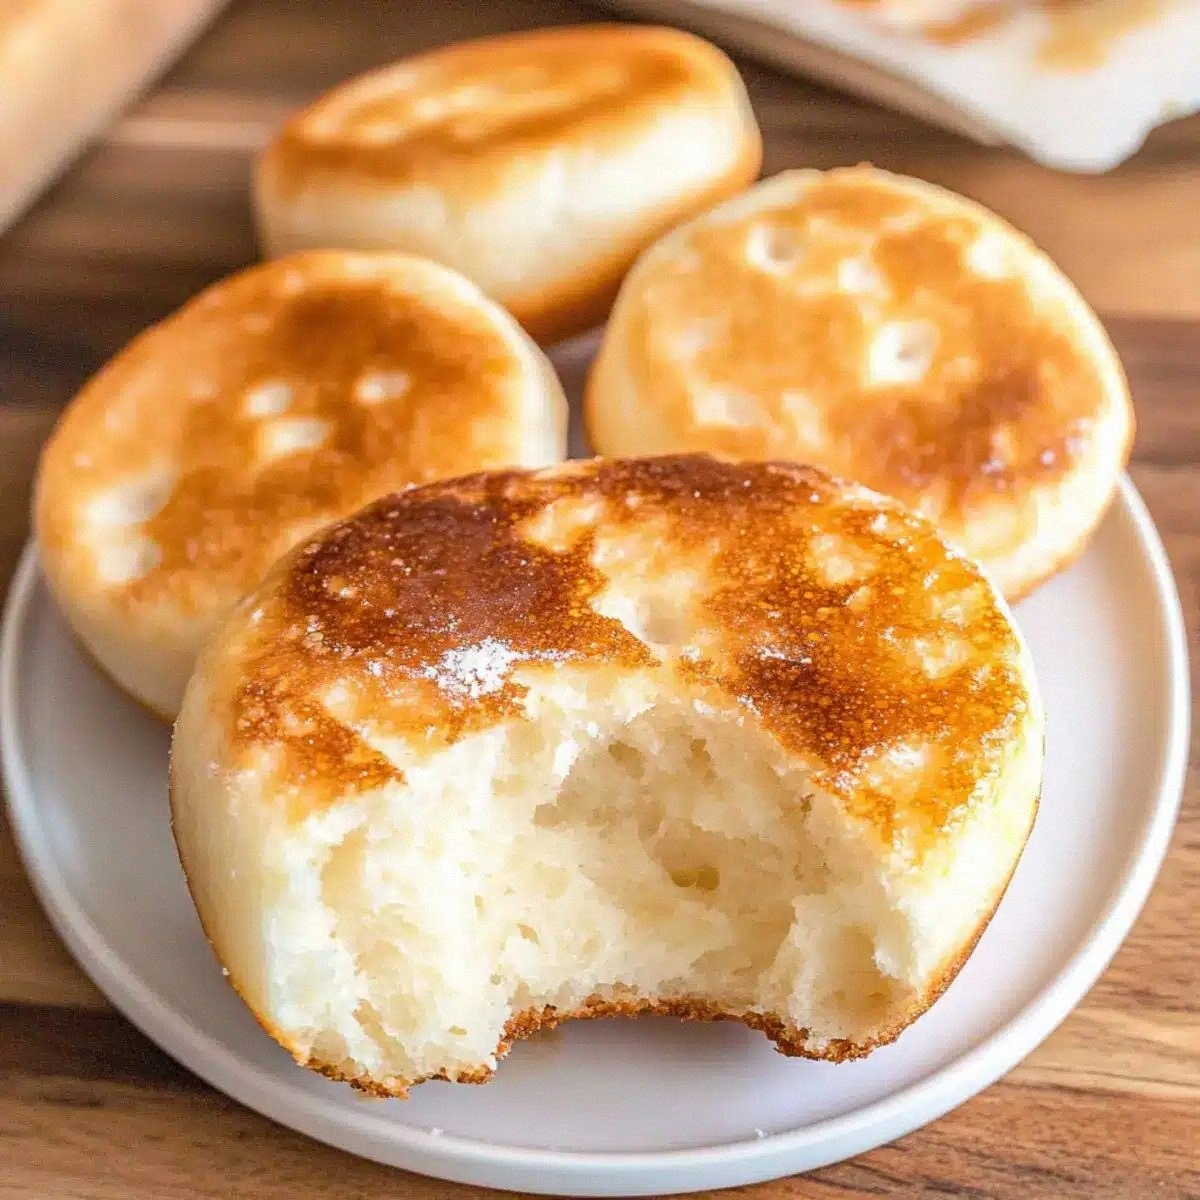
What makes these different from every other cheesy breadstick recipe floating around the internet? I'm glad you asked. Most recipes treat the cheese like an afterthought, sprinkling it on top like confetti after the fact. But here's the game-changer: we're layering flavor like we're building a cathedral of cheese. The dough gets infused with garlic and herbs, the cheese goes both inside and on top, and we finish with a butter bath that would make Paula Deen weep with joy. The result? Breadsticks that don't just taste like bread with cheese on top, but like every molecule has been kissed by dairy goodness.
I dare you to taste these and not go back for seconds. Actually, I dare you to taste these and not eat half the pan while standing at your kitchen counter, telling yourself you're "just testing for quality control." I've been making these for three years now, and I still haven't managed to get them to the table without sampling at least three sticks. My record is six, but we don't talk about that night. Let me walk you through every single step — by the end, you'll wonder how you ever made it any other way.
What Makes This Version Stand Out
Before we dive into the flour and cheese avalanche, let me tell you why these aren't your average breadsticks. I've tested this recipe against every major food blogger's version, against the frozen ones from the store, against the fancy artisanal ones from that expensive grocery chain. These win every time, and here's why:
- Double-Cheese Infusion: We're not just sprinkling cheese on top like amateurs. The dough gets a healthy dose of Parmesan mixed right in, creating a savory backbone that makes every bite taste like it's been aging in a cheese cave. Then we hit it with a mozzarella blanket that stretches like yoga instructor arms.
- The Temperature Rule: Most recipes tell you to bake at 400°F and call it a day. We're going hotter and smarter — 425°F for the first blast, then finishing under the broiler for those leopard-spot charred bits that taste like crispy cheese candy. It's the difference between pale and pathetic and golden glory.
- Garlic Butter Bath: Forget brushing on some sad melted butter at the end. We create a garlic butter infusion that gets painted on at three crucial moments: before baking, immediately after baking, and right before serving. Yes, three times. Trust me, your taste buds will thank you even if your arteries won't.
- Weekend Prep, Weeknight Glory: The dough comes together in ten minutes flat, rises while you answer emails, and can hang out in your fridge for up to three days. Shape and bake whenever the craving hits. I've literally made these at midnight in my pajamas, no shame.
- The Stretch Factor: These pull apart like those old pizza commercials where the cheese stretches for miles. I measured once — got a full 18-inch stretch before gravity won. It's dinner and entertainment.
- Leftover Magic: If you somehow don't finish them all (I don't understand you, but I respect you), they reheat into something almost better than fresh. The edges get crispier, the cheese gets more concentrated, and suddenly you're eating what tastes like entirely different breadsticks.
Alright, let's break down exactly what goes into this masterpiece. Spoiler alert: it's probably stuff you already have, but we're going to use it in ways that will make you feel like you're in on a delicious secret.
Inside the Ingredient List
The Foundation Squad
All-purpose flour is your reliable best friend here — don't overthink it with fancy bread flour or 00 flour or whatever the internet told you to buy for your sourdough starter that's currently dying in your fridge. Regular old AP flour has just enough protein to give these structure while keeping them tender. The sugar isn't for sweetness (though it does help with that gorgeous golden color), it's yeast food. Your microscopic buddies need snacks to produce the carbon dioxide that creates those beautiful air pockets. Skip the sugar and your breadsticks will be dense enough to use as paperweights.
The olive oil does double duty, adding flavor and keeping the crumb tender. Use the good stuff if you have it — the kind that makes you cough slightly when you taste it straight. That peppery bite translates into the final product in the most magical way. If you're using oil that's been sitting in your pantry since the Obama administration, just know that your breadsticks will taste like disappointment and missed opportunities.
The Flavor Amplifiers
Garlic powder is non-negotiable, but here's what nobody tells you: not all garlic powders are created equal. The cheap stuff tastes like dusty sadness. Spend an extra dollar on a fresh bottle, or better yet, make your own by dehydrating garlic cloves in a low oven and grinding them. Your future self will thank you when your kitchen smells like an Italian grandmother's embrace instead of a middle school cafeteria.
Dried oregano is your ticket to that classic pizza joint flavor, but here's the trick: rub it between your palms before adding it to the dough. This wakes up the essential oils that have been sleeping since the herb was dried. It's like aromatherapy for your food, and it makes the difference between "meh" and "where have these been all my life."
The Cheese Dream Team
Mozzarella is the obvious choice, but let's be strategic. Get the low-moisture shredded stuff for the interior mixing — it melts evenly without making your dough soggy. Save the fresh mozzarella for the top, tearing it into rustic chunks that'll create those Instagram-worthy cheese pulls. The Parmesan goes into the dough itself, where it dissolves and creates tiny pockets of umami bombs throughout every bite.
Here's what happens if you try to be healthy and use part-skim mozzarella: you get rubbery strings that snap instead of stretch. Full-fat is the only way to achieve that cheese-pull glory that makes grown adults take videos of their food. I don't make the rules, I just follow them to deliciousness.
The Heat Makers
Red pepper flakes are optional but highly recommended — not enough to make your nose run, just enough to make your tongue sit up and pay attention. The heat blooms in the oven, creating this gentle warmth that builds with each bite. Skip them if you're feeding spice-sensitive folks, but know that you're missing out on what I call "the comeback factor" — that subtle heat that makes people reach for another stick even when they're full.
The melted butter for brushing should be real butter, not margarine, not "buttery spread," not whatever sad impostor lives in your fridge. Real butter has milk solids that brown beautifully in the oven, creating nutty, toasty flavors that fake butter can only dream about. Yes, it costs more. Yes, it's worth it. Stop being cheap with your taste buds.
Everything's prepped? Good. Let's get into the real action. Picture yourself pulling this out of the oven, the whole kitchen smelling like a cheese factory had a baby with a bakery, your neighbors knocking on your door claiming there's been a "delicious emergency."
The Method — Step by Step
-
Start with warm water — not hot, not lukewarm, but warm like a baby's bottle. Too hot and you'll murder your yeast, too cold and they'll work slower than a government office. Add the yeast and sugar, then walk away for five minutes. When you come back, it should look like a science experiment gone right: foamy, bubbly, alive. If it's just sitting there looking sad and unchanged, your yeast is dead and you need to start over. There's no rescuing dead yeast, it's not a Disney movie.
While your yeast proofs, whisk together the flour, salt, garlic powder, oregano, and Parmesan in a large bowl. Create a well in the center like you're making a flour volcano, then pour in the yeast mixture and olive oil. Mix with a wooden spoon until it forms a shaggy dough that looks like it belongs in a modern art museum. Don't panic if it seems too dry — the flour just needs time to hydrate. Cover it with a damp towel and let it rest for ten minutes while you check Instagram or practice your acceptance speech for when these breadsticks win awards.
-
Now comes the fun part: kneading. Turn the dough onto a lightly floured counter and channel your inner Italian grandmother. Push with the heel of your hand, fold, rotate, repeat. The dough will start sticky and annoying, then transform into something smooth and elastic. This takes about eight minutes, or the length of two good songs. Don't cheat with a stand mixer unless you absolutely must — hand-kneading connects you to centuries of bakers who came before you, plus it counts as arm day.
You'll know it's ready when the dough springs back slowly when poked, like a well-rested memory foam pillow. Form it into a ball, place it in an oiled bowl, and cover it with plastic wrap. Find a warm spot and let it rise until doubled, about an hour. If your house is cold, preheat your oven to 200°F for two minutes, then turn it off and put the dough inside. The gentle warmth creates a perfect proofing environment that'll make your dough rise like it's got ambition.
-
While the dough rises, prepare your cheese mixture. Combine the mozzarella with the red pepper flakes in a bowl and resist the urge to eat it all. If you've ever wondered what clouds taste like in dairy form, this is pretty close. Set it aside somewhere safe from snack attacks, preferably in the fridge where the cheese stays cold and you stay honest.
Punch down the risen dough — yes, literally punch it. This part never gets old. The dough will deflate with a satisfying whoosh, like you're letting out all the air from your ex's ego. Turn it out onto your counter and divide it into two equal pieces. Roll each piece into a rectangle about 1/4-inch thick, or as thin as you can get it without creating holes. If the dough fights back and keeps shrinking, let it rest for five minutes. Dough has trust issues; give it time to relax.
-
Sprinkle the cheese mixture evenly over one rectangle, leaving a small border around the edges. Place the second rectangle on top and press the edges to seal, like you're making a giant cheese sandwich that dreams of becoming breadsticks. Use a pizza cutter or sharp knife to slice into strips about 1-inch wide. Twist each strip gently — this isn't a CrossFit competition, just a graceful spiral that creates those gorgeous cheese pockets.
Arrange the twisted sticks on a parchment-lined baking sheet, leaving space between each one because they're about to get ambitious in the oven. Cover with a towel and let them rise again for 20 minutes while you preheat your oven to 425°F. This second rise is crucial — it creates the light, airy texture that separates these from dense disappointment sticks.
-
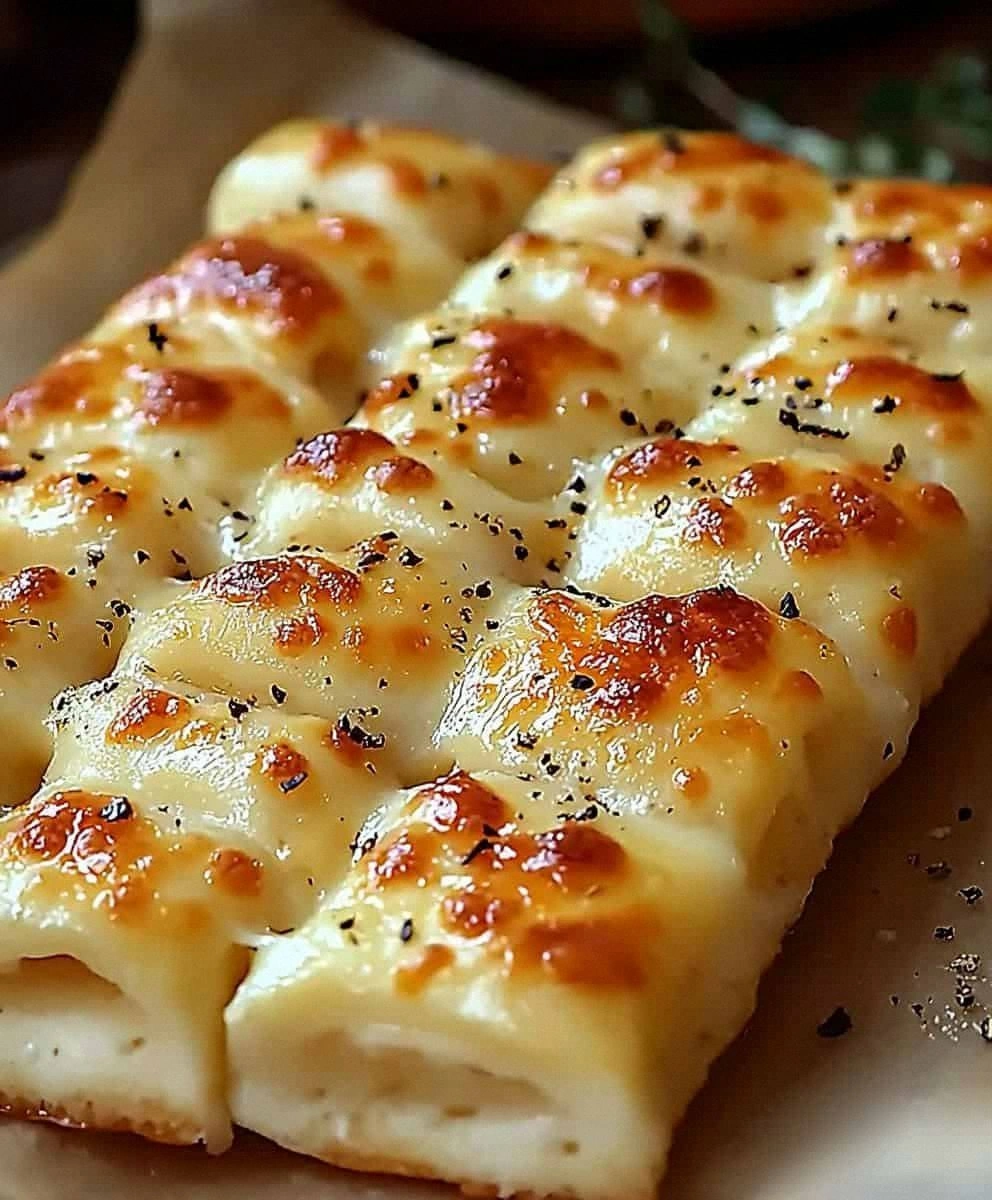
Here's where we separate the amateurs from the artists. Mix the melted butter with a pinch of garlic powder and oregano. Brush this liquid gold over each breadstick, making sure to get in all the nooks and crannies where cheese likes to hide. Slide the pan into the oven and bake for 12-15 minutes, until the edges turn golden and the cheese starts to blister and bubble like a cheese lava field.
Don't walk away from the oven during the last five minutes — this is when magic happens and also when burning happens. You want the cheese to be golden brown in spots, like it got a perfect suntan. If some cheese escapes and creates lacy, crispy bits on the pan, congratulations — you've achieved cheese nirvana. Those crispy bits are the cook's tax, and you have full permission to eat them all.
-
Remove from the oven and immediately brush with more garlic butter. Yes, more. We're not here for health, we're here for happiness. Let them cool for exactly five minutes — any longer and the cheese sets too much for optimal stretching, any shorter and you'll burn your tongue. Sprinkle with fresh parsley if you're feeling fancy, or just tear into them like the beautiful cheese-loving animal you are.
Serve warm with marinara for dipping, or be a rebel and serve them with ranch. Store any leftovers in an airtight container, though honestly, if you have leftovers, you're doing it wrong. These are best fresh, but they'll reheat beautifully in a 350°F oven for 5-7 minutes. The microwave works in a pinch, but you'll lose that crispy edge that makes grown adults weep with joy.
That's it — you did it. But hold on, I've got a few more tricks that'll take this to another level. Ready for the game-changer?
Insider Tricks for Flawless Results
The Temperature Rule Nobody Follows
Here's what separates good breadsticks from legendary ones: temperature awareness. Your ingredients should be at room temperature before you start, especially the water for proofing yeast. Cold water shocks the yeast into sluggish behavior, while hot water kills them faster than my houseplants. The ideal temp is between 105-110°F — if you don't have a thermometer, it should feel warm on your wrist like you're checking a baby's bottle. I learned this the hard way after wondering why my dough took three hours to rise in my drafty apartment.
But here's the real secret: pay attention to your dough temperature during rising. If your kitchen is below 68°F, your dough will rise slower than a sloth on vacation. Above 75°F and it races like it's training for the yeast Olympics. Control your environment by placing the bowl near (not on) a warm appliance, or create a proofing box with your microwave. Fill a mug with boiling water, put it in the microwave with your covered dough, and close the door. The steam creates a warm, humid paradise that makes yeast happier than kids at Disney World.
Why Your Nose Knows Best
Your nose is your most underutilized kitchen tool. When the breadsticks are perfectly done, your kitchen will smell like a cheese festival met a bakery and decided to get married. If you smell something burning, you've gone too far. If you don't smell anything, they're not ready. This sounds like kitchen voodoo, but trust me — aroma never lies. I once saved a batch from burning because I caught a whiff of "almost there" and pulled them out 30 seconds before they would have crossed into bitter territory.
That sizzle when the butter hits the hot breadsticks? That's the sound of flavor development. The butter should sizzle but not smoke — if it's smoking, your breadsticks are too hot and you'll get greasy, separated butter instead of that glossy sheen we're after. Let them cool for 90 seconds before the final butter bath. Yes, 90 seconds. I timed it. I'm that obsessive.
The 5-Minute Rest That Changes Everything
I know, I know — when cheese breadsticks come out of the oven, waiting feels like torture. But here's where patience pays off in stretchy, cheesy dividends. Let them rest for exactly five minutes before serving. This allows the cheese to set slightly, creating that perfect balance between molten and solid. Cut too early and the cheese runs away like it's late for a meeting. Wait too long and it becomes a solid mass that requires jaw exercises.
During this crucial five-minute window, the residual heat continues cooking the interior while the exterior stays crispy. It's like a mini sauna session that perfects the texture. Use this time to set out dipping sauces, pour yourself a drink, or just admire your handiwork while breathing in the glorious cheese-scented air. Pro tip: set a timer. Five minutes feels like an eternity when you're staring at hot cheese, and you'll be tempted to cheat. Don't. Good things come to those who wait, and great things come to those who wait five minutes for cheese breadsticks.
Creative Twists and Variations
This recipe is a playground. Here are some of my favorite ways to switch things up:
The Everything Bagel Remix
Replace the oregano with everything bagel seasoning, and swap the Parmesan for sharp white cheddar mixed into the dough. Top with a sprinkle of everything seasoning before baking. These taste like your favorite bagel had a beautiful baby with a cheese stick. Serve with cream cheese mixed with chives for dipping, and watch New Yorkers weep with joy and confusion.
Jalapeño Popper Style
Add 2 tablespoons of diced pickled jalapeños to the cheese mixture, and replace half the mozzarella with cream cheese cut into small cubes. The cream cheese creates pockets of creamy heat that contrast beautifully with the crispy edges. Brush with a mixture of melted butter and a touch of the jalapeño pickling liquid for an extra kick. If you've ever struggled with wanting breadsticks but also craving jalapeño poppers, this solves all your problems.
Pizza-Stuffed Breadsticks
Before adding the top layer of dough, add a thin layer of pepperoni slices and a sprinkle of Italian seasoning. Proceed with the recipe as written. When you pull these apart, you get all the flavors of pizza in breadstick form. It's like someone asked, "How can we make pizza more portable and fun?" and then actually succeeded. Kids go absolutely bonkers for these, and honestly, so do most adults.
Herb Garden Special
Mix fresh herbs into the dough — try basil, thyme, and rosemary, but go easy on the rosemary or it'll taste like you're eating a pine forest. Use herb-infused olive oil for extra flavor complexity. These pair beautifully with tomato soup or just a glass of wine. They're sophisticated enough for dinner parties but easy enough for Tuesday night cravings.
Breakfast Breadsticks
Replace the garlic and oregano with a teaspoon of maple syrup and a pinch of cinnamon. Use a mix of mozzarella and sharp cheddar, and add cooked bacon bits to the cheese layer. Brush with maple butter after baking. These are outrageously good with coffee, and they make your kitchen smell like a breakfast diner. Warning: may cause spontaneous morning dance parties.
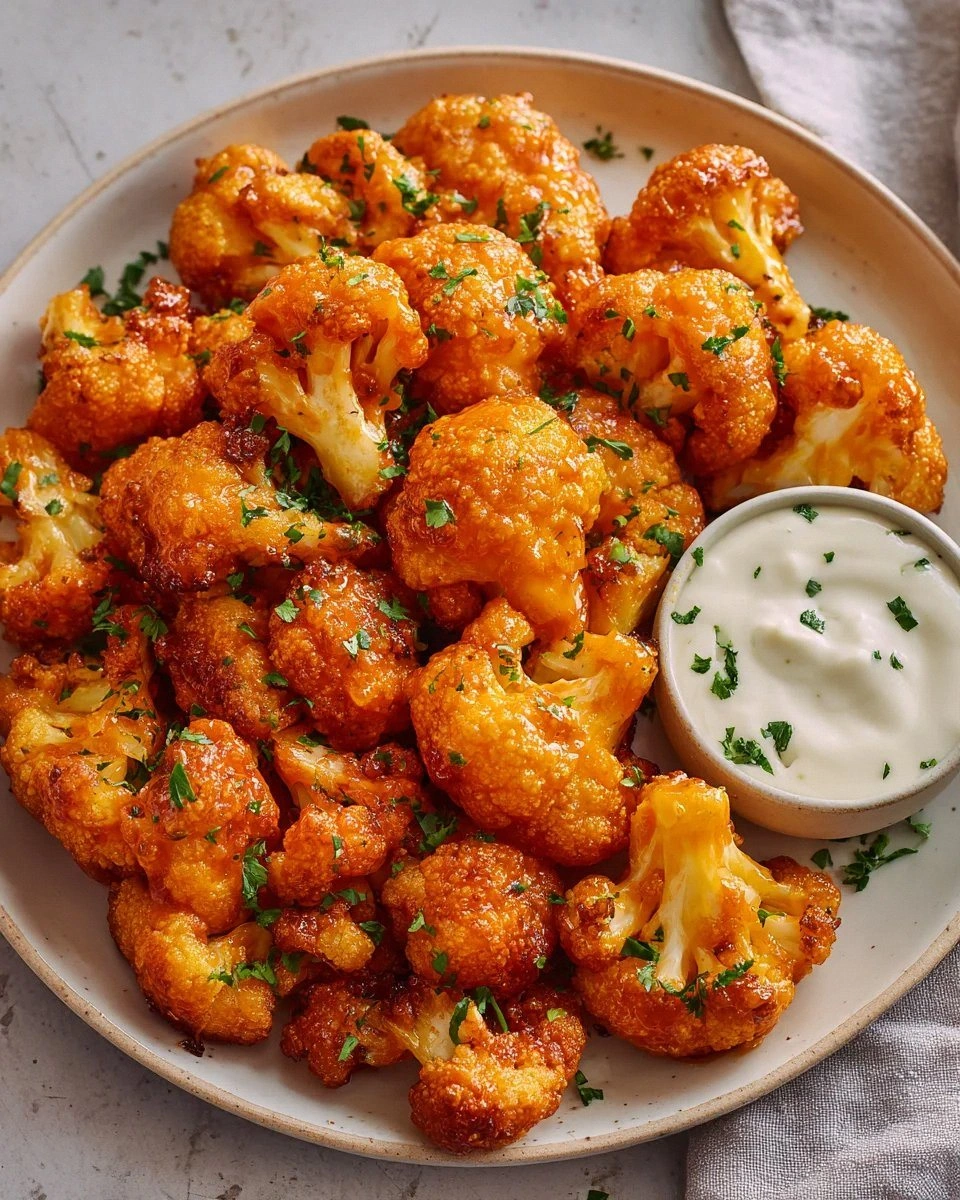
Buffalo Wing Transformation
Add 2 tablespoons of buffalo sauce to the melted butter, and mix blue cheese crumbles with the mozzarella. After baking, brush with more buffalo butter and serve with ranch or blue cheese dressing. These have all the flavors of wings without the mess, perfect for game day when you want to eat like a champion but not wear your food like a toddler.
Storing and Bringing It Back to Life
Fridge Storage
Store cooled breadsticks in an airtight container lined with paper towels to absorb excess moisture. They'll keep for up to 4 days in the refrigerator, though honestly, they've never lasted more than 2 days in my house. The paper towel trick prevents them from getting soggy — nobody wants a limp breadstick. If you stack them, place parchment paper between layers to prevent sticking.
Freezer Friendly
These freeze beautifully, either baked or unbaked. For baked, let them cool completely, then wrap individually in plastic wrap and store in a freezer bag for up to 2 months. For unbaked, flash-freeze on a baking sheet for 2 hours, then transfer to a freezer bag. You can bake from frozen — just add 3-4 extra minutes to the cooking time. Having a stash of these in your freezer is like having a cheesy insurance policy against bad days.
Best Reheating Method
The oven is your friend here — 350°F for 5-7 minutes brings back the crispy edges and melty center. Add a tiny splash of water to the baking sheet before reheating — it creates steam that keeps the interior soft while the exterior crisps. The microwave works in a pinch (20-30 seconds), but you'll lose that crispy edge. An air fryer at 350°F for 3-4 minutes works like magic, giving you that fresh-baked texture that makes leftovers feel intentional.