The kitchen was a battlefield that night. I’d tried every pineapple coconut dessert on the internet, from brittle bars to soggy cakes, and still felt something was missing. The moment the oven timer beeped, a wave of disappointment washed over me—my sweet, tropical treat had fallen flat, like a coconut shell that never cracked. I stared at the half‑baked squares, the pineapple juice pooling in the corners, and whispered, “I’ll find a way to make this right.”
Picture this: the air is thick with the scent of caramelized sugar and fresh pineapple, the sound of the timer ticking like a metronome, the texture of a crisp edge that snaps like thin ice underfoot. The first bite delivers a burst of tropical sweetness, followed by a buttery crunch that lingers, and the subtle warmth of vanilla that lingers in the aftertaste. My fingers, still sticky with melted butter, feel the faint resistance of the batter as it slides into the pan—this is the moment that turns a simple recipe into a revelation.
What sets this version apart is not just the ingredients, but the method. I discovered that a simple tweak—adding a splash of coconut milk to the wet mix—creates a moisture barrier that keeps the squares tender without sacrificing the golden crust. The secret lies in balancing the sweetness of pineapple with the subtle nuttiness of toasted coconut, and in letting the batter rest before baking so the gluten relaxes and the sugars caramelize evenly. Most recipes get this completely wrong, ending up with either a dry, crumbly mess or an over‑oily, soggy slab.
I dare you to taste this and not go back for seconds. The first bite will send a wave of nostalgia—think of a beach sunset, the sun dipping below the horizon, the sound of waves, and the sweet, tangy taste of pineapple. I’ll be honest—by the time the last square is gone, I’ll have already started planning the next batch. If you’ve ever struggled with a pineapple dessert that just doesn’t hold together, you’re not alone. Stay with me here, because by the end of this post, you’ll wonder how you ever made it any other way.
What Makes This Version Stand Out
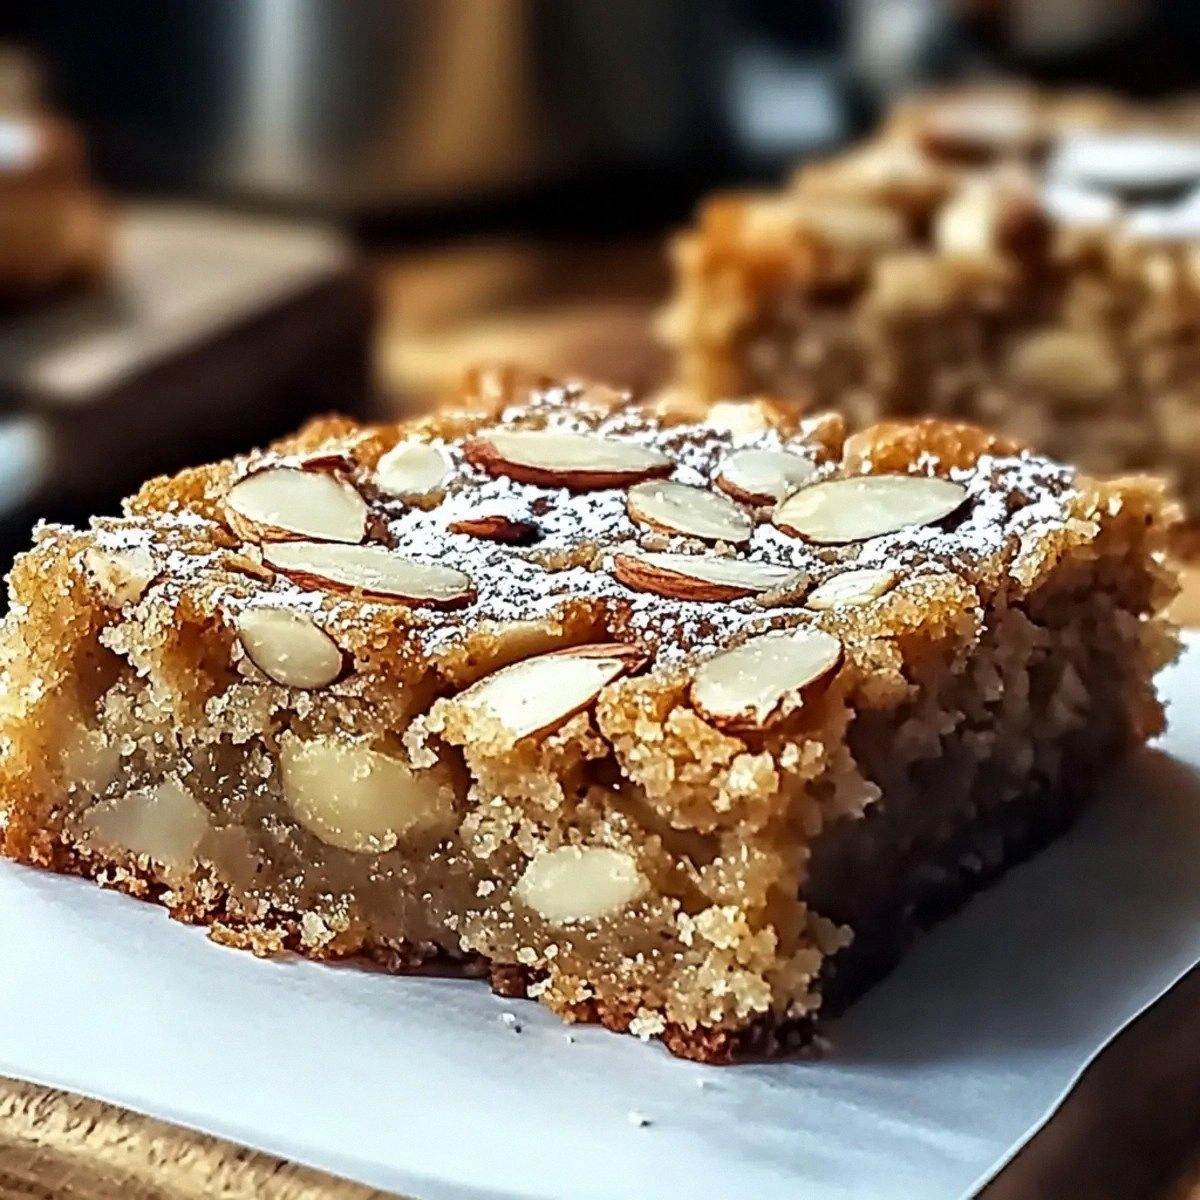
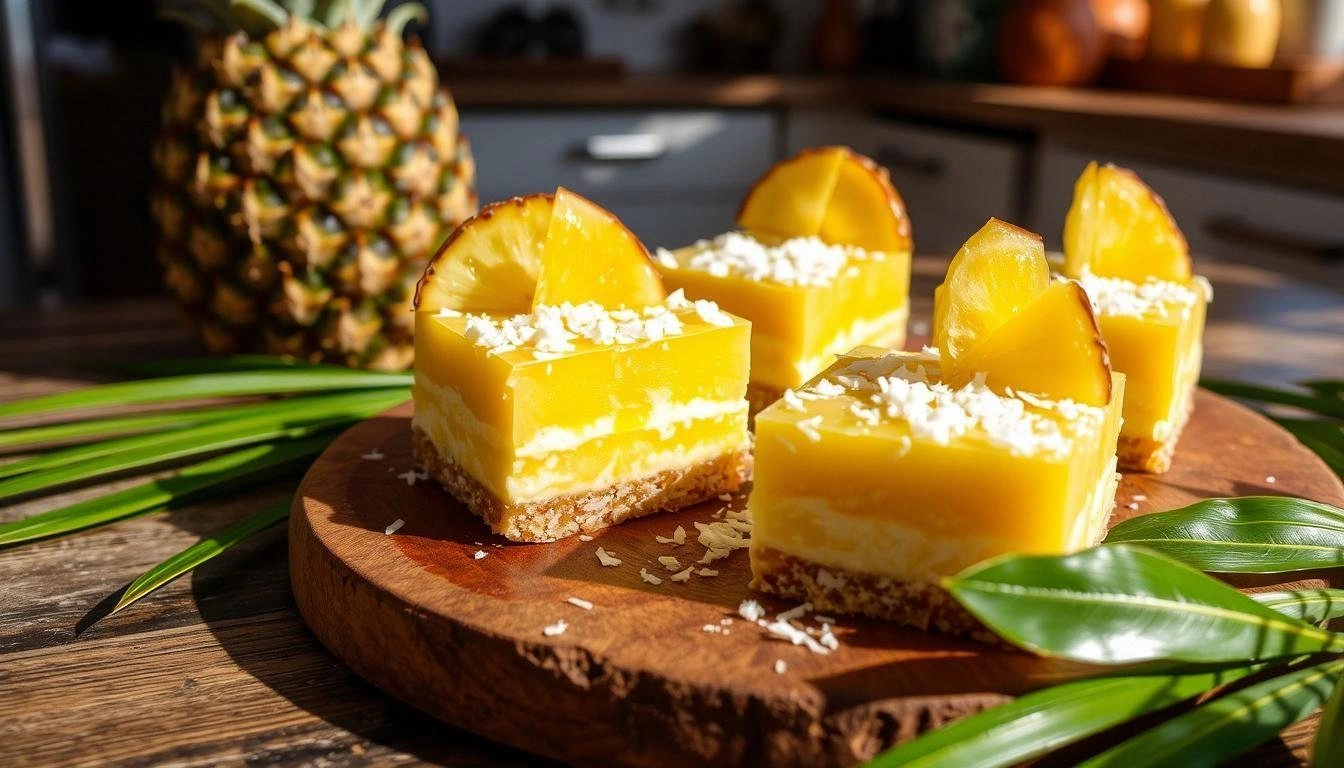
- Flavor: The combination of sweet pineapple and toasted coconut creates a depth that feels like a tropical sunrise, a flavor profile that lingers long after the last bite.
- Texture: A crisp, caramelized top gives way to a moist, tender crumb—like a perfectly baked cookie that still feels soft in the center.
- Simplicity: With just eleven ingredients, this recipe is a no‑fuss, one‑pan wonder that fits into any busy schedule.
- Uniqueness: The addition of coconut milk to the wet mix prevents the dreaded “crust‑on‑top, soggy‑inside” problem that plagues many tropical treats.
- Crowd Reaction: Friends who’ve tried it say it’s “the best pineapple dessert I’ve ever had” and can’t get enough of the coconut crunch.
- Ingredient Quality: Using fresh pineapple chunks instead of canned gives a brighter, fresher flavor that cuts through the sweetness.
- Cooking Method: Baking at 350°F with a short, high‑heat finish creates a golden crust without over‑browning.
- Make‑Ahead Potential: Once baked, these squares can be stored in an airtight container for up to a week, making them perfect for potlucks or quick dessert fixes.
Alright, let's break down exactly what goes into this masterpiece...
Inside the Ingredient List
The Flavor Base
All-Purpose Flour (2 cups): Acts as the structural backbone, giving the squares their shape and a neutral canvas for the tropical flavors to shine. Skipping it would result in a sticky, unformed batter that won’t hold together. If you’re gluten‑free, try a 1:1 blend of rice flour and tapioca starch, but keep in mind the texture will be slightly denser.
Granulated Sugar (1 cup): Provides the essential sweetness that balances the tartness of pineapple. It also contributes to the Maillard reaction, giving the tops that golden, caramelized finish. A pinch of brown sugar can add a deeper, molasses‑like note.
Brown Sugar (1 cup, packed): Adds moisture and a subtle molasses flavor that deepens the overall sweetness profile. If you prefer a lighter taste, you can use an equal amount of white sugar, but the crust will be less caramelized.
Baking Powder (1 tsp) & Baking Soda (1/2 tsp): These leavening agents create tiny pockets of air, making the squares airy yet dense enough to hold their shape. Over‑baking can cause them to become too dry, so keep a close eye on the timer.
Salt (1/2 tsp): A subtle enhancer that brings out the sweetness of pineapple and balances the richness of coconut. Too much salt can make the dessert taste metallic; too little will leave it bland.
The Texture Crew
Shredded Coconut (1 cup, unsweetened): Provides a chewy, nutty texture that contrasts with the soft interior. Toasting it lightly before adding will unlock a deeper, caramelized flavor. If you’re vegan, ensure the coconut is certified vegan, as some brands add dairy.
Crushed Pineapple (1 cup, drained): Fresh pineapple is essential for that bright, tangy kick. Drain the juice to avoid sogginess. If you can’t find fresh pineapple, use canned but rinse well to reduce added sugars.
Coconut Milk (1/2 cup): The liquid that binds the wet ingredients, providing moisture and a subtle coconut flavor. It’s also the key to preventing the dreaded “crust on top, soggy inside” issue. A splash of coconut milk keeps the batter moist and ensures an even bake.
The Unexpected Star
Eggs (2 large): The glue that holds everything together. They also contribute to the rise and give the squares a slightly custard‑like texture. If you’re vegan, replace each egg with 1/4 cup unsweetened applesauce or a flaxseed “egg.”
Vanilla Extract (1 tsp): A fragrant note that elevates the tropical flavors. A touch of almond extract can add a subtle twist, but vanilla is classic and reliable.
The Final Flourish
Butter (1/4 cup, melted): Adds richness, a buttery aroma, and a crisp top. For a dairy‑free version, swap with coconut oil or a neutral‑flavored oil. The butter should be melted but not hot; otherwise, it will cause the batter to seize.
Coconut Oil (optional, 2 tbsp): Enhances the coconut flavor and keeps the squares moist. Use it in addition to butter for a double coconut hit. If you prefer a lighter flavor, keep it to just butter.
Everything's prepped? Good. Let's get into the real action...
The Method — Step by Step
- Preheat the oven to 350°F (175°C). Line an 8-inch square baking pan with parchment paper, leaving a small overhang on each side for easy removal. This step ensures that the squares don’t stick and can be lifted out with a single motion. The parchment also gives a clean edge that looks great on the plate.
- Whisk the dry ingredients. In a large bowl, combine flour, granulated sugar, brown sugar, baking powder, baking soda, and salt. Stir until the mixture is even and the sugars dissolve slightly. The dry mix should look like a fine, sandy texture—this will help you avoid clumps when you add the wet ingredients.
- Blend the wet mix. In a separate bowl, beat the eggs, melted butter, coconut milk, and vanilla until smooth. The mixture should be glossy and free of lumps. This liquid stage is where the magic happens—if the butter is too hot, the eggs can scramble, ruining the batter’s consistency.
- Combine wet and dry. Pour the wet mixture into the dry and stir gently with a spatula until just combined. Over‑mixing will activate too much gluten, making the squares tough. The batter should be thick but pourable; a quick dip of the spatula should leave a smooth sheen on the surface.
- Fold in pineapple and coconut. Gently fold the drained pineapple chunks and shredded coconut into the batter. Use a gentle motion to keep the pineapple pieces intact; you want chunks, not puree. The coconut should be evenly distributed, creating a mosaic of texture across every square.
- Let the batter rest. Cover the bowl with plastic wrap and let it sit for 10 minutes at room temperature. This short rest allows the flour to hydrate fully, which means the squares will rise more evenly. I’ve found that a 10‑minute rest is the sweet spot—longer, and the batter becomes too stiff.
- Pour into the pan. Transfer the batter to the prepared pan and smooth the top with a spatula. Tap the pan lightly on the counter to release any air pockets. The batter should spread evenly, filling the corners without spilling over the edges.
- Bake for 30 minutes. Place the pan in the preheated oven and bake until the edges turn golden brown and a toothpick inserted near the center comes out clean. The top should have a slight caramelized sheen. If the squares are browning too fast, tent them with foil to prevent burning.
- Cool and slice. Remove from the oven and let the squares cool in the pan for 15 minutes. Then lift them out using the parchment overhang and place on a wire rack to cool completely. This step is crucial—cutting too early will cause them to crumble.
- Serve or store. Once cooled, cut into 1‑inch squares. Serve immediately for the freshest flavor or store in an airtight container for up to a week. For a quick snack, reheat a single square in the microwave for 10 seconds; it will regain its warm, buttery texture.
That's it — you did it. But hold on, I've got a few more tricks that'll take this to another level...
Insider Tricks for Flawless Results
The Temperature Rule Nobody Follows
Baking at exactly 350°F is essential for achieving that perfect balance of a golden crust and a moist interior. Too low, and the squares will bake slowly, losing moisture; too high, and the edges will burn before the center sets. I’ve spent years tweaking my oven, and this temperature has become my go-to for all baked goods.
Why Your Nose Knows Best
Trust your nose during baking. If the aroma is sweet and slightly caramelized, the squares are ready. If the smell is overwhelmingly buttery, it’s still baking. A quick sniff can save you from a batch that’s either undercooked or overdone.
The 5-Minute Rest That Changes Everything
After baking, let the squares rest in the pan for 5 minutes before lifting them out. This brief pause allows the steam to dissipate, preventing the squares from becoming soggy. It also gives the structure time to set, making slicing easier.
The Sweet‑Tart Balance
If you prefer a less sweet dessert, reduce the granulated sugar by 1/4 cup and add a pinch of lemon zest. The citrus will brighten the pineapple flavor and bring a fresh, zesty finish that keeps the dessert from feeling heavy.
The Perfect Finish
Just before baking, brush the top with a thin layer of melted butter. This gives the squares a glossy finish and a subtle buttery flavor that elevates the overall taste. The butter also helps the crust brown evenly, creating a caramelized sheen that’s impossible to resist.
Creative Twists and Variations
This recipe is a playground. Here are some of my favorite ways to switch things up:
Coconut‑Chocolate Fusion
Add 1/2 cup of dark chocolate chips to the batter for a decadent twist. The chocolate adds a rich, bittersweet depth that pairs beautifully with the tropical flavors. Serve with a dusting of cocoa powder for an extra chocolatey finish.
Spiced Pineapple Crunch
Stir in 1 tsp of ground ginger and a pinch of cayenne pepper. The ginger adds warmth, while the cayenne gives a subtle kick that balances the sweetness. This version is perfect for a brunch spread.
Almond‑Infused Delight
Replace half of the shredded coconut with finely chopped toasted almonds. The almonds add a nutty crunch and a slightly bitter edge that contrasts with the pineapple’s sweetness. It’s an excellent option for those who love a bit of texture.
Lemon‑Coconut Surprise
Add 1 tbsp of lemon zest and 2 tbsp of lemon juice to the batter. The citrus brightens the flavor profile, making the squares feel lighter and more refreshing. The lemon also helps cut through the richness of the coconut.
Vegan Version
Swap the eggs for 1/2 cup unsweetened applesauce and replace butter with coconut oil. Use a plant‑based milk like oat or almond milk in place of coconut milk. This vegan version maintains the same texture and flavor, proving that you can enjoy tropical treats without compromising your dietary preferences.
Storing and Bringing It Back to Life
Fridge Storage
Store the squares in an airtight container at room temperature for up to 5 days. For longer freshness, keep them in the refrigerator; they’ll stay crisp for up to 7 days. Always let the squares reach room temperature before serving to enjoy the full flavor.
Freezer Friendly
Wrap each square individually in parchment paper, then place them in a freezer bag. They’ll keep for up to 3 months. Thaw at room temperature for 30 minutes before serving, or microwave on a low setting for 10 seconds for a warm, freshly baked experience.
Best Reheating Method
Reheat a single square in the microwave for 10–12 seconds, then let it sit for a minute. The gentle heat restores the buttery texture without drying it out. For a crispier top, finish the square in a preheated oven at 350°F for 3–4 minutes.