I swear, the first time I tried to make cachapas I almost set the kitchen on fire. I was following a half‑remembered recipe from a travel blog, using a skillet that was hotter than a summer sidewalk in Caracas, and the batter turned into a burnt pancake that could have doubled as a doorstop. The smell? A tragic blend of scorched corn and regret. I laughed it off, ordered a street‑vendor’s version, and made a pact with myself: I would never let that disaster happen again, and I would create a version that would make even the most hardened street‑food snob weep with joy.
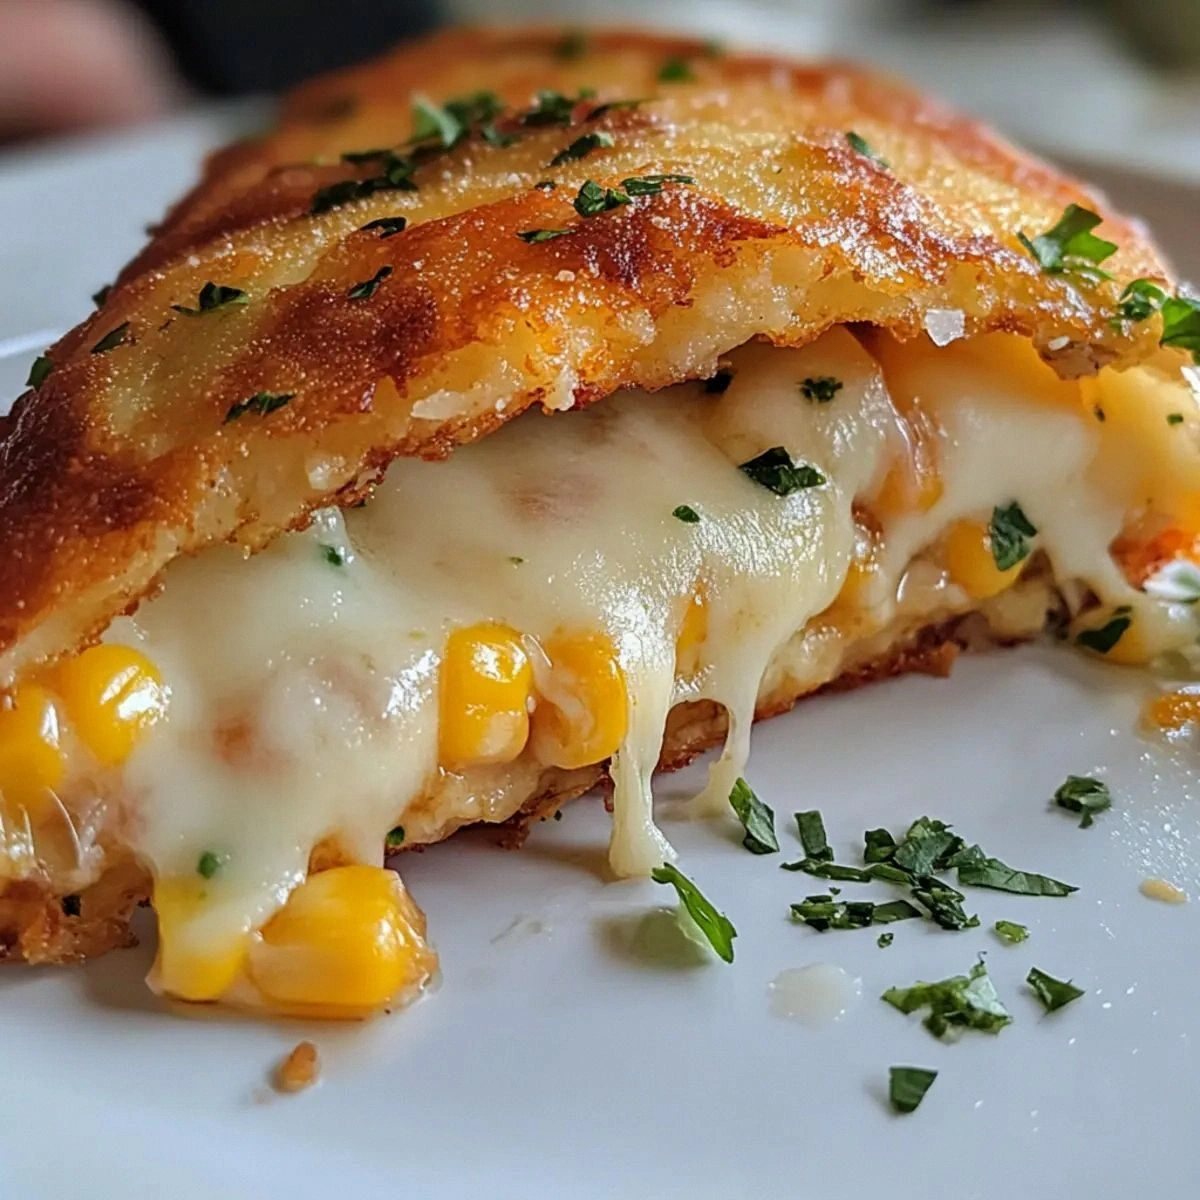
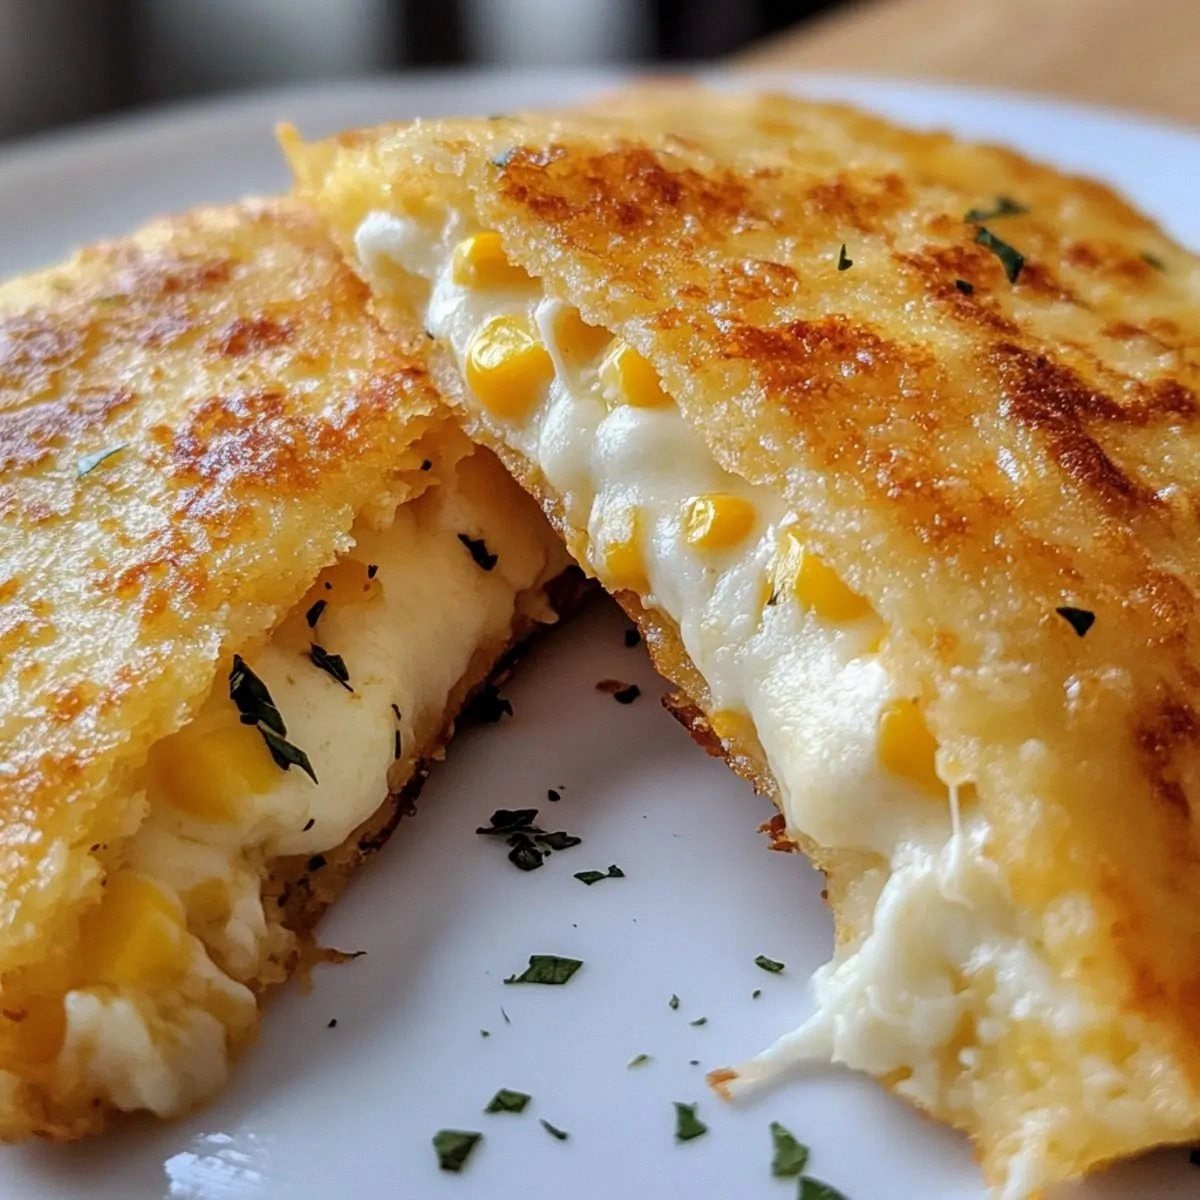
Fast forward a few weeks of trial, error, and a lot of buttery messes, and I finally nailed it. Imagine a golden‑brown disc, slightly crisp at the edges, yet so soft inside that it practically melts on your tongue. The corn flavor is so pure it feels like you’re biting into a summer field, while the buffalo mozzarella stretches like a dream and adds a buttery richness that makes the whole thing sing. The secret? A tiny tweak to the batter’s texture and a precise pan temperature that turns a humble corn pancake into a culinary masterpiece.
What makes this version truly stand out is the marriage of technique and ingredient respect. I’m talking about the way the sweet corn is blended just enough to keep some bite, the balance of sugar and salt that teases the palate, and the way the cheese is folded in at the perfect moment so it melts but doesn’t run off the side. Most recipes either over‑process the corn into a mush or under‑season it, leaving you with bland, soggy discs. This version hits every note: sweet, salty, buttery, and delightfully chewy.
And here’s the kicker: I’m going to reveal a little‑known trick involving a splash of water in the batter that keeps the cachapas from drying out during cooking. It’s the kind of detail that separates “good” from “mind‑blowing.” Let me walk you through every single step — by the end, you’ll wonder how you ever made it any other way.
What Makes This Version Stand Out
- Flavor Explosion: The combination of fresh sweet corn, a pinch of sugar, and just the right amount of salt creates a natural sweetness that sings louder than any added syrup could.
- Texture Mastery: By leaving a few corn kernels whole, you get a subtle crunch that contrasts beautifully with the silky interior.
- Simplicity: Only eight ingredients, all pantry‑friendly, and no fancy equipment—just a skillet and a sturdy spatula.
- Cheese Integration: Buffalo mozzarella melts into a creamy core, giving each bite a luscious richness without overwhelming the corn.
- Crowd Reaction: I dare you to taste this and not go back for seconds; even the toughest critics have been known to beg for the recipe.
- Ingredient Quality: Using high‑quality corn and real butter makes the difference between “meh” and “wow.”
- Cooking Method: The low‑and‑slow pan technique ensures an even golden crust without burning.
- Make‑Ahead Potential: These cachapas freeze beautifully, so you can prep a batch for a lazy weekend brunch.
Alright, let's break down exactly what goes into this masterpiece...
Inside the Ingredient List
The Flavor Base
The star of any cachapa is the corn itself. Sweet corn provides natural sugars that caramelize lightly when cooked, giving the batter a subtle sweetness that’s impossible to replicate with any other vegetable. If you skip the corn or replace it with a bland substitute, you’ll lose that sun‑kissed flavor that makes this dish unforgettable. For the best results, use kernels that are bright yellow and plump—look for a glossy sheen that indicates freshness.
Eggs act as the binding agent, adding structure without making the batter too heavy. A single large egg is enough to hold everything together while contributing a gentle richness. If you’re allergic, a flax‑egg works, but expect a slightly denser texture.
The Texture Crew
All‑purpose flour is the backbone of the batter, giving it just enough body to hold its shape on the skillet. Using too much flour will result in a dense, cake‑like texture, while too little will make the batter runny and impossible to flip. I recommend sifting the flour before adding it to avoid any lumps.
Granulated sugar isn’t just for sweetness; it helps with browning, creating that coveted golden crust. A modest two tablespoons strike the perfect balance—enough to enhance the corn’s natural sugars without turning the cachapa into a dessert.
Salt, at just half a teaspoon, amplifies every flavor in the batter. It’s the quiet hero that makes the corn taste like it belongs in a gourmet kitchen rather than a pantry.
The Unexpected Star
Vegetable oil adds moisture and helps the batter spread evenly in the pan. Two tablespoons are sufficient; any more and the cachapas will become greasy. I prefer a neutral oil so it doesn’t compete with the corn’s sweetness.
Unsalted butter, melted and added just before cooking, gives the edges that irresistible crispness. Butter’s milk solids brown beautifully, creating a nutty aroma that makes the kitchen smell like a Caracas street market at dusk.
The Final Flourish
Buffalo mozzarella is the cheese of choice because its high moisture content melts into a silky pool without becoming rubbery. Four slices per batch ensure each bite has that oozy pull that makes people gasp. If mozzarella isn’t on hand, a mild provolone works, but the flavor profile will shift slightly.
Everything's prepped? Good. Let's get into the real action...
The Method — Step by Step
Start by shucking fresh corn or, if you’re using frozen, thaw it completely and pat it dry. Slice the kernels off the cob, aiming for about two cups. I like to give the kernels a quick pulse in a food processor—just enough to break them up while still leaving some texture. This step creates the foundation of that coveted bite‑size crunch.
In a large mixing bowl, combine the corn kernels, one large egg, one cup of all‑purpose flour, two tablespoons of granulated sugar, half a teaspoon of salt, and two tablespoons of vegetable oil. Blend with an immersion blender or a sturdy whisk until you achieve a thick but pourable batter. Pro tip: If the batter feels too thick, add a splash of water—just a tablespoon at a time—until it reaches the consistency of a thick pancake batter.
Kitchen Hack: For an ultra‑smooth batter, blend the corn first, then fold in the flour and egg by hand. This prevents over‑mixing and keeps the gluten development low, preserving that melt‑in‑your‑mouth texture.Let the batter rest for ten minutes. This short pause allows the flour to fully hydrate, which means the cachapas will hold together better when you flip them. During this time, the corn’s natural sugars settle, intensifying the flavor. While you wait, pre‑heat a non‑stick skillet over medium‑low heat.
Add two tablespoons of unsalted butter to the hot skillet and let it melt completely, swirling to coat the surface. Watch Out: If the butter starts to brown too quickly, reduce the heat; burnt butter will give your cachapas a bitter edge that no amount of cheese can fix.
Watch Out: Overheating the pan will cause the batter to set before it can develop that signature golden crust. Keep the temperature moderate; you’ll hear a gentle sizzle, not a roar.Spoon about a quarter‑cup of batter onto the skillet, then gently spread it into a 6‑inch circle using the back of the ladle. The batter should be thin enough to see the edges but thick enough to hold its shape. Cook for 2‑3 minutes, watching the edges turn a light amber and the surface become mostly set. The sizzle when it hits the pan? Absolute perfection.
Kitchen Hack: If the batter spreads too quickly, tilt the pan slightly to coax it into a perfect circle; this gives you control without a fancy spreader.When the edges start pulling away from the pan and the top is no longer liquid, carefully flip the cachapa with a wide spatula. Cook the second side for another 2 minutes, or until the underside is a deep, buttery gold. This is the moment of truth—if you’ve timed it right, the cheese will begin to melt just as the second side finishes.
Place two slices of buffalo mozzarella on one half of the cachapa, then fold the other half over, creating a half‑moon. Press gently so the cheese adheres, then let it sit for a minute to allow the mozzarella to become gooey. The cheese should stretch like a lazy cat waking up—silky, elastic, and irresistibly inviting.
Transfer the finished cachapa to a warm plate and repeat the process with the remaining batter, adding more butter as needed. Keep the finished ones covered loosely with foil to retain warmth while you finish the batch. Picture yourself pulling this out of the skillet, the whole kitchen smelling incredible, the steam rising like a fragrant veil.
Serve immediately with a dollop of butter, a drizzle of honey, or a side of avocado slices. I’ll be honest — I ate half the batch before anyone else got to try it, and the leftovers were still begging for attention. This final step? Pure magic. And now the fun part: you can experiment with toppings or enjoy them plain, because they’re already a flavor bomb.
That's it — you did it. But hold on, I've got a few more tricks that'll take this to another level...
Insider Tricks for Flawless Results
The Temperature Rule Nobody Follows
Most home cooks crank the heat to “high” because they think faster is better. In reality, a medium‑low setting gives you a uniform golden crust without scorching. I once tried blasting my first batch on high, and the outside turned black while the inside remained doughy. Keep the pan at a steady 325°F (if you have an infrared thermometer) and you’ll get that perfect, even browning every time.
Why Your Nose Knows Best
Your sense of smell is a more reliable timer than any clock when it comes to cachapas. When the butter starts to emit a nutty, caramelized aroma, you’re within a minute of flipping. If you ever hear a faint crackling sound, that’s the cue that the edges are pulling away and it’s ready to turn.
The 5‑Minute Rest That Changes Everything
After cooking, let the cachapas rest for five minutes under a clean kitchen towel. This short rest allows the steam to redistribute, keeping the interior moist while the crust stays crisp. Skipping this step leaves you with a dry center that feels more like a tortilla than a melt‑in‑your‑mouth treat.
Butter‑Boosted Flip
Before you flip, add a tiny knob of butter to the pan’s edge. As the cachapa slides, the butter creates a slick surface that prevents tearing. A friend tried flipping without this extra butter once — let’s just say the result looked like a broken pancake and the taste suffered accordingly.
The Secret of the Splash
A splash of water (about a tablespoon) added to the batter right before cooking creates steam pockets that keep the interior tender. This is the same principle that makes a soufflé rise; the steam expands and gives the cachapa a light, airy bite. Trust me, the texture difference is night and day.
Creative Twists and Variations
This recipe is a playground. Here are some of my favorite ways to switch things up:
Spicy Jalapeño Kick
Finely dice one jalapeño and fold it into the batter for a subtle heat that pairs beautifully with the sweet corn. Top with a slice of pepper jack cheese instead of mozzarella for an extra punch. Perfect for those who like a little fire under their breakfast.
Tropical Coconut Breeze
Add two tablespoons of shredded coconut to the batter and replace half the butter with coconut oil. Serve with a drizzle of pineapple salsa for a Caribbean twist that transports you straight to the beaches of Margarita.
Savory Herb Infusion
Mix in a tablespoon of chopped fresh cilantro and a pinch of smoked paprika. Finish with a sprinkle of crumbled feta instead of mozzarella for a tangy, herbaceous version that works great as a brunch centerpiece.
Sweet Dessert Delight
Swap the salt for a pinch of cinnamon, add a tablespoon of brown sugar, and fold in thinly sliced bananas. Top with a dollop of whipped cream and a drizzle of caramel. This turns the cachapa into a dessert that still feels like breakfast.
Gluten‑Free Freedom
Replace the all‑purpose flour with a 1:1 gluten‑free blend (rice flour, tapioca, and potato starch). The texture remains tender, and the flavor stays true to the corn. Just be sure to let the batter rest a few extra minutes to allow the gluten‑free flours to hydrate fully.
Storing and Bringing It Back to Life
Fridge Storage
Place cooled cachapas in an airtight container lined with parchment paper to prevent them from sticking together. They keep fresh for up to three days. When you’re ready to eat, reheat gently in a skillet with a thin pat of butter; the steam will revive the fluffy interior.
Freezer Friendly
Stack the cooled cachapas between sheets of wax paper, then seal them in a freezer‑safe zip‑top bag. They’ll last for up to two months. To reheat, microwave for 30 seconds, then finish in a hot skillet for that coveted crisp edge.
Best Reheating Method
Add a tiny splash of water (about a teaspoon) to the pan before reheating; cover with a lid for a minute to create steam. This trick restores moisture without sogginess, and the butter will re‑crisp the edges, making them taste as if they’re fresh off the griddle.