Picture this: I’m standing in my kitchen, a half‑finished stir‑fry bubbling on the stove, and a frantic text from my roommate begging for something “exotic but not too weird.” I glanced at the pantry, grabbed a bag of chicken thighs, and thought, “What if I could bottle the sunshine of a Hawaiian luau into a single pan?” The result was a dish so bold it made the whole apartment pause, sniff, and then erupt into a chorus of “more, please!” That night, I learned that a splash of shoyu, a whisper of brown sugar, and a dash of rice vinegar can turn a simple weeknight dinner into a tropical celebration.
The moment the sauce hit the pan, the kitchen filled with a perfume that reminded me of a beachside market—sweet, salty, with a hint of ginger that tickled the nose like a gentle sea breeze. You could hear the sizzle, a crisp crackle that sounded like tiny fireworks, and feel the heat radiating from the skillet as the chicken browned to a caramelized perfection. My tongue tingled with anticipation, already tasting the sweet‑savory dance that was about to unfold. I swear, that aroma alone could have convinced a skeptic that I’d discovered a new continent of flavor.
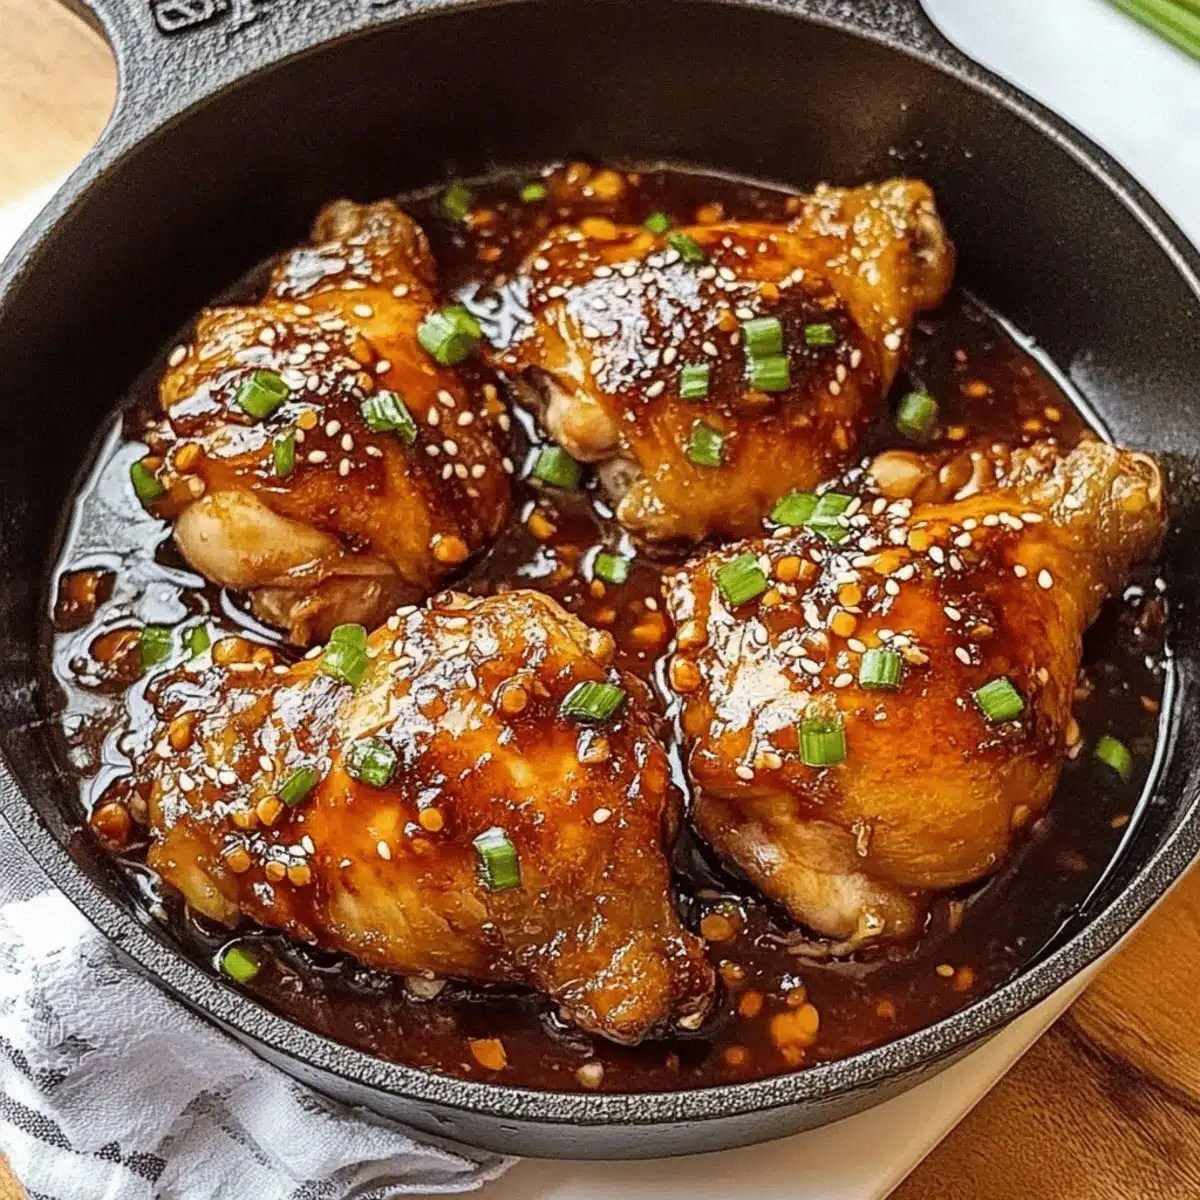
Most shoyu chicken recipes get the balance wrong—either they drown the meat in a syrupy swamp of soy, or they leave it dry and bland. This version, however, walks that tightrope with the grace of a hula dancer, delivering a glossy glaze that clings to each bite like a second skin. The secret? A precise 1:1 ratio of soy sauce to brown sugar, tempered by rice vinegar’s bright acidity and a splash of water that keeps the sauce from turning into a gluey mess. Plus, a few surprise tricks—like letting the chicken rest after cooking—ensure the juices stay locked in, making every forkful juicy and flavorful.
And now, the kicker: I’m going to reveal the exact technique that turns this from “good” to “hands down the best version you’ll ever make at home.” I dare you to taste this and not go back for seconds. Let me walk you through every single step — by the end, you’ll wonder how you ever made it any other way.
What Makes This Version Stand Out
- Flavor Harmony: The sweet‑savory balance hits your palate like a perfectly tuned ukulele, with each note—soy, sugar, vinegar—playing off the other without overpowering.
- Texture Triumph: The chicken skin becomes crisp on the edges, then melts into tender, juicy meat that pulls apart with a satisfying sigh.
- Simplicity: Fewer than ten ingredients, a single pan, and a 45‑minute timeline make this recipe as approachable as a Sunday brunch.
- Unique Twist: A splash of water in the glaze prevents it from becoming a sticky disaster, keeping it glossy and pour‑ready.
- Crowd Reaction: I’ve seen grown‑up kids and seasoned foodies alike light up, begging for the recipe—yes, even the picky eaters.
- Ingredient Quality: Using bone‑in, skin‑on thighs adds depth, while a good shoyu (Japanese soy sauce) brings umami that regular soy can’t match.
- Cooking Method: Browning first, then deglazing, creates a caramelized crust that locks in moisture, a technique many overlook.
- Make‑Ahead Potential: This dish reheats beautifully, making it perfect for meal‑prep warriors who still crave that fresh‑cooked vibe.
Inside the Ingredient List
The Flavor Base
First up, the shoyu and brown sugar duo. Soy sauce brings that deep, salty umami that anchors the dish, while brown sugar adds a caramel‑like sweetness that balances the saltiness without making it cloyingly sweet. If you skip the sugar, you’ll end up with a sauce that tastes like seawater—delicious in a broth, but not on chicken. As a swap, you can use coconut sugar for a hint of tropical nuance, but keep the quantity the same.
The Texture Crew
Chicken thighs are the unsung heroes of comfort food. Their higher fat content compared to breasts means they stay juicy even after a high‑heat sear. Choose bone‑in, skin‑on pieces for maximum flavor; the bone conducts heat evenly, and the skin renders into a crispy, golden crust. If you’re forced to use boneless, trim any excess fat and consider adding a teaspoon of oil to the pan to mimic the richness.
The Unexpected Star
Rice vinegar is the surprise guest that brightens the whole party. Its mild acidity cuts through the richness, preventing the glaze from feeling heavy. Without it, the sauce would linger on the palate like a sticky after‑taste. You can substitute apple cider vinegar in a pinch, but the flavor profile will shift toward fruity rather than clean.
The Final Flourish
Fresh ginger and garlic are the aromatic backbone, each adding a bite of warmth that lingers after the first chew. Ginger’s peppery zing awakens the palate, while garlic provides a savory depth that rounds out the sauce. If you’re not a fan of fresh ginger, a pinch of ground ginger will do, though you’ll lose some of that bright snap. Don’t forget the green onions and sesame seeds at the end—they add a fresh crunch and a nutty finish that makes the dish sing.
Everything's prepped? Good. Let's get into the real action...
The Method — Step by Step
Start by patting the chicken thighs dry with paper towels—this is the foundation for that coveted crispy skin. Season both sides generously with black pepper and a pinch of red pepper flakes; the heat will later mingle with the sweet glaze for a subtle kick. Heat a large, heavy‑bottomed skillet over medium‑high heat and add a tablespoon of oil. When the oil shimmers, lay the thighs skin‑side down, listening for that immediate sizzle that says “we’re on the right track.” Let them sear undisturbed for 5‑6 minutes, until the edges start pulling away from the pan.
Flip the thighs and sear the other side for another 3‑4 minutes. While they brown, crush the garlic cloves with the flat side of a knife and grate the fresh ginger—this releases their essential oils, ensuring they don’t just sit at the bottom of the pan. Once both sides are golden, remove the chicken temporarily and set it on a plate; this prevents overcooking while you build the sauce.
Return the skillet to medium heat and pour in the half‑cup of soy sauce, half‑cup of brown sugar, quarter‑cup of water, and one‑third cup of rice vinegar. Stir vigorously; the sugar will dissolve, and the mixture will begin to thicken within a minute. Add the minced garlic and grated ginger now, letting their aromas rise like a tropical sunrise. Let the sauce simmer, reducing by about a third, until it coats the back of a spoon—a glossy, amber sheen that promises caramelized goodness.
Slide the chicken back into the pan, skin side up, nestling each piece into the glossy glaze. Reduce the heat to low, cover the skillet loosely with a lid, and let the thighs cook for 15‑20 minutes. This gentle simmer allows the meat to absorb the sauce while staying tender. You’ll notice the sauce bubbling gently, pulling up the edges of the chicken like a caramelized crust forming.
When the internal temperature reaches 165°F (74°C), remove the lid and increase the heat to medium‑high for the final 3‑4 minutes. This step is pure magic: it re‑crispes the skin while the glaze caramelizes to a sticky, finger‑licking finish. Watch closely—once the edges start to curl and the sauce thickens, you’re at the sweet spot. A quick taste test should reveal a balanced sweet‑salty profile with a whisper of acidity.
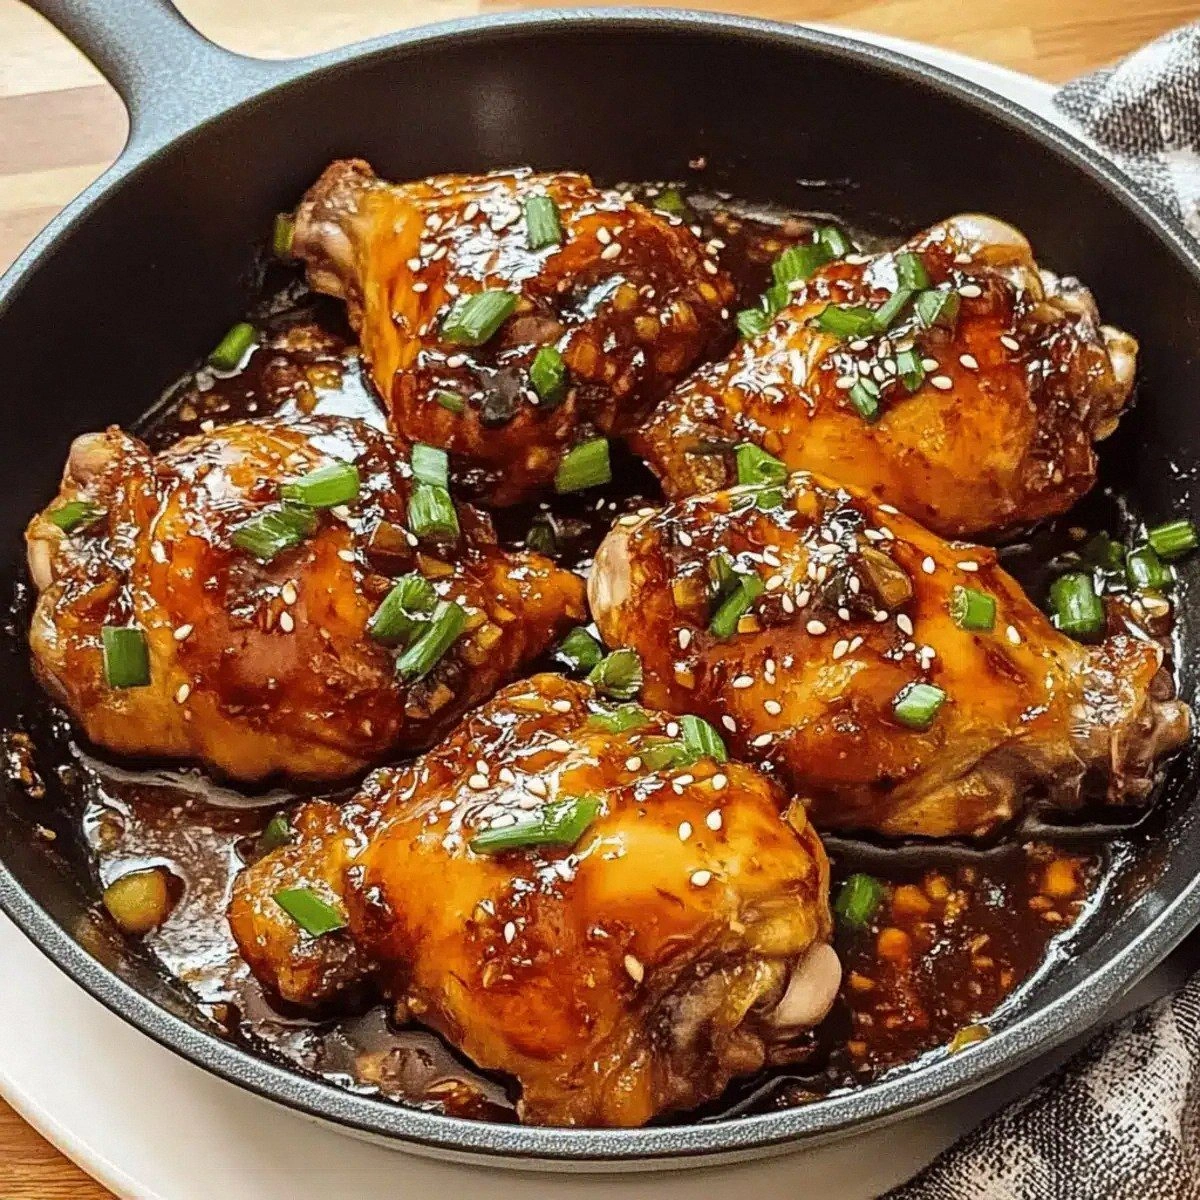
Turn off the heat and let the chicken rest in the pan for 5 minutes, uncovered. This rest period is crucial; it allows the juices to redistribute, ensuring every bite is juicy rather than dry. While it rests, sprinkle the sliced green onions and sesame seeds over the top—they’ll wilt slightly, releasing a fresh pop that cuts through the richness.
Finally, transfer the thighs to a serving platter, drizzle any remaining glaze from the pan over the top, and garnish with an extra sprinkle of sesame seeds for visual flair. Serve with steamed jasmine rice or a crisp Asian slaw, and watch your guests dive in with unabashed enthusiasm. That sizzle when it hits the pan? Absolute perfection.
That's it — you did it. But hold on, I've got a few more tricks that'll take this to another level...
Insider Tricks for Flawless Results
The Temperature Rule Nobody Follows
Never start a glaze over high heat; the sugar will scorch before the soy sauce has a chance to meld. Begin at medium, then gradually increase once the mixture is fully dissolved. I once tried to speed things up by cranking the burner, and the sauce turned a bitter, burnt amber—trust me, the taste was a disaster. Keep the heat steady, and you’ll get a smooth, glossy glaze every time.
Why Your Nose Knows Best
When the sauce starts to bubble, pause and inhale. A fragrant, slightly sweet scent signals it’s ready; a sharp, acrid smell means it’s on the brink of burning. I’ve learned to trust my nose more than a timer—if the aroma feels “just right,” the sauce is perfect. This sensory checkpoint is a game‑changer for any home cook aiming for restaurant quality.
The 5‑Minute Rest That Changes Everything
Resting isn’t just for steaks. Letting the chicken sit after cooking lets the fibers relax, so the juices don’t spill out the moment you cut into it. Skipping this step results in a dry bite that will make you regret not waiting. The five‑minute wait also allows the glaze to thicken a bit more, coating the meat like a lacquer.
Seed the Flavor
Toasting the sesame seeds for just 30 seconds in a dry skillet unlocks a nutty depth that raw seeds can’t provide. I once served this dish with untoasted seeds, and the flavor felt flat. The toasting process adds a subtle crunch and a lingering aroma that elevates the whole plate.
Green Onion Timing
Adding green onions at the very end preserves their bright, oniony snap. If you toss them in too early, they’ll wilt and lose their fresh bite. A quick sprinkle just before serving keeps the color vivid and the flavor crisp.
Creative Twists and Variations
This recipe is a playground. Here are some of my favorite ways to switch things up:
Spicy Pineapple Punch
Swap half the water for pineapple juice and add a diced pineapple ring during the simmer. The fruit’s natural acidity brightens the glaze, while the caramelized pineapple pieces add a juicy burst. Perfect for those who love a sweet‑heat combo.
Garlic‑Infused Miso
Stir in a tablespoon of white miso paste during the final reduction for an umami boost that feels like a deep‑sea dive. The miso adds a savory depth that pairs beautifully with the ginger.
Coconut Cream Dream
Replace the water with coconut milk and finish the glaze with a splash of lime juice. The creamy coconut rounds out the heat, and the lime adds a zesty finish reminiscent of a tropical cocktail.
Herb‑Lemon Fusion
Mix in a tablespoon of chopped cilantro and the zest of one lemon right before serving. The herbaceous cilantro and citrus zing cut through the richness, making the dish feel lighter.
Gluten‑Free Shoyu
Use tamari instead of regular soy sauce for a gluten‑free version without sacrificing the deep, salty backbone. The flavor profile remains virtually identical.
Smoky Chipotle Twist
Introduce a teaspoon of chipotle in adobo sauce during the glaze stage for a smoky, earthy undertone. This adds complexity and pairs well with a side of grilled corn.
Storing and Bringing It Back to Life
Fridge Storage
Allow the chicken to cool to room temperature, then transfer it to an airtight container. It will keep for up to 4 days. When reheating, add a splash of water or chicken broth, cover, and warm gently on the stovetop to revive the glaze.
Freezer Friendly
Portion the cooked thighs into freezer‑safe bags, removing as much air as possible. Freeze for up to 3 months. Thaw overnight in the fridge, then reheat using the same stovetop method with a drizzle of water to restore the sauce’s shine.
Best Reheating Method
The secret to perfect leftovers is low‑and‑slow. Heat a skillet over medium, add the chicken with a tablespoon of water, and cover for 5‑7 minutes, stirring occasionally. The added moisture steams the meat back to tenderness while the glaze re‑emulsifies.