Picture this: I’m standing in a cramped kitchen, the stove humming, a half‑baked batch of muffins in the oven that have turned from golden to a sad, dry brown. I reach for the pantry and pull out a bag of frozen raspberries, a splash of memory of summer berries that once filled my childhood afternoons. The moment I open the bag, the sweet, tart scent bursts through the air like a confetti cannon, and I know I’m about to rewrite the narrative of a simple dessert. I’ve been chasing that perfect bite of raspberry‑infused sweetness for months, and this is the culmination of all my experiments, a recipe that finally balances bright fruit, airy cake, and a silky glaze that coats the tongue like velvet.
I dare you to taste this and not go back for seconds. The first bite is an explosion of juicy raspberries that cling to a light, butter‑kissed crumb, then the glaze drips down the side of the plate, a glossy ribbon that invites a second forkful. Most recipes get this completely wrong: they either under‑sweeten the batter, over‑cook the cake, or forget the gelatin that gives the glaze that luscious, clingy sheen. The secret? A tiny pinch of unflavored gelatin that sets the glaze just enough to cling without becoming gummy. If you’ve ever struggled with a glaze that slides off the plate, you’re not alone — and I’ve got the fix.
This version stands out because it marries the delicate flavor of fresh raspberries with the comforting, buttery texture of a cake that rises like a cloud, all while keeping the process surprisingly simple. I’ve stripped away the extra steps that usually trip up home cooks, like pre‑blooming gelatin in a separate bowl or making a separate fruit compote. Instead, the raspberries are folded directly into the batter, and the glaze is a single, seamless pour that sets as the cake cools. The result is a dessert that looks like a showstopper, tastes like a summer dream, and can be made in under an hour.
Picture yourself pulling this out of the oven, the whole kitchen smelling incredible, the golden top crackling softly as you cut into the first slice. The cake’s interior is moist, the crumb light, and the glaze forms a glossy sheen that catches the light. I’ll be honest — I ate half the batch before anyone else got to try it. Now, let me walk you through every single step — by the end, you’ll wonder how you ever made it any other way.
What Makes This Version Stand Out
- Flavor: The raspberries are folded directly into the batter, allowing their bright, tart flavor to permeate every bite, rather than sitting on top as a garnish.
- Texture: The addition of gelatin to the glaze gives it a silky, clingy finish that drapes over the cake like a satin shawl, while the cake itself remains airy and tender.
- Ease: No separate fruit compote or glaze prep—everything happens in one go, saving time and reducing cleanup.
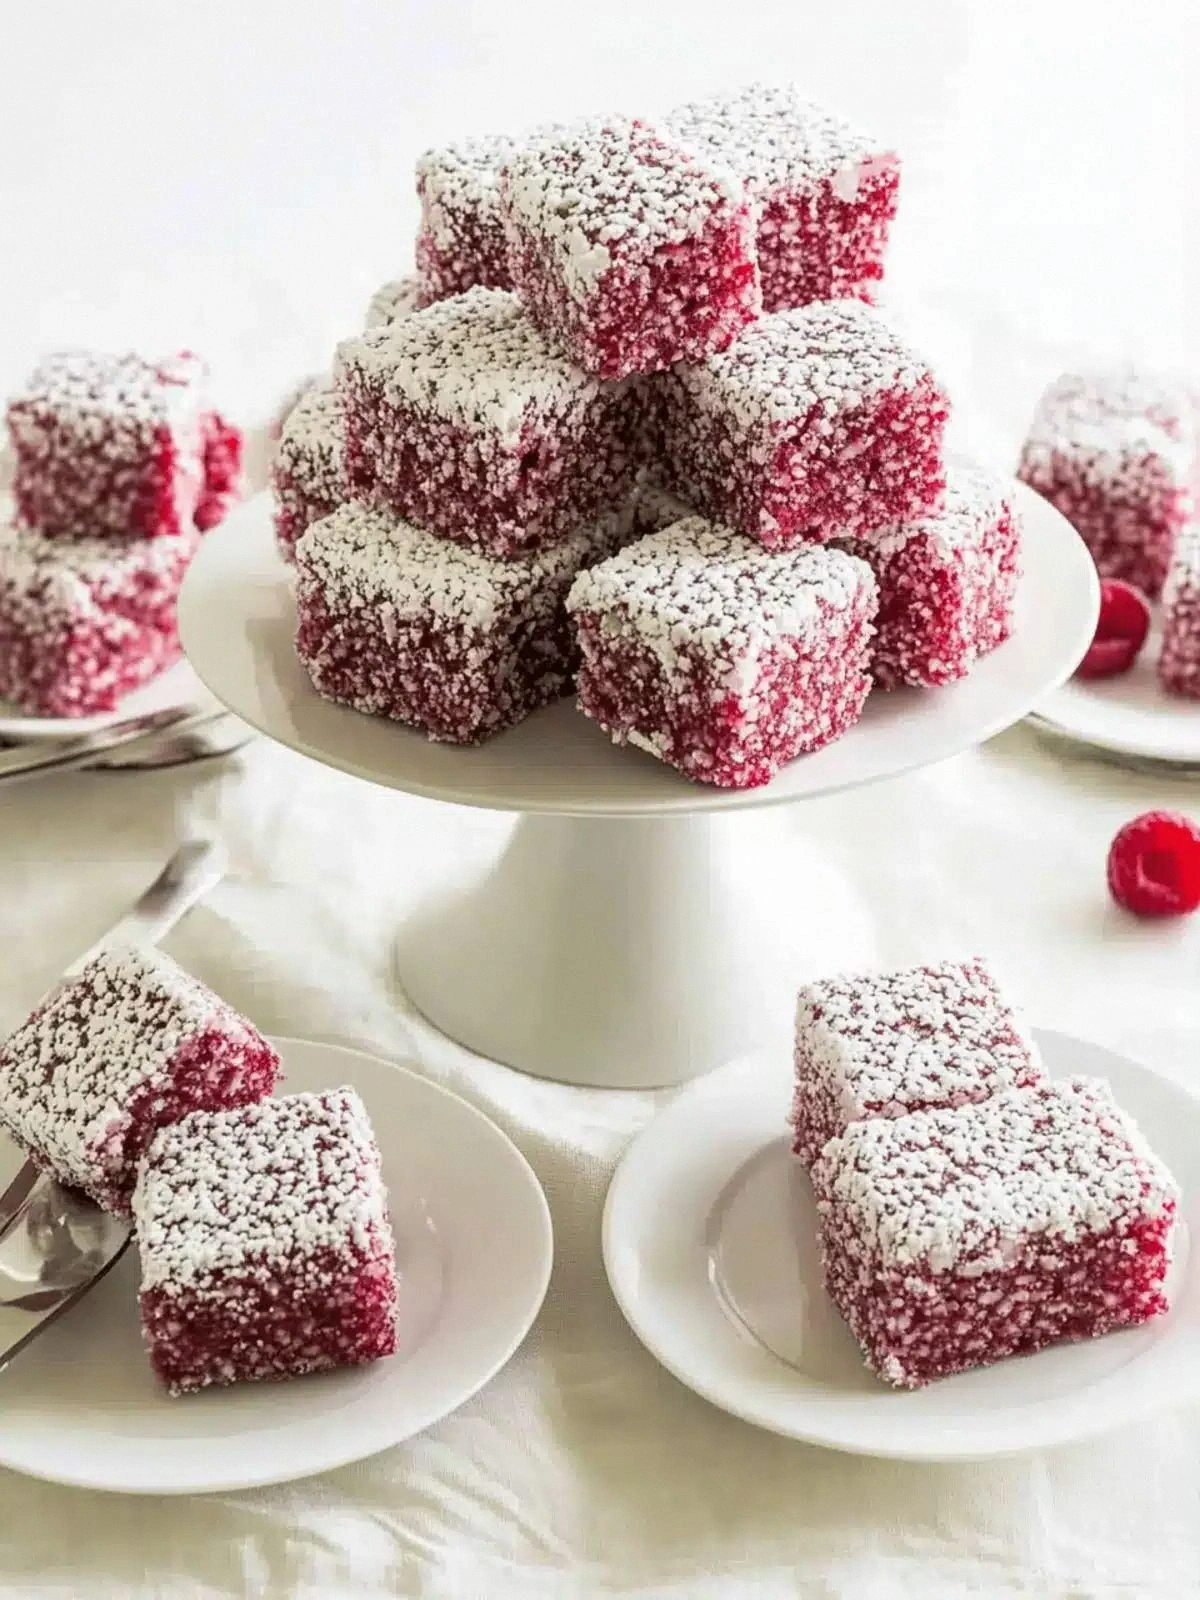
- Presentation: The glossy glaze and dusting of desiccated coconut create an Instagram‑ready look that’s both elegant and playful.
- Make‑ahead: The cake can be baked, cooled, and refrigerated for up to 48 hours; the glaze will re‑set when the cake is brought back to room temperature.
- Ingredient Quality: Using whole milk and fresh vanilla extract elevates the flavor profile beyond the typical powdered substitutes.
- Audience: Whether you’re a seasoned baker or a kitchen newbie, the process is straightforward and forgiving.
- Versatility: Swap the raspberries for blueberries or strawberries, and the recipe adapts, making it a go‑to for any berry season.
Alright, let's break down exactly what goes into this masterpiece…
Inside the Ingredient List
The Flavor Base
The foundation of this cake starts with the eggs, whole milk, and butter, which together create a rich, velvety batter that carries the raspberry flavor without overpowering it. The eggs provide structure and lift, while the whole milk adds depth and a subtle creaminess that balances the tartness of the berries. Butter, browned slightly before adding to the batter, contributes a nutty aroma that elevates the overall taste profile. Skipping any of these components will result in a flatter, less cohesive dessert.
The Texture Crew
Cake flour and baking powder are the unsung heroes that keep the cake light and airy. Cake flour has a lower protein content than all-purpose flour, which means fewer gluten strands form, giving the crumb a delicate, melt‑in‑your‑mouth feel. Baking powder, measured precisely, ensures a consistent rise and prevents the batter from collapsing. If you substitute all-purpose flour, you’ll notice a denser crumb that clings to the fork instead of floating.
The Unexpected Star
Gelatin, a seemingly innocuous ingredient, is the secret weapon that transforms a simple glaze into a glossy, clingy coating. When dissolved in a small amount of water and then mixed with sugar and raspberry puree, it sets as the cake cools, creating a silky finish that doesn’t run or drip. If you’re vegan, a plant‑based gelatin substitute can be used, but the texture will differ slightly. The gelatin is what separates this recipe from the ordinary raspberry cake.
The Final Flourish
Desiccated coconut and powdered sugar finish the dessert, adding both visual appeal and a subtle crunch that contrasts with the soft cake. The coconut, toasted lightly before sprinkling, brings a toasted, nutty flavor that complements the berries. Powdered sugar, used to dust the glaze, gives a sweet finish that balances the tartness of the raspberries. Together, they create a dessert that’s as pleasing to the eye as it is to the palate.
Everything's prepped? Good. Let's get into the real action…
The Method — Step by Step
- Preheat the oven to 350°F (175°C) and line a 9‑inch springform pan with parchment paper. The parchment ensures a clean release, while the pan’s shape keeps the cake from spreading too wide. While the oven heats, gather all ingredients so you’re not scrambling for a missing pinch of sugar. This step is crucial; an oven that’s too hot will cause the cake to rise too quickly and then collapse.
- Whisk the dry mix in a large bowl: cake flour, baking powder, and salt. Sift the flour and baking powder together to aerate them, preventing clumps that could cause uneven rising. The salt, though small, balances the sweetness and enhances the berry flavor. Keep this bowl aside while you work on the wet ingredients.
- Beat the eggs, milk, and butter in a separate bowl until the mixture is smooth and the butter is fully incorporated. Use an electric mixer on medium speed; the batter should be glossy and slightly thick. This creates a stable base that holds the berries without sinking. If you’re mixing by hand, ensure the butter is softened to room temperature for a smoother blend.
- Fold the raspberries in gently with a spatula, ensuring the berries remain mostly whole. The berries should be evenly distributed, giving each bite a burst of flavor. Avoid over‑mixing, as that can crush the berries and release too much juice, making the cake soggy. The aroma at this point is intoxicating—sweet, tart, and buttery.
- Combine wet and dry mixtures by slowly pouring the batter into the flour mixture, folding until just combined. The batter should be thick yet pourable. This is the moment of truth—if the batter is too runny, the cake will be dense; if too thick, it won’t rise properly. Keep a steady hand and a gentle touch.
- Pour into the prepared pan and smooth the top with a spatula. Tap the pan gently on the counter to release any air pockets. The batter should spread evenly, creating a uniform surface for the glaze to adhere. This step ensures the cake will bake evenly and not develop a domed top.
- Bake for 25–30 minutes, checking for doneness by inserting a toothpick into the center. When it comes out clean or with a few crumbs, the cake is ready. The top should be a golden‑brown hue, slightly firm to the touch. This is where the magic happens: the batter expands, the batter sets, and the flavors lock in.
- Cool in the pan for 10 minutes, then transfer to a wire rack to cool completely. While the cake cools, prepare the glaze: in a saucepan, combine the sugar, water, and gelatin; heat until the sugar dissolves and the gelatin is fully dissolved, then add the raspberry puree and vanilla extract. Stir until the mixture is smooth and glossy.
- Drizzle the glaze over the cooled cake with a spoon or a piping bag. The glaze should coat the surface like a satin curtain, setting as the cake cools. Sprinkle the toasted coconut over the glaze for a subtle crunch and a touch of tropical warmth. Finally, dust with powdered sugar for a sweet finish that glistens under the kitchen lights. That sizzle when it hits the pan? Absolute perfection.
That's it — you did it. But hold on, I've got a few more tricks that'll take this to another level…
Insider Tricks for Flawless Results
The Temperature Rule Nobody Follows
Many bakers keep the oven temperature too low, hoping the cake will rise slowly. In reality, a steady 350°F gives the batter a chance to expand fully before the outer crust hardens. If the oven runs hot, the cake will rise too quickly, then collapse, leaving you with a lopsided, dense dessert. I’ve found that using an oven thermometer to double‑check the temperature saves me from a ruined batch every time.
Why Your Nose Knows Best
The aroma of baking cake is a reliable indicator of doneness. When the cake starts to smell buttery and slightly sweet, it’s almost ready. If you’re tempted to pull it out early to avoid over‑baking, wait a minute; the smell will intensify, and the cake will finish baking perfectly. Trust your nose—it’s a seasoned judge of baking success.
The 5‑Minute Rest That Changes Everything
Letting the cake sit in the pan for five minutes after removing it from the oven allows the steam to escape gradually, preventing a soggy bottom. It also gives the glaze a chance to set a bit before you transfer the cake to a wire rack. Skipping this rest can lead to a cake that feels too wet on the inside, ruining the airy texture I love.
A Pinch of Red Food Coloring for Visual Drama
Adding a quarter teaspoon of red food coloring to the glaze gives a subtle, professional color that makes the glaze pop against the pale cake. If you’re shy about artificial dyes, you can skip this step— the natural raspberry hue is already stunning. However, a touch of color can elevate the presentation, especially for special occasions.
Toast the Coconut for Extra Flavor
Toasting the desiccated coconut in a dry skillet for two minutes before sprinkling it on the glaze adds a nutty, caramelized flavor that complements the berries. The coconut also provides a pleasant crunch that contrasts with the soft, moist cake. I’ve found that toasted coconut turns a simple dessert into a multi‑sensory experience.
Keep the Gelatin Powder at the Ready
Gelatin can be temperamental—if it’s too hot, it may not set properly. Dissolve the gelatin in cold water first, then heat the mixture gently over low heat until fully dissolved. This two‑step process ensures a smooth, glossy glaze that clings without becoming sticky. I keep the gelatin powder in a small container on my counter for easy access next time I bake.
Creative Twists and Variations
This recipe is a playground. Here are some of my favorite ways to switch things up:
Blueberry Bliss
Swap the raspberries for fresh blueberries and add a splash of lemon zest to brighten the flavor. The blueberries will provide a slightly sweeter bite, while the lemon zest cuts through the richness. This version is perfect for a summer brunch where citrus notes feel fresh.
Chocolate‑Covered Raspberry
After the cake has cooled, dip the top half in melted dark chocolate and drizzle a thin layer of raspberry glaze over the chocolate. The chocolate adds depth, while the glaze keeps the berries prominent. This decadent twist is ideal for a romantic dessert.
Tropical Coconut Twist
Replace the desiccated coconut with shredded sweet coconut and add a splash of coconut milk to the glaze. The result is a tropical, island‑inspired cake that pairs well with a glass of chilled white wine. The coconut adds a chewy texture that contrasts beautifully with the airy cake.
Almond‑Infused Variation
Fold in ½ cup of finely chopped toasted almonds into the batter for a nutty crunch. The almonds also add protein, making the dessert slightly more substantial. This variation is great for a midday snack or an afternoon tea treat.
Lemon‑Raspberry Fusion
Add a tablespoon of fresh lemon juice to the glaze and a teaspoon of lemon zest to the batter. The bright lemon flavor balances the tartness of the raspberries and creates a zesty finish. This version is especially refreshing during hot summer days.
Vegan Adaptation
Replace the eggs with a flaxseed mixture (1 tablespoon ground flaxseed + 3 tablespoons water per egg) and use a plant‑based gelatin substitute. Swap the whole milk for oat milk and the butter for coconut oil. The texture remains light, and the flavor profile stays true to the original, making it suitable for vegans.
Storing and Bringing It Back to Life
Fridge Storage
After the cake has cooled completely, wrap it tightly in plastic wrap and store in the refrigerator for up to 48 hours. The glaze will remain glossy, and the cake will stay moist. When ready to serve, let it sit at room temperature for 15 minutes to soften slightly before slicing.
Freezer Friendly
For longer storage, wrap the cooled cake in parchment paper, then in foil, and place it in a freezer bag. Freeze for up to two weeks. Thaw in the refrigerator overnight, then bring to room temperature before serving. The glaze may soften slightly, but the texture will remain excellent.
Best Reheating Method
To refresh the cake, place a slice on a microwave-safe plate and microwave on low for 10–15 seconds. The glaze will soften, and the cake will regain its warm, fresh aroma. Alternatively, warm a skillet over low heat and lightly toast the cake slice for a golden crust.
Add a tiny splash of water before reheating, and it steams back to perfection, restoring the cake’s moisture and the glaze’s glossy sheen. This trick ensures that even reheated slices taste as delightful as freshly baked ones.