I remember the night I burned a batch of tacos and the kitchen smelled like regret. The tortillas were charred, the beef was dry, and my friends laughed while I stared at the stove. That disaster turned into a personal mission: to create the most mouth‑watering, melt‑in‑your‑mouth quesadilla that would make anyone forget the burnt fiasco. I spent hours experimenting with spice blends, cheese ratios, and cooking techniques until I hit a flavor note that sang louder than the sizzling skillet.
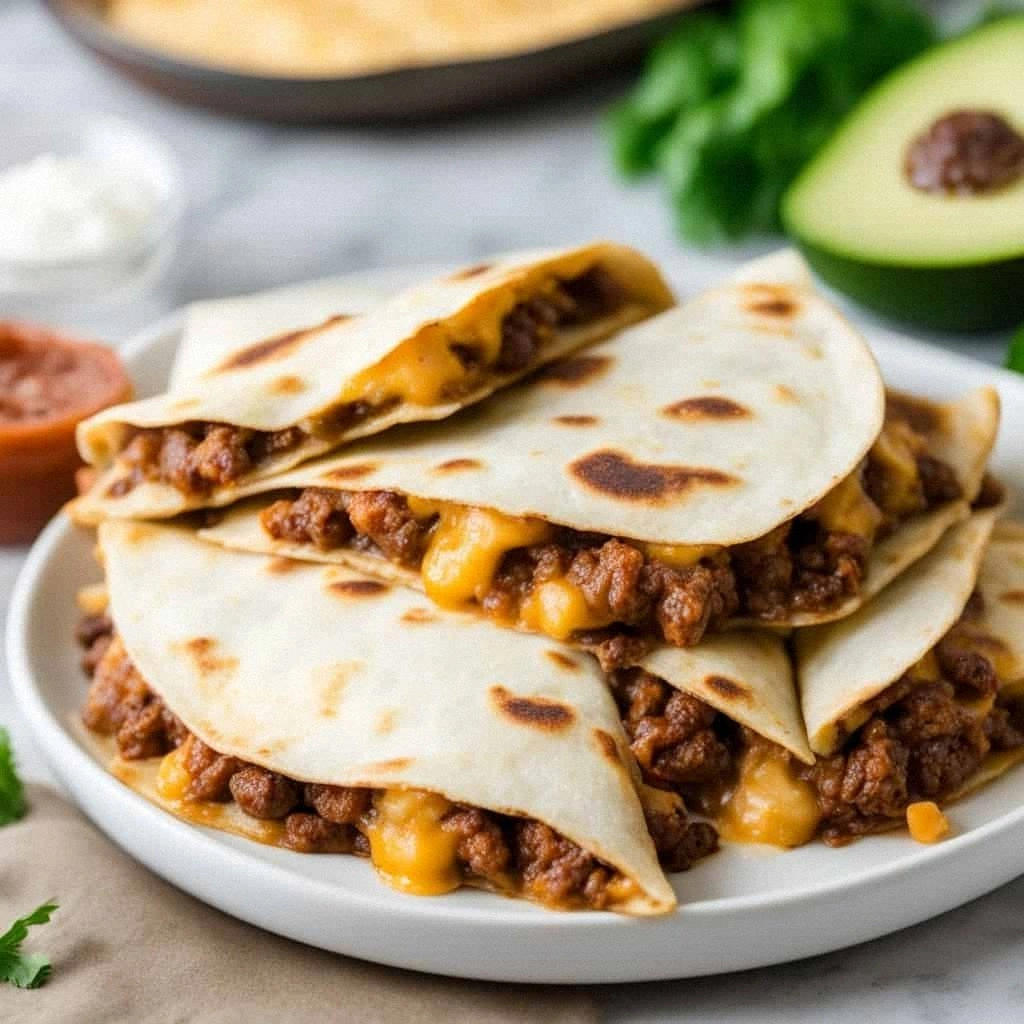
Picture this: golden, crisp edges that crackle like thin ice, a filling that oozes with smoky cumin and fresh cilantro, and a cheese layer that stretches into a velvety ribbon. The aroma rises in waves—meaty, garlicky, and peppery—drawing you into a culinary trance. When you bite, the tortilla gives a satisfying crunch, the beef is juicy, and the tomatoes add a sweet burst that balances the heat. That is the sensory symphony that defines this recipe.
What sets this version apart is that it’s not just a recipe; it’s a statement. I dare you to taste this and not go back for seconds. The blend of spices is meticulously balanced—too much cumin? No. Too much paprika? No. I found the sweet spot where every bite is a revelation. It’s hands down the best version you'll ever make at home, and I’m not exaggerating.
The secret? A few unconventional tricks that most recipes overlook. For instance, I use a silicone spatula to keep the filling from sticking to the pan, and I fold the tortillas at a precise angle to maximize the melt. I also add a splash of tomato sauce early on to lock in moisture. These small deviations elevate the dish from good to unforgettable.
If you've ever struggled with soggy tortillas or bland fillings, you're not alone—and I've got the fix. Stay with me here—this is worth it. Let me walk you through every single step, and by the end, you'll wonder how you ever made it any other way.
What Makes This Version Stand Out
- Taste: The combination of cumin, chili powder, and paprika creates a smoky depth that pairs perfectly with the fresh cilantro and diced tomatoes. Each bite delivers a complex flavor profile that satisfies both comfort and adventurous palates.
- Texture: The tortillas achieve a golden, crispy exterior while the inside remains soft, thanks to a quick sear and the right amount of cheese. The filling stays juicy, preventing the dreaded dry meat.
- Simplicity: With only eight ingredients, this recipe is a breeze to assemble, making it ideal for busy week‑nights or impromptu gatherings.
- Uniqueness: The addition of sliced black olives adds a briny contrast that most quesadillas lack. It gives the dish a sophisticated edge.
- Crowd Reaction: Friends who taste these quesadillas often request the recipe immediately, making it a go‑to for parties and family meals.
- Ingredient Quality: Using fresh, high‑quality ingredients like a good Mexican blend cheese and fresh cilantro ensures each component shines.
- Cooking Method: A cast‑iron skillet distributes heat evenly, allowing the tortillas to crisp without overcooking the filling.
- Make‑Ahead Potential: The filling can be prepared a day ahead and stored, so you can assemble and cook in under 10 minutes when guests arrive.
Inside the Ingredient List
The Flavor Base
Ground beef is the heart of this dish—lean, well‑seasoned, and cooked to a perfect medium‑rare. It absorbs the cumin and chili powder, creating a savory foundation that carries the rest of the flavors. Skipping the beef would turn this from a hearty quesadilla into a simple cheese melt.
Onion and garlic are sautéed until translucent, releasing their sweet aroma and adding depth. If you’re looking for a vegetarian version, try crumbled tempeh or textured vegetable protein instead. The key is to cook them until they’re fragrant but not browned.
The Texture Crew
Flour tortillas provide the crisp, buttery base. Choosing medium‑size, 8‑inch tortillas ensures a manageable portion and easy folding. If you prefer gluten‑free, swap for corn tortillas or a gluten‑free blend.
Mexican blend cheese melts beautifully, creating a gooey, stretchy layer that binds the filling. The cheese also adds a creamy counterpoint to the sharp tomatoes and olives. For a sharper flavor, use a mix of cheddar and pepper jack.
The Unexpected Star
Black olives bring a salty, briny bite that cuts through the richness of the beef and cheese. They’re a subtle nod to Mediterranean flavor profiles and add a pop of color. If you can’t find fresh olives, a jar of pitted olives works fine.
Sour cream and salsa on the side are optional, but they add a cool, tangy contrast that elevates each bite. They’re also great for guests who like a little extra kick.
The Final Flourish
Fresh cilantro and diced tomatoes add brightness and a fresh burst of acidity that balances the richness. The cilantro’s citrusy note is a natural complement to cumin, while the tomatoes provide a sweet, juicy counterpoint. If you’re not a cilantro fan, try parsley or basil for a different flavor profile.
The salsa or tomato sauce is the glue that binds the flavors together. A mild salsa keeps the heat in check, while a smoky chipotle salsa adds an extra layer of complexity. Adjust the amount to your taste preference.
Everything's prepped? Good. Let's get into the real action...
The Method — Step by Step
- Heat a cast‑iron skillet over medium‑high heat. Add the ground beef, breaking it apart with a wooden spoon. Cook until browned, about 5–6 minutes. The beef should be fully cooked, with a slight caramelization on the edges. Drain excess fat if necessary.
- Add the diced onion and minced garlic to the skillet. Sauté until the onion becomes translucent, about 3 minutes. Stir in the cumin, chili powder, and paprika. The spices should toast for 30 seconds, releasing their aromas.
- Stir in the tomato sauce or salsa and the chopped cilantro. Let the mixture simmer for 2 minutes, allowing the flavors to meld. Add the diced tomatoes, green onions, and sliced black olives. Cook for another 2 minutes until everything is heated through.
- Remove the skillet from heat and let the mixture rest for 5 minutes. This rest period allows the flavors to settle and the beef to become tender. The rest also gives the cheese time to melt into the filling, creating a cohesive texture.
- Place a tortilla on the skillet. Spoon about 2–3 tablespoons of the beef mixture onto one half of the tortilla. Sprinkle a generous amount of shredded cheese over the filling. Fold the tortilla in half, pressing gently to seal. Repeat with the remaining tortillas.
- Cook each quesadilla for 3–4 minutes per side, or until the tortilla turns golden brown and the cheese melts. Flip carefully with a spatula. The edges should look crisp and slightly charred.
- Remove the quesadillas from the skillet and let them rest for 2 minutes. This rest allows the cheese to set slightly, preventing it from oozing out of the tortilla when you cut. Slice into wedges and serve immediately with sour cream and salsa on the side.
That's it—you did it. But hold on, I've got a few more tricks that'll take this to another level. These insider tips will help you avoid common pitfalls and elevate your quesadillas to culinary greatness.
Insider Tricks for Flawless Results
The Temperature Rule Nobody Follows
Cooking at the right temperature is the backbone of a perfect quesadilla. A skillet that’s too hot will burn the tortilla before the cheese melts. A skillet that’s too cool will leave the tortilla soggy. Aim for medium‑high heat and keep a close eye on the color changes.
Why Your Nose Knows Best
Smell is a powerful indicator of doneness. When the beef begins to sizzle, it’s a sign that the fats are rendering and the flavor is intensifying. If you smell a burnt scent, lower the heat immediately.
The 5‑Minute Rest That Changes Everything
Letting the filling rest after cooking allows the spices to settle and the juices to redistribute. This small pause transforms a good quesadilla into a great one. I’ve seen people skip this step and end up with a dry, uneven filling.
The Cheese Layer Is Key
Use a blend of cheeses for depth. A touch of sharp cheddar adds bite, while a smear of pepper jack brings heat. The combination creates a melt that’s both creamy and flavorful.
Keep It Clean
Clean the skillet after each use. Residual bits can cause uneven browning on the next batch. A quick wipe with a paper towel removes any stuck-on bits before the next tortilla lands.
Creative Twists and Variations
This recipe is a playground. Here are some of my favorite ways to switch things up:
Spicy Chipotle Surprise
Swap the regular salsa for a chipotle‑infused version. The smoky heat adds depth, making the quesadillas perfect for chili lovers. Serve with a lime wedge for an extra zing.
Mediterranean Twist
Add diced cucumber and feta cheese. Replace black olives with sun‑dried tomatoes. This version offers a bright, tangy profile that pairs beautifully with the beef.
Veggie‑Loaded Option
Omit the beef entirely and use a mix of sautéed mushrooms, bell peppers, and spinach. The texture stays hearty, and the cheese still provides that satisfying melt.
Corn Tortilla Edition
Swap flour tortillas for corn tortillas for a gluten‑free or lower‑carb option. The corn adds a subtle sweetness that complements the savory filling.
Breakfast Quesadilla
Add scrambled eggs and a dash of hot sauce to the filling. This makes a satisfying breakfast that’s both protein‑packed and flavorful. Serve with a side of fresh fruit.
Cheesy Burrito Bowl
Instead of folding, pour the filling over a bed of rice and beans. Top with guacamole, sour cream, and salsa for a deconstructed take on the classic.
Storing and Bringing It Back to Life
Fridge Storage
Store cooked quesadillas in an airtight container in the refrigerator for up to 3 days. Keep them on a rack to preserve crispness. When ready to eat, reheat in a skillet for 2 minutes per side.
Freezer Friendly
Wrap each quesadilla individually in foil and place them in a freezer bag. They stay fresh for up to 2 months. Thaw overnight in the refrigerator before reheating.
Best Reheating Method
The key to a fresh‑seeming quesadilla is a quick pan‑reheat. Add a splash of water to the skillet, cover briefly to steam, then finish with a dry pan for crispness. This trick restores the original texture.