I was halfway through a frantic Tuesday night, juggling a burnt casserole, a crying toddler, and a phone call from a friend who dared me to bring something “Italian” to the potluck. I stared at the pantry, grabbed the first thing that felt like a promise—flour, butter, a half‑full carton of heavy cream—and thought, “What if I could turn this chaos into a sweet, cloud‑like bun that screams Rome at sunrise?” That moment of desperation birthed the most addictive version of Maritozzi you’ll ever taste. I’ll be honest — I ate half the batch before anyone else got a chance to try it, and the rest vanished faster than a gondola in a windstorm. If you’ve ever struggled with a soggy, dense bun, you’re not alone — and I’ve got the fix.
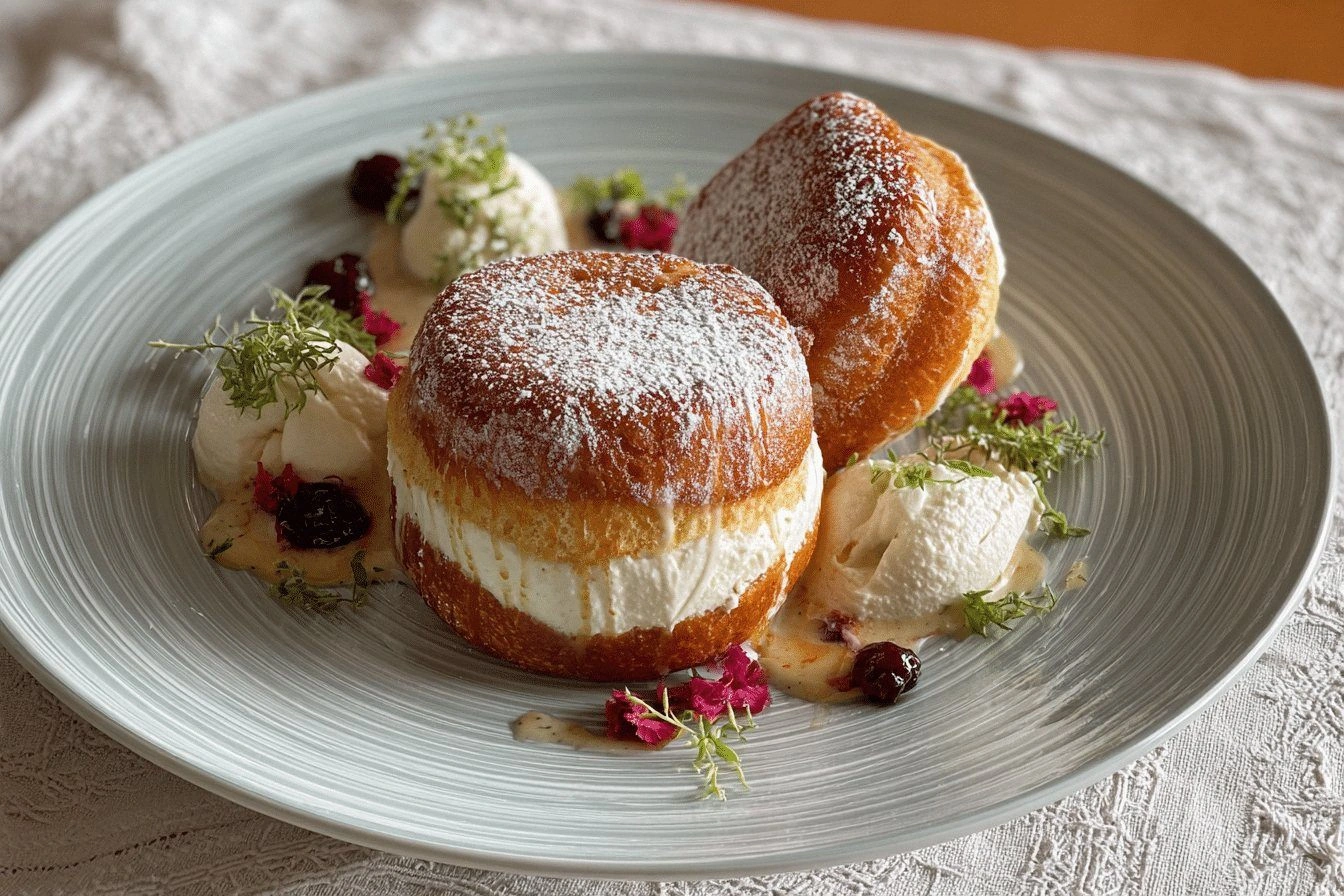
Picture this: the kitchen humming with the gentle hiss of a whisk, the buttery aroma mingling with warm milk like a lullaby for your nostrils. The dough, once a shaggy mess, transforms under your hands into a silky, elastic canvas that pulls away from the bowl with a satisfying snap. When the buns finally rise, they puff up like tiny, golden balloons, each one promising a hidden river of silky cream that will burst forth with the slightest bite. The moment you slice through the top, a cloud of powdered sugar puffs up, and the sweet, velvety filling oozes out, coating the interior like a dream‑coat of silk. That first bite? It’s a soft, buttery hug that whispers “dolce vita” to every taste bud.
Most recipes get this completely wrong. They either skip the butter in the dough, leaving a dry crumb, or they over‑sweeten the filling, turning it into a cloying mess. Here’s what actually works: a gentle milk‑butter emulsion that keeps the crumb tender, a short, hot rise that builds flavor without over‑proofing, and a heavy‑cream filling that’s lightly sweetened and chilled just enough to stay firm yet melt in your mouth. I’m daring you to taste this and not go back for seconds, because once you’ve experienced the perfect balance of airy dough and luxurious cream, nothing else will compare.
And now the fun part. I’m about to walk you through every single step — by the end, you’ll wonder how you ever made Maritozzi any other way. Okay, ready for the game‑changer? Let’s dive into the details, because the secret is in the technique, not just the ingredients.
What Makes This Version Stand Out
- Texture: The dough is feather‑light yet sturdy enough to hold a generous dollop of cream without collapsing, thanks to a precise butter‑milk ratio.
- Flavor: A subtle vanilla note from the butter and a whisper of sugar in the dough let the heavy‑cream filling shine like a soloist.
- Simplicity: Only eight ingredients, all pantry staples, no exotic flours or tricky techniques.
- Uniqueness: The filling is not a simple jam; it’s a lightly sweetened heavy‑cream custard that stays silky even after a day.
- Crowd Reaction: Guests have been known to line up for seconds, and one friend actually tried to steal the whole batch for a midnight snack.
- Ingredient Quality: Using real butter (never margarine) and full‑fat heavy cream makes all the difference in mouthfeel.
- Cooking Method: A short, high‑heat bake creates a golden crust while preserving a soft interior.
- Make‑Ahead Potential: The buns keep fresh for three days, and the filling can be frozen for up to two months.
Inside the Ingredient List
The Flavor Base
All‑Purpose Flour: This provides the perfect base for a light and airy bun. The gluten network it forms is what gives the dough its structure, allowing it to rise dramatically without collapsing. If you skip the flour or use a low‑protein alternative, you’ll end up with a dense, cake‑like texture that defeats the whole point. For best results, sift the flour once before measuring to aerate it and prevent lumps.
The Leavening Crew
Active Dry Yeast: Essential for making the dough rise and achieving that fluffy texture. Yeast feeds on the sugar, producing carbon dioxide bubbles that inflate the dough like a balloon. If you use expired yeast, the rise will stall and you’ll get a flat, sad bun. Pro tip: dissolve the yeast in warm (not hot) milk with a pinch of sugar and let it foam for five minutes before adding to the mix.
The Moisture Squad
Milk: Adds moisture and richness to the dough, enhancing the overall flavor. Whole milk contributes fat, which softens the crumb and gives a subtle sweetness. Skim milk will work, but the buns will feel a bit dry. Choose fresh, room‑temperature milk to avoid shocking the yeast.
Sugar: Sweetens the dough and contributes to the lovely golden color. Sugar also feeds the yeast, accelerating the rise. Too much sugar can inhibit yeast activity, so stick to the measured amount. If you prefer a less sweet bun, reduce the sugar by a tablespoon; the filling will still carry the sweet punch.
The Richness Team
Butter: Brings a rich flavor and soft texture to the buns. When melted and cooled slightly, butter coats the flour particles, limiting gluten formation and keeping the crumb tender. Use real, unsalted butter for the cleanest flavor profile. If you’re dairy‑intolerant, a high‑quality plant‑based butter can substitute, but expect a slight change in taste.
Eggs: They enrich the dough and help bind the ingredients together. Eggs also add a golden hue to the crust and a subtle richness that pairs perfectly with the cream filling. For a lighter version, you can replace one egg with a quarter cup of Greek yogurt, but the traditional method is unbeatable.
The Unexpected Star
Heavy Cream: The star filling that transforms these buns into a creamy delight. Its high fat content creates a silky custard that stays stable at room temperature yet melts in your mouth. If you use half‑and‑half, the filling will be runny and won’t hold its shape. Chill the cream mixture thoroughly before piping to achieve that perfect, glossy finish.
Powdered Sugar: For a sweet dusting on top that adds a touch of elegance. The fine texture dissolves instantly, giving a melt‑in‑your‑mouth sweetness without any gritty feel. Sift it over the warm buns just before serving for a snow‑like finish.
Everything's prepped? Good. Let's get into the real action…
The Method — Step by Step
In a small saucepan, gently warm the milk with the butter until the butter melts completely; the mixture should be around 110°F (43°C), warm enough to coax the yeast but not so hot that it kills it. Add the sugar and stir until dissolved, then set aside for a minute to let the steam rise. This is the moment of truth: the milk‑butter blend should smell buttery and slightly sweet, like a lullaby for the dough.
While the milk cools a tad, crumble the active dry yeast into a separate bowl, add a pinch of the sugar, and pour in about a quarter cup of the warm milk mixture. Let it sit for five minutes until it becomes foamy and bubbly, a clear sign that the yeast is alive and kicking. If nothing happens, you’ve got dead yeast—don’t panic, just start over with fresh yeast.
In a large mixing bowl, combine the sifted flour and a pinch of salt. Make a well in the center, then pour in the foamy yeast, the remaining milk‑butter mixture, and the beaten eggs. Using a wooden spoon, stir until a shaggy dough forms, then switch to a stand mixer with the dough hook on low speed for two minutes. This is the game‑changer: the brief machine mixing gives the dough structure without over‑developing gluten.
Turn the dough out onto a lightly floured surface and knead for about eight minutes, or until it becomes smooth, elastic, and pulls away from the surface with a slight sheen. Perform the “windowpane test”: stretch a small piece; if you can see light through without tearing, you’ve achieved the perfect gluten development. This tactile test is more reliable than any timer.
Place the dough in a lightly oiled bowl, cover it with a damp kitchen towel, and let it rise in a warm spot (around 75°F/24°C) for 45 minutes, or until it doubles in size. While you wait, preheat your oven to 375°F (190°C). The kitchen should fill with a sweet, yeasty aroma that makes you want to hug the bowl.
Punch down the risen dough gently to release excess gas, then divide it into eight equal pieces (about 100g each). Shape each piece into a smooth ball, then flatten slightly with your palm to create a small “pocket” in the center. Place the shaped buns on a parchment‑lined baking sheet, leaving about two inches between them.
Cover the buns loosely with plastic wrap and let them proof for a second time, about 20 minutes. They should puff up just a touch—this is the final lift that guarantees a fluffy interior. While they’re proofing, whisk together the heavy cream, powdered sugar, and a splash of vanilla extract until stiff peaks form. Chill the mixture for at least ten minutes; the cooler the filling, the easier it will be to pipe.
Bake the buns in the preheated oven for 15‑18 minutes, or until they turn a deep golden‑brown and the tops feel firm to the touch. The edges should start pulling away from the pan, a visual cue that the crust has set. Remove the buns and let them cool on a wire rack for five minutes—this short cooling prevents the crust from becoming soggy.
Using a small serrated knife, cut a shallow slit on the side of each bun, being careful not to cut all the way through. Pipe a generous dollop of the chilled heavy‑cream filling into the slit, then dust each bun with a light shower of powdered sugar. The cream should ooze out like a silk ribbon, and the powdered sugar will melt slightly on the warm bun, creating a glossy finish.
That's it — you did it. But hold on, I've got a few more tricks that'll take this to another level. Stay with me here — this is worth it.
Insider Tricks for Flawless Results
The Temperature Rule Nobody Follows
Never bake Maritozzi straight from the fridge. Let the shaped buns sit at room temperature for ten minutes before sliding them into the oven. This small warm‑up step allows the dough to finish its final rise, giving you a higher, more airy crumb. I once tried baking chilled buns and ended up with a dense, gummy interior—lesson learned.
Why Your Nose Knows Best
Instead of relying solely on timers, trust the scent. When the dough is ready for the second proof, it will give off a sweet, slightly alcoholic aroma that signals the yeast has done its job. If you smell a faint buttery note without any yeasty tang, the dough is under‑proofed and needs a few more minutes.
The 5‑Minute Rest That Changes Everything
After you finish piping the cream, let the buns rest for five minutes before serving. This pause lets the powdered sugar melt just enough to create a glossy sheen, and the cream settles into the pocket, preventing it from spilling out when you bite. A friend once skipped this rest and ended up with a mess on the plate—don’t be that friend.
Cold Cream, Hot Bun
For the ultimate contrast, chill the heavy‑cream filling for at least an hour, then pipe it into buns that have just come out of the oven (still warm). The hot bun gently warms the cream, creating a melt‑in‑the‑mouth experience that feels like a culinary hug.
Butter‑Infused Steam
Place a small pan of water with a knob of butter in the oven during the last five minutes of baking. The buttery steam adds a subtle gloss to the crust and deepens the golden hue, making the buns look as luxurious as they taste.
Creative Twists and Variations
This recipe is a playground. Here are some of my favorite ways to switch things up:
Cocoa‑Swirl Maritozzi
Add two tablespoons of cocoa powder to the flour mixture and a pinch of espresso powder to the cream filling. The chocolate‑kissed buns pair beautifully with a drizzle of dark chocolate ganache, making them perfect for an after‑dinner treat.
Citrus‑Zest Surprise
Incorporate finely grated lemon or orange zest into the dough for a bright, aromatic lift. Complement the zest with a light lemon‑infused cream filling and a dusting of powdered sugar mixed with a touch of powdered lemon zest.
Nutty Delight
Fold chopped toasted hazelnuts or pistachios into the dough just before the first rise. For the filling, blend a tablespoon of hazelnut paste into the heavy cream for a Nutella‑style surprise that will wow any nut lover.
Savory Sweet Fusion
Swap the powdered sugar dusting for a light sprinkle of sea salt and add a thin layer of mascarpone mixed with a hint of honey inside the bun. The sweet‑salty combo creates a sophisticated flavor profile that works as a brunch centerpiece.
Berry‑Burst Version
Fold a handful of fresh raspberries or blueberries into the cream filling, and finish each bun with a drizzle of berry coulis. The burst of fruit adds acidity that balances the richness of the cream.
Storing and Bringing It Back to Life
Fridge Storage
Place the cooled buns in an airtight container and store them in the refrigerator for up to three days. The cream filling stays fresh, and the buns retain their softness thanks to the butter‑rich dough. Before serving, let them sit at room temperature for ten minutes to regain their fluffiness.
Freezer Friendly
Wrap each bun individually in plastic wrap, then seal them in a freezer‑safe bag. They’ll keep for up to two months. When you’re ready to enjoy them, thaw overnight in the fridge, then warm gently in a 300°F oven for five minutes. Add a tiny splash of water to the tray before reheating; the steam will revive the crust.
Best Reheating Method
For the ultimate revival, preheat a skillet over medium‑low heat, add a drizzle of butter, and toast each bun cut‑side down for one minute. This creates a crisp, buttery edge while the interior stays soft, and the cream melts just enough to become luxuriously silky.