I’ll be honest — I was halfway through a Netflix binge when a sudden craving for something buttery, cheesy, and downright addictive slammed into me like a plot twist. I raided the fridge, found a lonely tub of leftover mashed potatoes, and a block of sharp cheddar that was practically screaming for a makeover. The first attempt? A sad, soggy patty that fell apart the moment I lifted it. Most recipes I’ve tried either turn into dry, crumbly bites or melt into a gooey mess that slides off the plate. That disaster sparked a dare: I would create the ultimate comfort snack that hits the perfect balance of crisp, creamy, and cheesy, and then I’d challenge you to taste it and not go back for seconds.
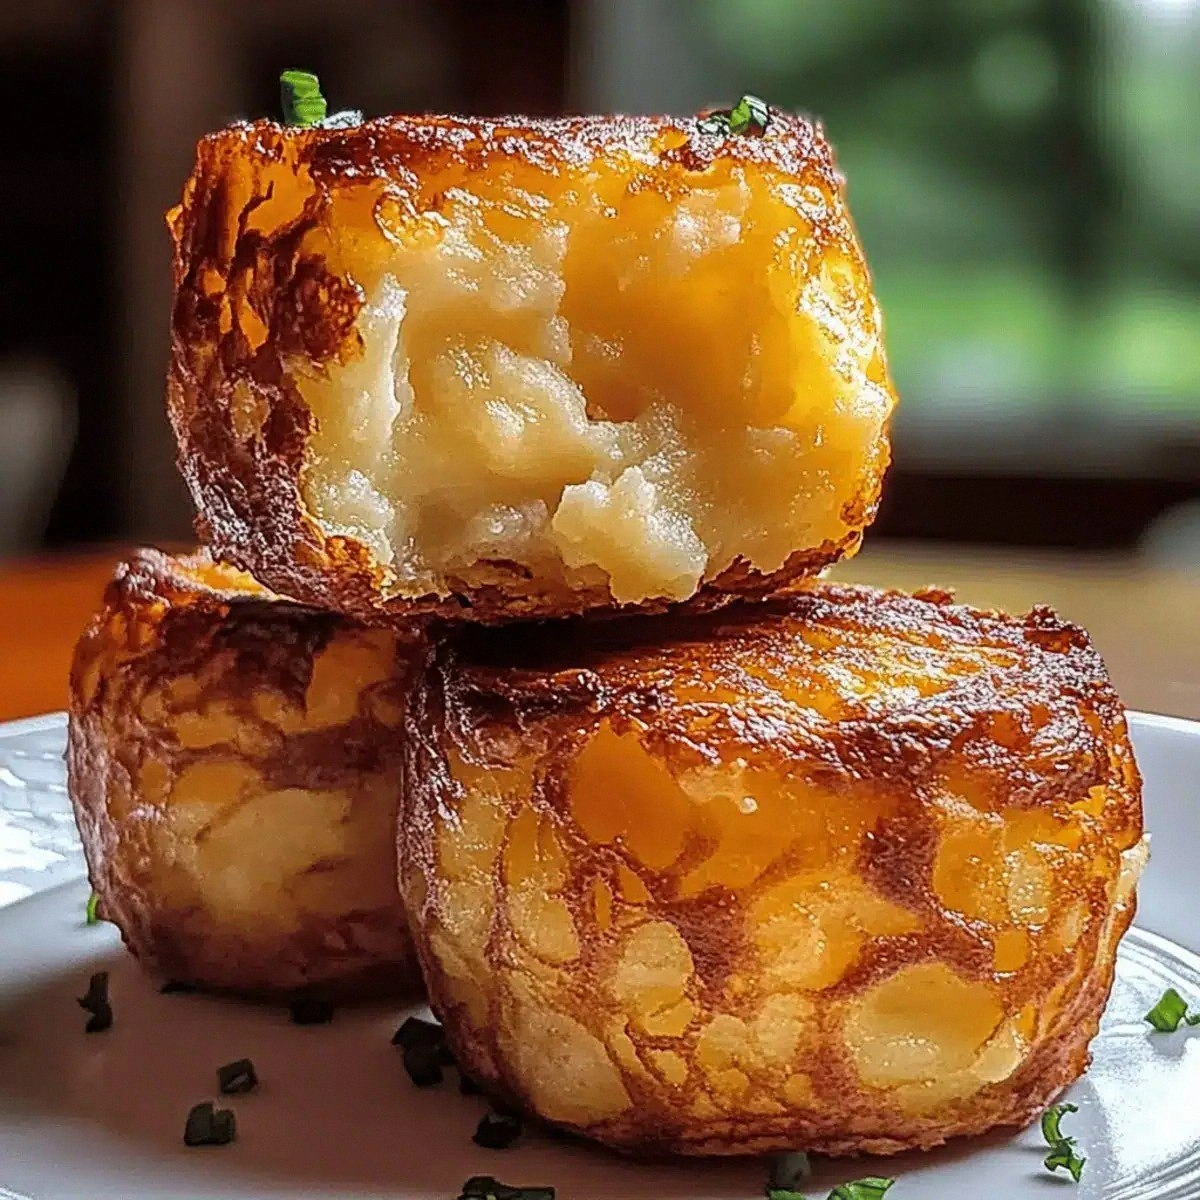
Picture this: the kitchen fills with the warm, earthy aroma of potatoes mingling with the sharp, buttery perfume of cheddar as it begins to melt. The sizzle when the puffs hit the hot pan is like a tiny fireworks show, and the golden edges start to pull away, promising a crunchy bite that gives way to a cloud‑soft interior. You hear the faint crackle of the oil, feel the heat radiating from the skillet, and see the puffs puff up like tiny, golden clouds ready to burst. The moment you bite, the cheese stretches like a velvety ribbon, the potatoes melt like silk, and the seasoning hits your palate with a gentle, savory kiss that makes you sigh in pure satisfaction.
What sets this version apart is a secret technique I stumbled upon while watching a pastry chef flatten a dough with a rolling pin — I fold the mashed potatoes into a light batter that traps air, creating a puff that’s airy on the inside yet crisp on the outside. Most recipes get this completely wrong, either drowning the potatoes in flour or over‑mixing the batter and ending up with a dense loaf. Here, we keep the mixture gentle, we let the cheese melt just enough to bind, and we finish with a quick flash‑fry that locks in moisture while giving you that irresistible crunch.
And the twist? I’m adding a splash of milk‑enhanced flour to give the batter a silk‑like texture, and a dash of smoked paprika that adds a whisper of smoky depth you wouldn’t expect from a humble comfort snack. Okay, ready for the game‑changer? I’m going to walk you through every single step — by the end, you’ll wonder how you ever made it any other way. Let’s dive in and turn those leftover potatoes into a snack that will have everyone begging for the recipe.
What Makes This Version Stand Out
- Flavor Explosion: The sharp cheddar melds with the buttery potatoes, creating a taste that’s both familiar and exhilarating, like a childhood favorite upgraded with a gourmet twist.
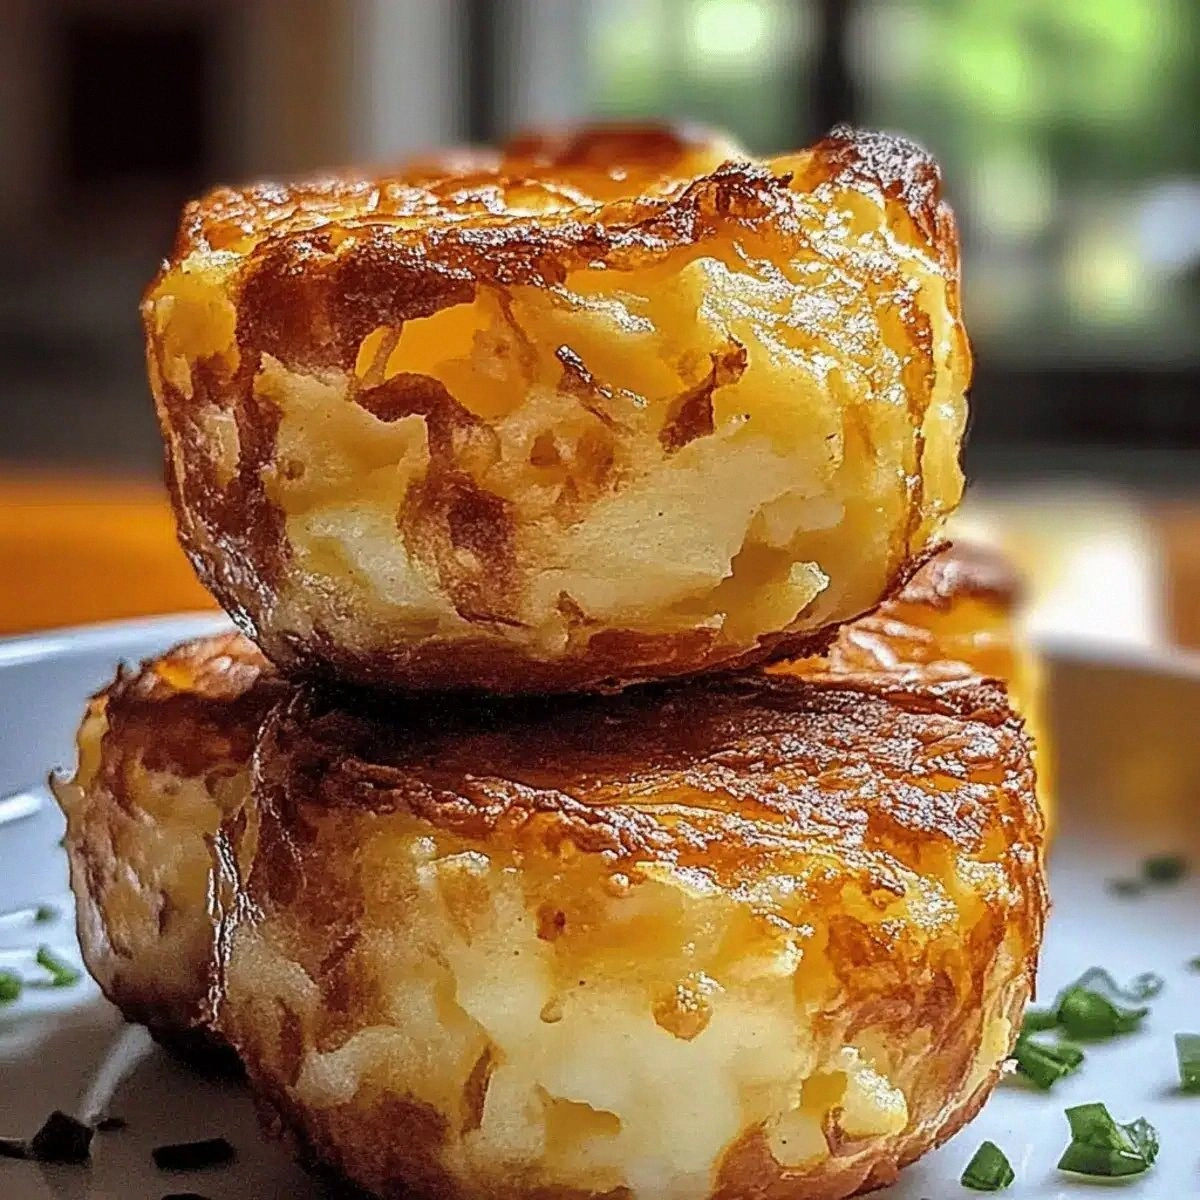
- Texture Harmony: A crisp, golden crust gives way to a pillowy, melt‑in‑your‑mouth center, delivering that perfect contrast you crave in every bite.
- Simple Ingredients: Only pantry staples are needed, meaning you won’t have to run to the store for exotic items — just what you already have on hand.
- Speedy Prep: From start to finish it takes under an hour, making it ideal for last‑minute gatherings or a quick midnight snack.
- Versatile Crowd‑Pleaser: Kids love the cheesy goodness, while adults appreciate the subtle spice and sophisticated texture.
- Make‑Ahead Friendly: You can shape and freeze the puffs ahead of time, then fry them straight from the freezer for a stress‑free snack.
- Ingredient Quality: Using real shredded sharp cheddar and fluffy, well‑seasoned mashed potatoes elevates the dish from “just okay” to “hands down the best version you’ll ever make at home.”
- Cooking Method Magic: A quick flash‑fry locks in moisture and creates a crust that stays crisp even after a brief rest.
Alright, let's break down exactly what goes into this masterpiece...
Inside the Ingredient List
The Flavor Base
Mashed potatoes are the heart of this snack, providing a buttery canvas that carries the cheese and seasonings. Use a mash that’s smooth but not overly whipped — a little texture helps the batter hold together. If you skip this and use instant mash, you’ll end up with a gummy mess that never crisps. For the best flavor, choose potatoes with a high starch content like Russets, and season them lightly with salt before mashing.
The Texture Crew
Shredded sharp cheddar cheese is the binding hero; its melt‑point creates that stretchy, gooey interior we all love. Opt for a cheese that’s freshly shredded rather than pre‑shredded, because the anti‑clumping agents in bagged cheese can interfere with the puff’s rise. If you’re dairy‑free, a sharp vegan cheddar works, but expect a slightly different melt texture.
The Unexpected Star
All‑purpose flour is the subtle architect that gives structure without weighing the puffs down. The ½ cup amount is carefully balanced to bind the mixture while keeping it light. If you substitute with whole‑wheat flour, the puffs will be denser and have a nuttier flavor — a fun twist for a rustic vibe.
The Final Flourish
Eggs act as the glue that holds everything together, creating a cohesive batter that puffs up beautifully when fried. Using large eggs ensures enough moisture and protein for that perfect rise. A pinch of black pepper adds a gentle heat that cuts through the richness, while salt amplifies every flavor note. If you’re watching sodium, you can reduce the salt to ½ tsp, but the overall taste will be milder.
Everything's prepped? Good. Let's get into the real action...
The Method — Step by Step
First, gather all your ingredients and set a large mixing bowl on a clean countertop. I like to measure everything before I start because it keeps the momentum going. Toss the mashed potatoes into the bowl, then sprinkle the shredded cheddar over the top. This is the moment of truth: you should see the cheese melt slightly as you stir, creating a glossy, buttery mixture that smells like comfort itself.
In a separate small bowl, whisk the two large eggs until they’re light and frothy. Add a pinch of salt and the black pepper, then pour the egg mixture into the potato‑cheese blend. Stir gently with a rubber spatula, folding the eggs in just enough to coat the potatoes without turning the batter into a scramble. The batter should be thick yet pliable, resembling a soft dough that holds together when pressed.
Now, sift the ½ cup of all‑purpose flour over the batter, sprinkling it evenly. Use a gentle folding motion to incorporate the flour, being careful not to over‑mix. Over‑mixing activates the gluten in the flour, which can make the puffs tough instead of light. The batter should look slightly speckled with flour and feel a bit less sticky — that’s the perfect consistency.
Heat a large skillet over medium‑high heat and add just enough oil or cooking spray to coat the bottom thinly. I prefer a high‑smoke‑point oil like avocado or grapeseed because it lets the puffs get that golden crust without burning. Once the oil shimmers, it’s time for the next power transition: “Okay, ready for the game‑changer?” Scoop a heaping tablespoon of batter and gently drop it into the pan. You’ll hear an immediate sizzle, the sound of a tiny fireworks display that signals the start of crispiness.
Let the puff fry for about 2‑3 minutes on the first side. You’ll know it’s ready to flip when the edges turn a deep amber and start pulling away from the pan, creating a tiny “crack” sound. Using a thin spatula, carefully turn the puff over and fry the other side for another 2 minutes. The second side should develop a slightly darker crust, giving you that perfect balance of color and crunch.
Once both sides are golden, transfer the puff to a paper‑towel‑lined plate to drain excess oil. While the first few are still hot, sprinkle a tiny pinch of extra salt and a dash of smoked paprika for a flavor boost. This final touch is pure magic; the paprika adds a subtle smoky note that elevates the entire bite.
Repeat the process with the remaining batter, adjusting the heat slightly if the pan starts to look too dry. You’ll notice the puffs start to look more uniform as the batter stabilizes. By the end, you should have a batch of golden‑brown, cheese‑streaked puffs that sit proudly on the plate, steam rising like a promise of indulgence.
Serve them hot, straight from the pan, with a side of cool ranch dip or a tangy tomato salsa if you like a contrast. I dare you to taste this and not go back for seconds — the combination of crisp and creamy is practically addictive. And now the fun part: you can store any leftovers in the fridge and re‑crisp them later, but trust me, they’re best enjoyed fresh.
That's it — you did it. But hold on, I've got a few more tricks that'll take this to another level...
Insider Tricks for Flawless Results
The Temperature Rule Nobody Follows
Most home cooks set the stove to “medium” and hope for the best, but the secret is to start a bit lower, around 325°F (163°C) if you’re using an electric skillet, then raise it gradually after the first flip. This gradual increase ensures the interior cooks evenly while the exterior forms that coveted crunch. I once tried blasting the heat from the start; the puffs turned into blackened discs with a raw center — a lesson learned the hard way.
Why Your Nose Knows Best
Your sense of smell is a more reliable timer than any clock. When the oil reaches the perfect temperature, you’ll detect a faint nutty aroma, and the first puff will emit a gentle “hiss” that’s louder than a whisper but softer than a roar. If you’re unsure, sprinkle a tiny piece of bread in the oil; it should turn golden in about 30 seconds. Trusting your nose prevents over‑cooking and guarantees that perfect golden hue.
The 5‑Minute Rest That Changes Everything
After you finish frying, let the puffs rest on a cooling rack for at least five minutes. This short pause allows the interior steam to settle, preventing the cheese from oozing out when you bite. A friend once skipped this step and ended up with a soggy mess that fell apart on the plate — not the experience we want. So, patience is a virtue, especially when it leads to a flawless bite.
Seasoning Layering Mastery
Season the mashed potatoes lightly before mixing, then add a final sprinkle of salt and smoked paprika right after frying. This two‑stage seasoning ensures that the flavor penetrates the interior while the exterior gets a bright, aromatic finish. Skipping the second layer leaves the puffs tasting flat, no matter how good the cheese is.
Freeze‑And‑Fry for On‑Demand Snacks
If you want to prep ahead, shape the puffs, flash‑freeze them on a parchment sheet, then transfer to a zip‑top bag. When you’re craving a snack, pop them straight into a hot pan; they’ll crisp up in just a few minutes, giving you that fresh‑made feel without the prep work. I’ve used this trick for movie nights, and it never fails to impress the crowd.
Creative Twists and Variations
This recipe is a playground. Here are some of my favorite ways to switch things up:
Spicy Jalapeño Kick
Finely dice a jalapeño and fold it into the batter for a subtle heat that wakes up the palate. Pair with a cooling sour cream dip to balance the fire, and you’ve got a snack that’s perfect for game day.
Herb‑Infused Garden
Add a tablespoon of chopped fresh chives, parsley, and thyme to the mixture. The herbs bring a fresh, bright note that makes the puffs feel lighter, ideal for a spring brunch.
Bacon‑Wrapped Bliss
Wrap each puff with half a slice of bacon and secure with a toothpick before frying. The bacon renders its fat into the pan, adding smoky richness and an extra crunch that’s impossible to resist.
Cheese‑Lover’s Dream
Swap half of the sharp cheddar for mozzarella and the other half for Gruyère. This blend creates a melty, nutty flavor profile that’s decadently cheesy, perfect for a cheese board accompaniment.
Sweet & Savory Twist
Incorporate a teaspoon of maple syrup into the batter and finish with a drizzle of honey after frying. The subtle sweetness pairs beautifully with the sharp cheddar, creating a flavor contrast that’s both comforting and surprising.
Storing and Bringing It Back to Life
Fridge Storage
Place cooled puffs in an airtight container lined with a paper towel to absorb excess moisture. They’ll stay fresh for up to three days. When you’re ready to eat, reheat in a preheated 350°F (175°C) oven for 8‑10 minutes, or pop them back into a hot skillet for a quick crisp.
Freezer Friendly
Arrange the fully cooled puffs on a parchment sheet and flash‑freeze for 1‑2 hours. Transfer them to a zip‑lock bag; they’ll keep for up to two months. To serve, fry them straight from frozen for 3‑4 minutes per side, or bake at 375°F (190°C) for 12 minutes, adding a splash of water to the pan to create steam that revives the interior.
Best Reheating Method
The secret to resurrecting that original crunch is to use a hot skillet with a thin layer of oil, and add a few drops of water to the pan before covering for a minute. The steam softens the interior while the oil re‑crispifies the crust, delivering a texture that’s practically identical to fresh‑made.