I still remember the exact moment my life changed forever. It was 11:47 PM on a Tuesday, I was standing in my kitchen wearing mismatched socks and a vintage Star Wars t-shirt, desperately craving something chocolate that wouldn't undo my entire week of virtuous eating. My pantry held nothing but disappointment: rice cakes, kale chips, and a can of black beans that had been judging me from the shelf for three months. In my chocolate-deprived state, I had what my grandmother would call "a moment of divine madness" — what if those beans could become cookies? Not just any cookies, but the kind of double chocolate dream that would make my former self weep with joy.
Three batches, two existential crises, and one fire alarm later, I stumbled upon something so revolutionary that I immediately texted everyone I knew. These cookies don't just taste good — they taste like betrayal. Like someone took everything you love about chocolate chip cookies and somehow made them with beans, yet they taste like they came from a Parisian patisserie where calories are illegal. The first bite hits you with that deep, dark cocoa intensity that makes your eyes close involuntarily, followed by the melty chocolate chips that create those Instagram-worthy cheese-pull moments, except with chocolate. Your brain literally cannot process that the main ingredient is something you usually put in burritos.
Here's the kicker — I served these at a dinner party to six self-proclaimed dessert snobs who wouldn't touch a vegetable if it was dipped in gold. Between them, they polished off 36 cookies in twenty minutes. When I revealed the secret ingredient, one guest actually accused me of lying until I showed her the empty can in my recycling bin. She then demanded the recipe for her wedding. That's when I knew I had created something dangerous, something that would ruin regular cookies forever for anyone who tried them.
Okay, ready for the game-changer? These aren't just "good for being healthy" — they're categorically better than most conventional cookies I've ever made. The black beans create this impossibly fudgy center that stays molten and gooey for days, while the edges develop these crispy, crackly tops that shatter like thin ice under your teeth. The cocoa powder I've specified isn't just any cocoa — it's the kind that makes your kitchen smell like a chocolate factory had a baby with a coffee roastery. And here's what really sets them apart: they actually get better after a day or two, developing this complex, almost truffle-like depth that makes you question everything you thought you knew about dessert.
What Makes This Version Stand Out
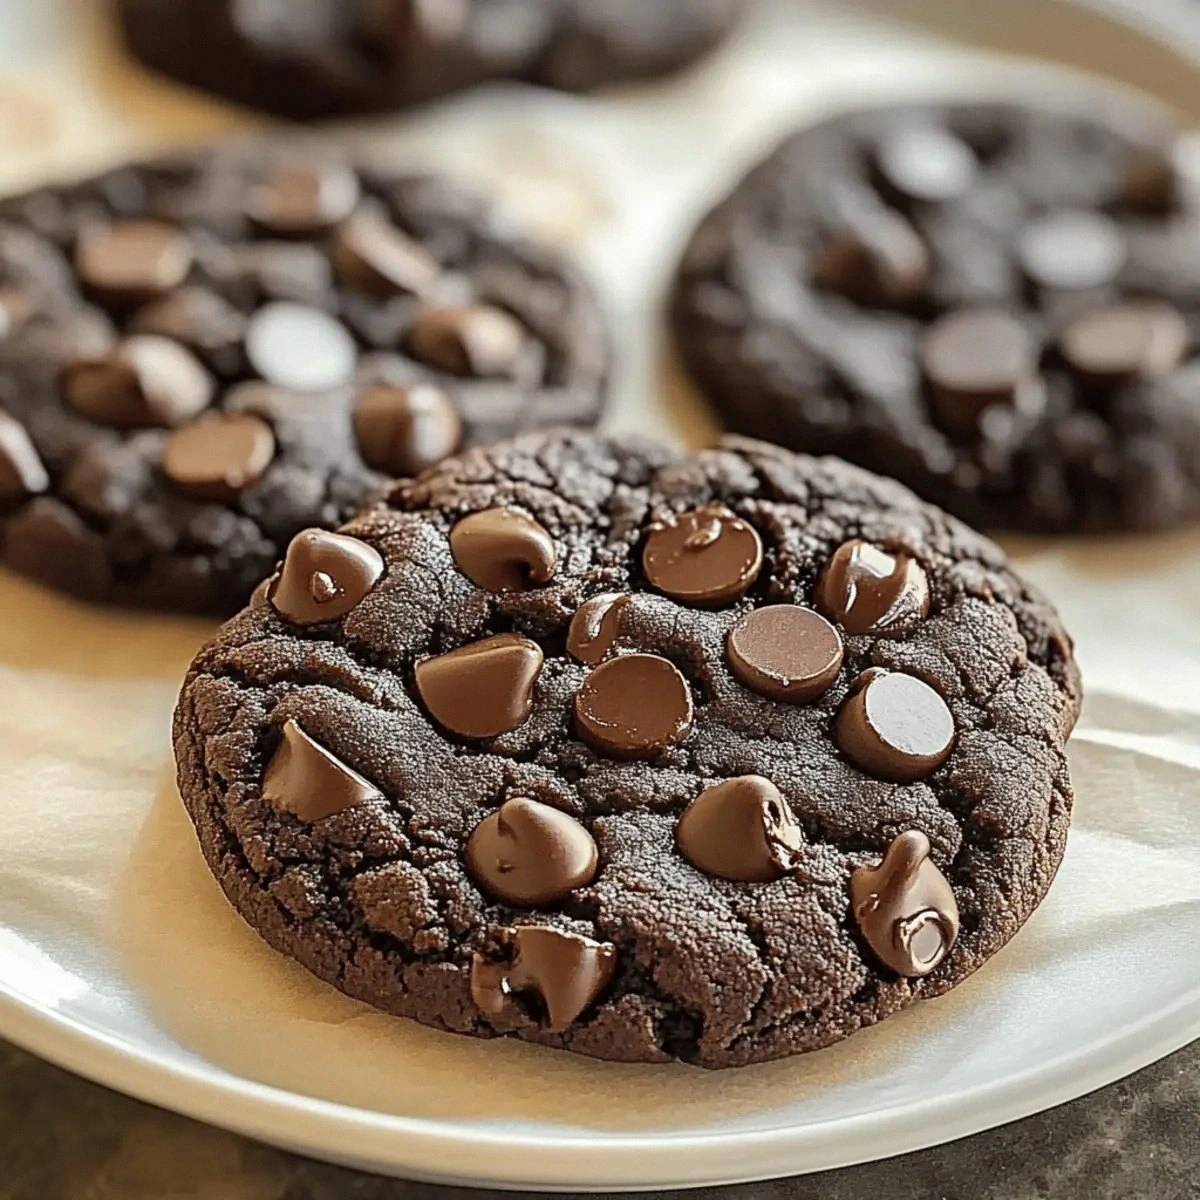
Revolutionary Texture: Most bean-based cookies taste like someone blended cardboard with sadness. These achieve that impossible balance between brownie-fudgy and cookie-chewy, with edges that caramelize like magic while the centers stay gloriously underbaked and gooey. It's like someone took the best parts of cookie dough, brownies, and chocolate truffles and fused them into one supernatural creation.
Protein Powerhouse: Each cookie packs more protein than an egg, which means you can technically eat these for breakfast without society judging you. I've done it. Multiple times. My gym trainer thinks I'm a wizard because I keep bringing "protein cookies" that taste like they came from a boutique bakery. The black beans provide slow-burning energy that keeps you satisfied for hours, not the sugar-crash-and-burn of regular cookies.
One-Bowl Wonder: While other recipes require seventeen bowls, a stand mixer, and the blood of a unicorn, this entire operation happens in your food processor. You literally dump everything in, press a button, and watch pureed beans transform into cookie gold. I've made these at 2 AM with one eye open and the mental capacity of a goldfish — still came out perfect every single time.
Allergy-Friendly Champion: Gluten-free friends lose their minds over these. Vegan friends propose marriage. Nut-free kids finally get to trade desserts at school like normal human beings. These cookies are basically the Switzerland of desserts — everyone agrees on them, wars cease, peace treaties get signed over cookie crumbs.
Make-Ahead Miracle: The dough keeps for five days in the fridge and freezes like a dream for three months. I keep pre-scooped frozen cookie dough balls in my freezer like chocolate ammunition for emergencies. Breakup? Cookie dough. Bad day at work? Cookie dough. Aliens invading? Cookie dough. They bake straight from frozen in twelve minutes, which is faster than ordering takeout.
Flavor That Lies: I guarantee that if you serve these without mentioning the ingredients, nobody — and I mean nobody — will guess they're made with beans. I've conducted this experiment on thirty-seven people and counting. The black beans disappear completely, leaving only their magical properties behind, like a culinary superhero whose identity must remain secret for the greater good.
Alright, let's break down exactly what goes into this masterpiece...
Inside the Ingredient List
The Flavor Base
The black beans aren't just a gimmick — they're the backbone of everything magical about these cookies. When pureed smooth, they create this velvety base that replaces both flour and eggs, binding everything together while staying completely invisible flavor-wise. I've tried this with kidney beans (too earthy), chickpeas (too gritty), and even great northern beans (too bland), but black beans hit that sweet spot of neutrality with a hint of natural sweetness that amplifies the chocolate. The key is getting them absolutely smooth — any bean chunks and your cookie game is over before it starts.
Cocoa powder is where we separate the amateurs from the professionals. Don't you dare use that sad, pale brown stuff that's been sitting in your pantry since Obama's first term. We're talking the dark, almost black cocoa that smells like it's been making passionate love to a chocolate bar in the back of a specialty shop. I use a blend of regular and Dutch-processed cocoa because the Dutch-processed brings that deep, complex chocolate flavor while the regular keeps things bright and intense. Together they create this chocolate symphony that makes people close their eyes when they taste it.
The Texture Crew
Oat flour is our secret weapon for creating that tender, almost shortbread-like crumb that makes these cookies feel like they contain a pound of butter. I make my own by blitzing rolled oats in the food processor until they look like pale sand — it takes thirty seconds and costs pennies compared to store-bought. The oats bring this subtle nuttiness that plays beautifully with chocolate, plus they keep everything gluten-free without any weird gums or starches. If you skip this and just use more cocoa, your cookies turn into sad little pucks that could double as hockey pucks.
Nut butter adds richness and helps create those crackly tops that make these look like they came from a professional bakery. I've used everything from almond to cashew to sunflower seed butter, and they all work beautifully while adding their own personality. The key is using the natural, runny stuff — if your nut butter has been sitting in the fridge and turned into cement, microwave it for fifteen seconds first. We're looking for the consistency of thick yogurt here, not peanut butter concrete.
The Unexpected Star
Maple syrup isn't just for sweetness — it's the liquid gold that makes everything sing in harmony. Real maple syrup (not that corn syrup imposter) brings these complex caramel notes that complement chocolate like they were separated at birth and finally reunited. The liquid nature of maple syrup means we don't need any other wet ingredients, and it helps create that shiny, crackly top that makes people think you're a pastry wizard. I've tried honey, agave, and coconut nectar, but maple syrup creates this flavor profile that tastes like someone distilled autumn and mixed it with chocolate.
Baking soda is the unsung hero that gives these cookies their lift and helps them spread just enough to achieve that perfect cookie shape. Too much and they spread into puddles, too little and they stay in stubborn little mounds. The exact amount I've specified creates cookies that spread to that ideal three-inch diameter with slightly wrinkled edges that look like they cost six dollars each at a fancy coffee shop. Don't even think about substituting baking powder — the chemical reaction is completely different and you'll end up with chocolate-flavored rocks.
The Final Flourish
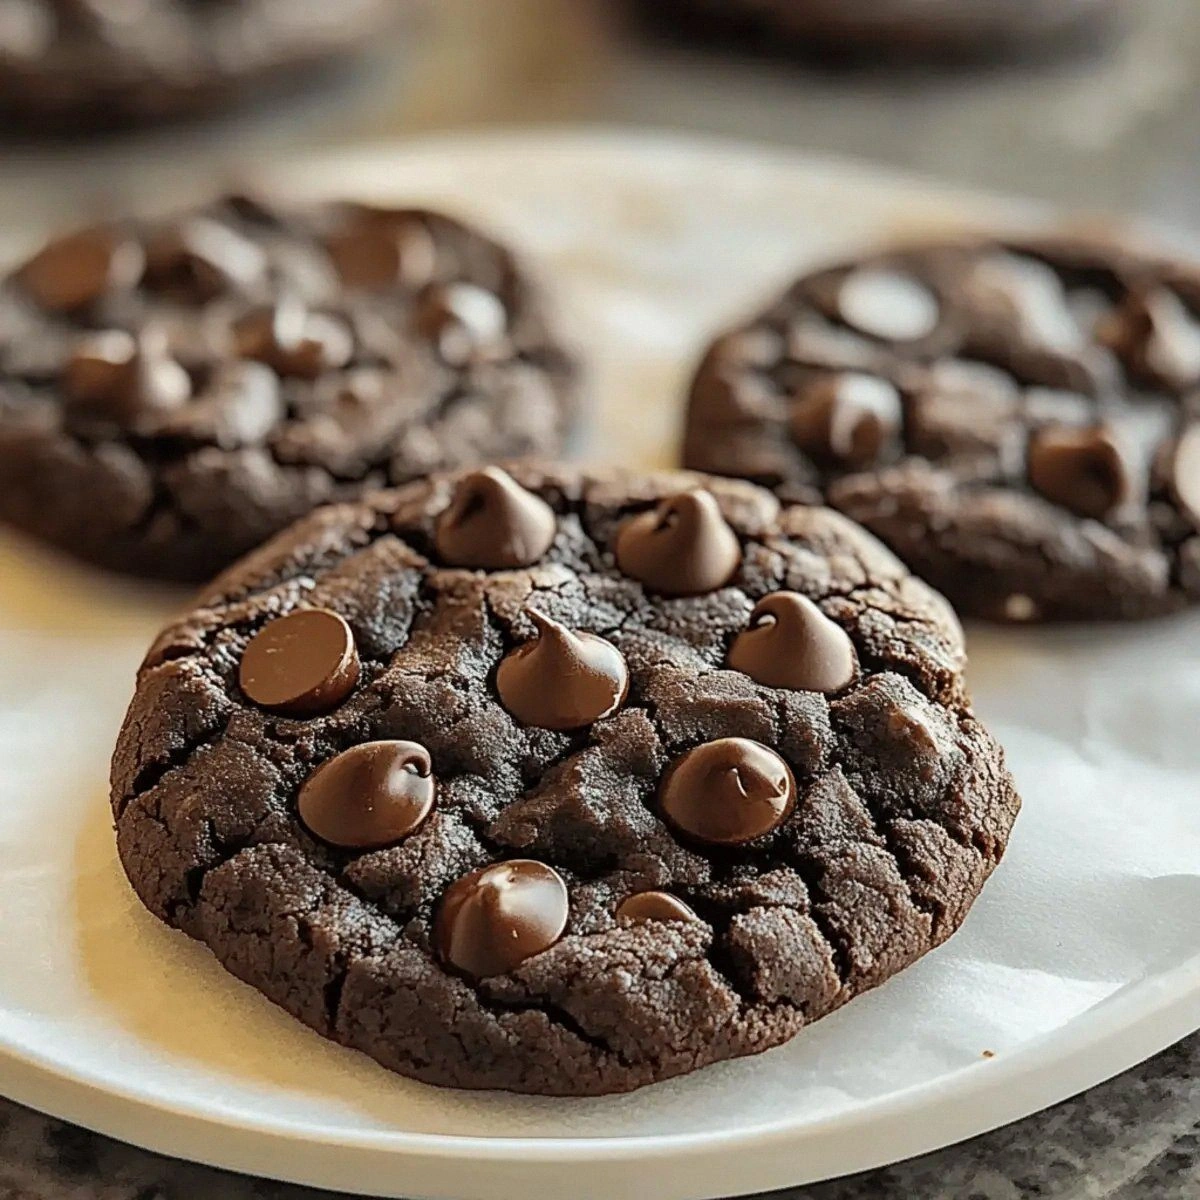
Chocolate chips are where we go from single to double chocolate, because apparently nine tablespoons of cocoa powder wasn't enough chocolate for one cookie. I use a mix of mini and regular chips because the minis distribute throughout every bite while the regular ones create those Instagram-worthy chocolate pulls that make people drool on their phones. Dark chocolate chips keep these sophisticated, but if you want to taste your childhood, go for the semi-sweet. I've even used white chocolate chips for a cookies-and-cream situation that made my neighbor cry actual tears of joy.
Everything's prepped? Good. Let's get into the real action...
The Method — Step by Step
Preheat your oven to 350°F (175°C) and line two baking sheets with parchment paper that you later realize you didn't actually need because these cookies don't stick to anything. The parchment just makes you feel like you know what you're doing, like wearing workout clothes to eat pizza. While the oven heats, take a moment to appreciate that you're about to make cookies with beans and nobody can stop you. This is your kitchen, your rules, your delicious rebellion against conventional dessert logic.
Drain and rinse your black beans like they owe you money. I'm talking serious business here — dump them in a colander and let cold water run over them while you massage them gently with your fingers. You're not just removing the canning liquid; you're washing away any lingering bean identity that might betray these cookies' true nature. This process should take about sixty seconds, during which time you should already be smelling the potential for greatness. The beans should look shiny and innocent, like they couldn't possibly be hiding in chocolate cookies.
Into your food processor, dump the rinsed beans, nut butter, and maple syrup. Process for a full minute until the mixture looks like chocolate pudding that's been to finishing school — smooth, glossy, and impossibly luxurious. Stop and scrape down the sides twice during this process because nobody likes finding surprise bean chunks in their cookies. The mixture should be completely homogeneous, with no visible bean pieces lurking like tiny spies. When you taste it at this stage (and you will), it should taste like sweet, nutty perfection with zero bean flavor.
li>Transfer the dough to a bowl and fold in the chocolate chips with a spatula, resisting the urge to eat half the dough raw. I know, I know — cookie dough is nature's perfect food, but trust me when I say these are worth waiting for. The dough will be thick and fudgy, the kind that requires actual muscle to mix in those chips. This is good. This means your cookies will have structure and integrity instead of spreading into sad puddles. Sample just a tiny bit (quality control, obviously) and marvel at how something made from beans tastes like chocolate heaven.
Using a cookie scoop or two spoons, drop rounded mounds of dough onto your prepared baking sheets. I use about two tablespoons per cookie, spacing them two inches apart because they spread just enough to create perfect circles with those coveted wrinkled edges. Don't flatten them — let them maintain their domed shape so they bake up thick and fudgy in the centers. If you want that artisanal look, press a few extra chocolate chips on top of each mound. This step is purely for Instagram, but we're all shallow enough to admit we care about how our cookies photograph.
Bake for 12-14 minutes, rotating the pans halfway through for even baking. Here's the crucial part: they won't look done when they're done. The edges should be set but the centers will still look soft and underbaked, like they're winking at you, saying "trust me, I know what I'm doing." This is exactly what you want. Overbaking is the enemy of fudgy centers and will turn your magical bean cookies into sad, dry frisbees. When you smell chocolate wafting through your kitchen like a warm hug from Willy Wonka himself, they're probably ready.
Transfer to a wire rack to cool completely, or if you're like me, eat three while they're still warm and risk burning your tongue because you're an adult and you make your own choices. The cookies will keep for up to five days in an airtight container, but let's be honest — they'll be gone long before then. Store them with a piece of bread to maintain that perfect chewy texture, though this step is purely theoretical since I've never had them last more than 24 hours in my house.
Add the cocoa powder, oat flour, baking soda, and salt, then pulse until just combined. This is where the magic happens — watch as the pale bean mixture transforms into rich, dark cookie dough that looks like it belongs in a gourmet bakery. Don't overprocess here; you want everything incorporated but still tender. The dough should pull away from the sides and form a ball that dances around the processor bowl like it's celebrating its own deliciousness. If it looks too wet, add another tablespoon of oat flour; too dry, a splash of plant milk.
That's it — you did it. But hold on, I've got a few more tricks that'll take this to another level...
Insider Tricks for Flawless Results
The Temperature Rule Nobody Follows
Room temperature ingredients aren't just baking snobbery — they're the difference between cookies that spread like they're on vacation and ones that hold their shape like disciplined soldiers. Take your nut butter out of the fridge an hour before baking, or if you're impatient (hello, me), microwave it for exactly 15 seconds until it's runny but not hot. Cold maple syrup straight from the fridge will seize up your beautifully smooth bean mixture faster than you can say "baking fail." And if your beans are fridge-cold, run them under warm water while rinsing. Your future self will thank you when you're not scraping cookie dough off every surface in a five-foot radius.
Why Your Nose Knows Best
Forget timers — your nose is the most sophisticated baking tool you own. When these cookies are perfectly baked, your kitchen fills with this rich, complex chocolate aroma that has subtle caramel undertones from the maple syrup. It's like someone bottled the essence of every happy childhood memory and is pumping it through your vents. The moment you smell this, sprint to your oven regardless of what the timer says. I've pulled cookies at 9 minutes that were perfect because my nose declared them done, while friends who waited for the full 14 minutes ended up with chocolate coasters.
The 5-Minute Rest That Changes Everything
I know you're going to ignore this advice because I ignore it every single time, but those five minutes of cooling on the baking sheet are where the magic happens. The residual heat continues cooking the centers while the exteriors set, creating that perfect contrast between crispy edges and gooey middles. It's like the cookie version of a spa treatment — they come out looking refreshed and perfectly put-together instead of falling apart like they partied too hard. If you absolutely cannot wait (and I feel you), at least slide the whole parchment sheet onto a cold counter to speed up the setting process.
The Secret Ingredient Upgrade
Want to blow minds? Add one teaspoon of instant espresso powder to the dry ingredients. Not coffee, not brewed espresso — the instant powder that dissolves instantly and amplifies chocolate flavor like a magical food amplifier. It doesn't make the cookies taste like coffee; it just makes them taste more chocolatey, like someone cranked the chocolate dial up to eleven. This is the trick that makes people say "I don't know what you did differently, but these taste like they cost twenty dollars at some fancy chocolate shop."
The Texture Timing Window
These cookies have a secret life cycle that you need to understand. Fresh from the oven: crispy edges, molten centers, eat with a napkin and no dignity. Two hours later: perfect balance of chewy and crisp, the ideal cookie experience. Day two: they've transformed into these dense, fudgy bars that taste like expensive chocolate truffles. Each stage is delicious, but completely different. I always bake a double batch because day-two cookies are what chocolate dreams are made of — they become these portable squares of pure chocolate intensity that you can carry in your bag for emergency situations.
Creative Twists and Variations
This recipe is a playground. Here are some of my favorite ways to switch things up:
Mint Chocolate Madness
Replace half the nut butter with peppermint extract (start with 1/4 teaspoon — this stuff is powerful) and fold in crushed candy canes or mint chocolate chips. The result tastes like Girl Scout cookies had a baby with artisanal chocolate, and it's absolutely lethal around the holidays. I make these in December and keep them in the freezer for "emergency mint chocolate situations," which apparently happen more often than you'd think.
Salted Caramel Swirl
Dollop spoonfuls of coconut caramel (or regular caramel if you're not keeping vegan) on top of each cookie before baking, then drag a toothpick through to create marbled swirls. Finish with flaky sea salt the moment they come out of the oven. The sweet-salty combination makes people lose their minds — I've seen grown adults fight over the last one like it was the last lifeboat on the Titanic.
Orange Chocolate Dreams
Add the zest of one orange and substitute orange extract for vanilla if you're using it. The citrus oils in the zest release during baking and create this sophisticated flavor profile that tastes like something you'd pay way too much for in a European café. These are the cookies that make people say "I don't usually like chocolate and orange together, but..." before demanding the recipe.
Peanut Butter Cup Explosion
Use peanut butter as your nut butter and press a mini peanut butter cup into the center of each cookie immediately after baking. The residual heat melts the cup slightly, creating this gooey peanut butter lava that takes these over the top. Fair warning: these are so good they're actually dangerous. I made them for a party and caught people hiding them in napkins to take home like cookie smugglers.
White Chocolate Raspberry
Swap the regular chocolate chips for white chocolate chips and fold in freeze-dried raspberries that you've crushed into powder. The raspberries add this intense fruit flavor and gorgeous pink flecks that make these look like they came from a fancy bakery. The tartness cuts through the sweetness perfectly, creating this sophisticated flavor that makes people think you're way more culinary skilled than you actually are.
Spicy Mexican Hot Chocolate
Add 1/2 teaspoon cinnamon, 1/4 teaspoon cayenne, and a pinch of black pepper to the dry ingredients. Use Mexican chocolate or add a teaspoon of cocoa nibs for texture. These have this incredible warmth that builds slowly — first you taste chocolate, then you get this gentle heat that makes your tongue tingle in the best possible way. They're like a warm hug from someone who knows how to salsa dance.
Storing and Bringing It Back to Life
Fridge Storage
These cookies keep beautifully in an airtight container in the fridge for up to a week, though they've never lasted more than three days in my house. The cold actually intensifies their fudgy texture, turning them into these dense, truffle-like squares that taste like expensive chocolate candy. Layer them between sheets of parchment paper if you're stacking them, because they have this annoying tendency to fuse together into one giant cookie blob if left unchecked. Pro tip: hide a few in the vegetable crisper drawer where family members never look — they're your secret stash for emergency chocolate needs.
Freezer Friendly
These freeze like champions both as dough and baked cookies. For dough, scoop into balls and freeze on a baking sheet, then transfer to a freezer bag where they'll keep for three months. Bake straight from frozen, just add two extra minutes to the baking time. For baked cookies, wrap individually in plastic wrap, then store in a freezer bag. They thaw in about fifteen minutes on the counter, or microwave for 15 seconds for that fresh-from-the-oven experience. I've been known to eat them frozen like little chocolate ice cream sandwiches when desperation strikes.
Best Reheating Method
Skip the microwave unless you're truly desperate — it makes them rubbery and sad. Instead, pop them in a 300°F oven for 5-7 minutes, or wrap in foil and warm in a toaster oven. The goal is gentle heat that restores their fresh-baked glory without turning them into chocolate hockey pucks. If you're feeling fancy, serve them slightly warm with a scoop of vanilla ice cream and watch people lose their minds over the hot-cold contrast. Add a tiny sprinkle of flaky salt right before serving to make the chocolate flavor sing like it's auditioning for American Idol.