I was standing in my kitchen, staring at the charred remains of what I thought was a pumpkin pie, when my friend texted me a dare: “Make the best pumpkin cheesecake ever and send me the recipe.” The kitchen smelled of burnt sugar and disappointment, and I could hear the faint hiss of the oven as the pie slid off the rack. My eyes narrowed; I was determined to turn that culinary catastrophe into a triumph. I grabbed a phone, opened a blank document, and vowed to write the ultimate high‑protein pumpkin cheesecake that would make even the most skeptical foodie swoon.
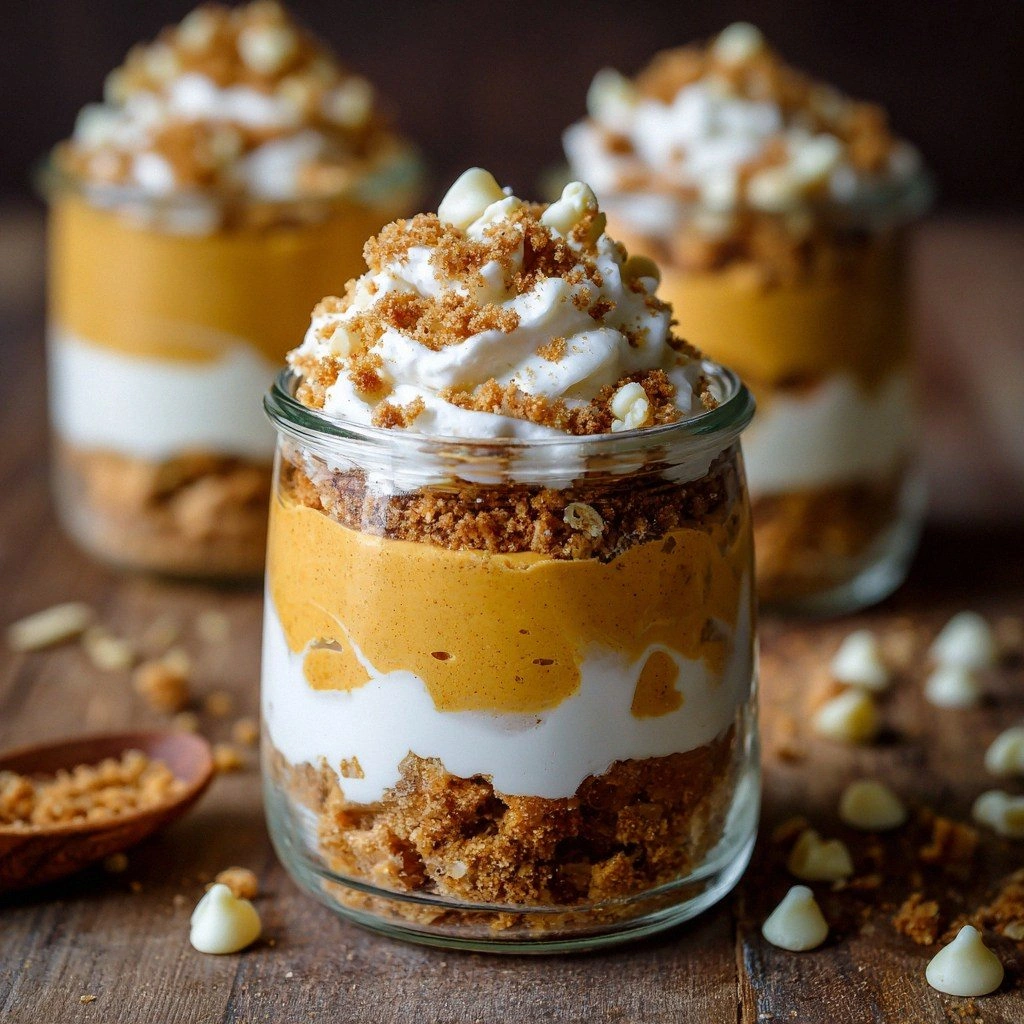
Picture this: a golden crust that crackles like fresh‑cut corn, a filling that swirls with silky pumpkin and creamy Greek yogurt, and a finish that glistens with a hint of chocolate. The aroma is a warm hug of cinnamon, nutmeg, and toasted pecans, while the first bite delivers a satisfying chew that melts into a velvety texture. The sound of the first spoonful is a gentle sigh of relief, and the taste is a harmonious blend of sweet, spicy, and protein‑rich. Every sense is engaged, and the experience feels like a comforting hug from an old friend.
What sets this version apart from the endless pumpkin cheesecake recipes on the internet is that it’s built around a high‑protein foundation that doesn’t sacrifice flavor. I’ve swapped out heavy cream for Greek yogurt, added whey protein powder for muscle‑friendly protein, and used oat flour to keep the crumb tender yet sturdy. The result is a dessert that satisfies cravings while keeping the calories in check. It’s the kind of dish that turns a regular night into a special occasion, and I’m about to walk you through every single step—by the end, you’ll wonder how you ever made it any other way.
And before we dive into the method, let me tease you with a secret: the key to that silky texture lies in a small, often overlooked step that I discovered during a late‑night baking experiment. Trust me, I dare you to taste this and not go back for seconds. Let’s get started.
What Makes This Version Stand Out
- Protein Power: The blend of whey protein and Greek yogurt delivers 25 grams of protein per serving, turning dessert into a post‑workout treat.
- Low Carb: Replacing sugar with a touch of honey and using oat flour keeps carbs controlled without compromising sweetness.
- Texture Mastery: The addition of pumpkin puree and a touch of almond butter creates a dense yet airy crumb that melts in your mouth.
- Flavor Layering: Pumpkin pie spice, cinnamon, and a dash of cloves elevate the flavor profile beyond ordinary pumpkin desserts.
- Make‑Ahead Friendly: Chill in the fridge for 4 hours or freeze for up to a week—perfect for busy schedules.
- All‑Day Appeal: This cheesecake can be served as a sweet breakfast, a mid‑day snack, or a decadent dessert.
- Crust Perfection: A buttery oat crust with a hint of maple syrup adds crunch and caramel notes.
- Customization: Optional chocolate chips and pecans give you the flexibility to tailor the flavor to your taste.
Inside the Ingredient List
The Flavor Base
Pumpkin Puree: The star of the show, pumpkin puree provides a natural sweetness and a smooth, velvety texture. It also brings a subtle earthy note that balances the richness of the yogurt. If you skip it, the cheesecake will taste flat and lack depth. I recommend using canned pumpkin puree for consistency, but fresh roasted pumpkin works beautifully if you’re feeling adventurous.
Greek Yogurt: This creamy, tangy ingredient is the backbone of the filling. It adds moisture and a slight tartness that cuts through the sweetness, creating a balanced flavor profile. If you’re dairy‑free, a coconut yogurt can be a good substitute, but the texture will be slightly different.
Whey Protein Powder: Vanilla whey protein is the secret weapon that boosts the protein content without adding a noticeable protein flavor. It also helps set the cheesecake, giving it a firm yet tender bite. Feel free to experiment with plant‑based protein powders, but keep the vanilla flavor to maintain harmony.
The Texture Crew
Oat Flour: Oat flour gives the batter a light, slightly nutty flavor and a tender crumb. It’s also gluten‑free, making this cheesecake accessible to a wider audience. If you’re not a fan of oats, almond flour can be used, but the texture will be denser.
Eggs: Eggs act as a binder, ensuring the cheesecake holds together while providing a silky mouthfeel. They also help the batter set during baking. If you need an egg substitute, a flaxseed egg works well for a vegan version.
Almond Milk: Unsweetened almond milk balances the richness of the filling, keeping the batter smooth and preventing it from becoming too heavy. A splash of water can replace almond milk if you’re looking for a lower calorie option.
The Unexpected Star
Dark Chocolate Chips: Optional, but they add a burst of bittersweet flavor that contrasts the pumpkin’s sweetness. The chips also create a visual pop when they melt slightly in the cheesecake. If you’re avoiding chocolate, a sprinkle of cocoa powder can mimic the flavor profile.
Pecans: Chopped pecans bring a crunchy texture and a buttery nutty flavor that pairs beautifully with pumpkin. They also add a subtle earthy undertone that enhances the overall taste. For a nut allergy, replace with sunflower seeds or leave out entirely.
The Final Flourish
Spices: Pumpkin pie spice, cinnamon, ginger, and cloves create a warm, aromatic profile that elevates the cheesecake to holiday‑season perfection. The spices also provide natural antioxidants and digestive benefits. Feel free to adjust the amounts to suit your spice tolerance.
Butter & Maple Syrup (Crust): These ingredients give the crust a buttery richness and a subtle caramel sweetness. The butter adds flavor and helps the crust set, while maple syrup adds depth and a hint of sweetness. If you’re avoiding dairy, use coconut oil instead of butter.
Rolled Oats & Almond Butter (Crust): They provide a chewy texture and nutty flavor that contrasts the creamy filling. Oats add fiber, while almond butter adds healthy fats and a slight almond note. Together, they create a crust that is both crunchy and satisfying.
Everything’s prepped? Good. Let’s get into the real action.
The Method — Step by Step
- Preheat your oven to 325°F (165°C). Line a 9‑inch springform pan with parchment paper and set aside. The parchment ensures a smooth release later. This step is crucial; a too‑hot oven can cause the cheesecake to crack.
- In a large bowl, whisk together the oat flour, whey protein powder, baking powder, salt, and pumpkin pie spice until well combined. This dry mix will form the backbone of your batter. I’ve found that sifting the flour first gives a lighter texture.
- In a separate bowl, beat the eggs and vanilla extract until frothy. Add the pumpkin puree, Greek yogurt, almond milk, and honey, whisking until the mixture is smooth. The goal is a silky batter with no lumps. This is where the magic begins.
- Pour the wet mixture into the dry ingredients and fold gently until just combined. Over‑mixing can make the cheesecake tough. Think of it as a gentle dance; you want the ingredients to meet but not collide.
- Fold in the dark chocolate chips and pecans if using. The chips should be evenly dispersed to avoid pockets of pure chocolate. The pecans add a pleasant crunch that contrasts the creamy filling.
- Prepare the crust: In a bowl, combine rolled oats, almond butter, butter, maple syrup, and a pinch of cinnamon. Mix until crumbly, then press the mixture firmly into the bottom of the springform pan. This crust will hold the cheesecake together and add a buttery crunch.
- Pour the batter over the crust, smoothing the top with a spatula. Place the pan in the preheated oven and bake for 35 minutes, or until the edges are set and the center still has a slight wobble. The wobble is a sign of a perfectly moist cheesecake.
- Once baked, turn off the oven and let the cheesecake sit inside for 15 minutes. This gradual cooling prevents cracking and allows the filling to set. Then, remove the cheesecake from the oven and let it cool completely on a wire rack.
- Wrap the cheesecake in plastic wrap and refrigerate for at least 4 hours, preferably overnight. The chill will firm up the texture and intensify the flavors. When you’re ready to serve, remove the springform ring and slice with a clean knife.
That’s it — you did it. But hold on, I’ve got a few more tricks that'll take this to another level. Keep reading for insider tips that will make every bite a revelation.
Insider Tricks for Flawless Results
The Temperature Rule Nobody Follows
Oven temperature consistency is vital. I use a calibrated oven thermometer to ensure the oven reads exactly 325°F, not 350°F. A slight deviation can cause the cheesecake to overcook or crack. Keep a glass of water on the bottom rack to maintain humidity, which preserves the cheesecake’s moisture.
Why Your Nose Knows Best
When the cheesecake starts to rise and the edges pull away slightly, that’s the sign you’re in the right place. Your nose will detect the subtle scent of caramelized pumpkin. If you’re tempted to pull it out early, resist. The cheesecake will settle and continue to firm up as it cools.
The 5-Minute Rest That Changes Everything
After baking, let the cheesecake sit in the oven with the door ajar for 5 minutes. This gentle rest allows the heat to dissipate gradually, preventing the center from collapsing. I’ve seen people open the door too soon and watch their cheesecake sink like a bad dream.
Mixing Technique for a Silky Finish
Use a silicone spatula to fold the batter. This tool is gentle on the protein powder and avoids over‑mixing. A gentle fold keeps the batter airy, while a vigorous stir can densify the texture.
Cooling Rack Trick
Place the cheesecake on a wire rack while it cools. The airflow prevents condensation from forming on the surface, which can make the cheesecake soggy. If you don’t have a rack, a clean plate with a small plate on top works as a makeshift solution.
The Final Touch
Just before serving, drizzle a thin line of maple syrup over the top. This adds a glossy sheen and a caramel kick that ties the flavors together. If you’re on a low‑sugar diet, a dusting of powdered erythritol will give the same glossy finish without the sugar.
Creative Twists and Variations
This recipe is a playground. Here are some of my favorite ways to switch things up:
Spiced Matcha Cheesecake
Replace the vanilla whey protein with matcha protein powder. Add a teaspoon of matcha powder to the batter for a subtle green tea flavor. This version pairs wonderfully with a cup of chai.
Almond‑Butter Swirl
Fold in a tablespoon of almond butter into the batter before pouring it over the crust. The swirl adds a nutty aroma and a silky texture that elevates the cheesecake.
Coconut‑Lime Finish
Swirl in a tablespoon of coconut cream and a squeeze of fresh lime juice before baking. The tropical notes give the cheesecake a refreshing twist, ideal for a summer gathering.
Chocolate‑Pumpkin Fusion
Omit the pumpkin puree and replace it with a dark chocolate ganache. The result is a rich, chocolatey cheesecake with a hint of spice from the pumpkin pie spice.
Low‑Fat Leaner Version
Swap Greek yogurt for low‑fat cottage cheese and use skim milk instead of almond milk. The texture will be slightly firmer, but the protein content stays high while calories drop.
Vegan Delight
Use silken tofu instead of eggs and a plant‑based protein powder. Replace butter with coconut oil, and use maple syrup as the sweetener. This version keeps the same flavor profile while being fully plant‑based.
Storing and Bringing It Back to Life
Fridge Storage
Wrap the cheesecake tightly in plastic wrap and store in the refrigerator for up to 5 days. The chilled cheesecake remains firm and the flavors intensify. When you’re ready to serve, let it sit at room temperature for 10 minutes to soften slightly.
Freezer Friendly
Wrap the cheesecake in plastic wrap and then in foil before freezing. It will keep for up to 3 months. Thaw in the refrigerator overnight, then bring to room temperature before serving.
Best Reheating Method
If you need to reheat, set your oven to 300°F (150°C) and place the cheesecake on a baking sheet. Warm for 10-12 minutes, then remove and let cool slightly. Add a splash of water to the bottom of the pan to create steam, which keeps the cheesecake moist.