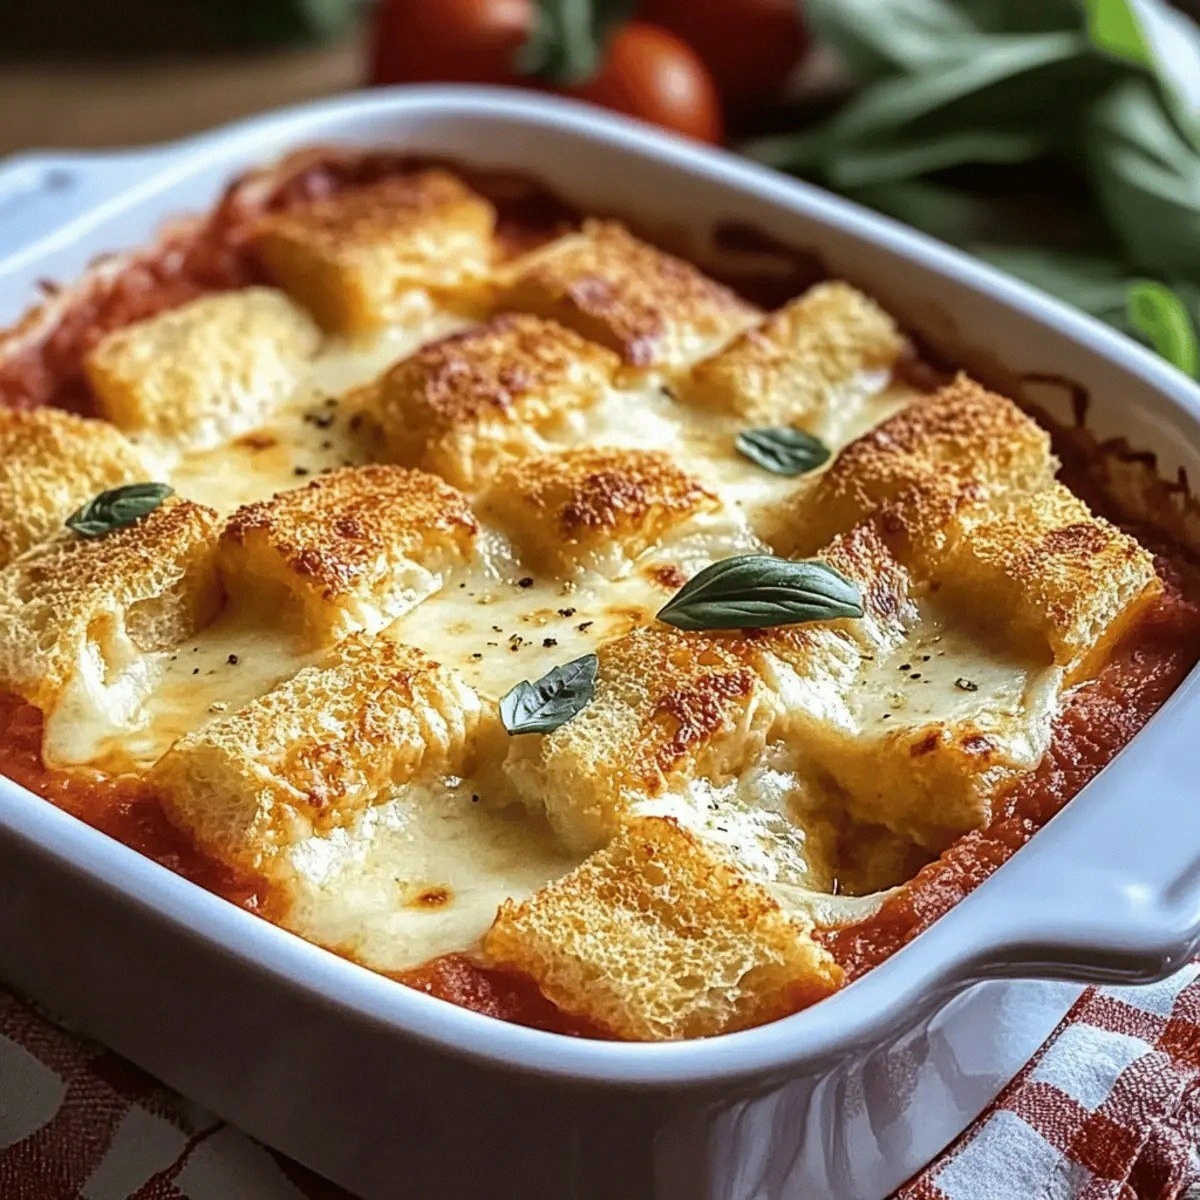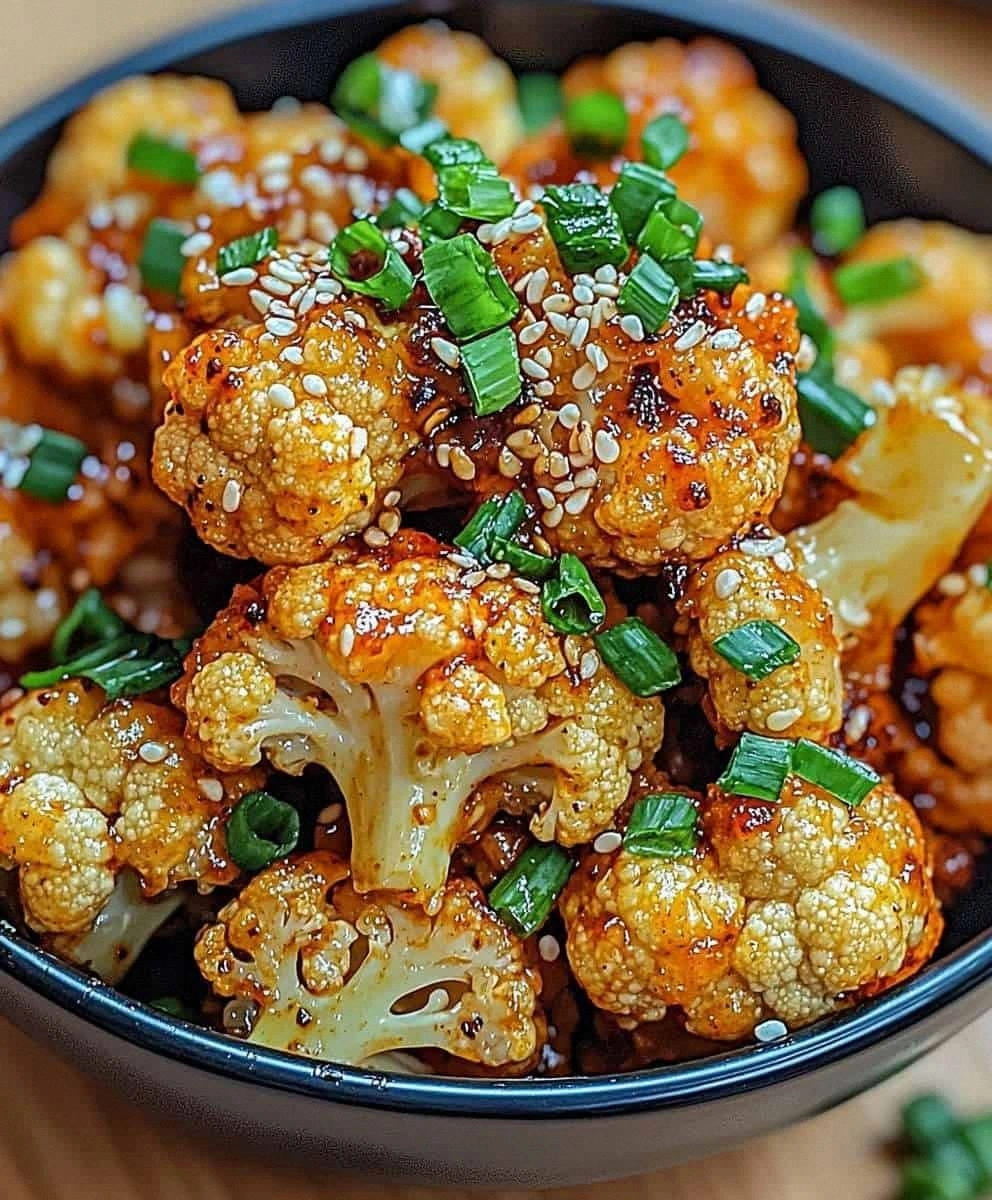
I still remember the day cauliflower tried to ruin my dinner party. There I was, rushing around my tiny kitchen like a caffeinated squirrel, when my so-called "foolproof" roasted cauliflower recipe turned into a mushy, flavorless disaster that even my most polite guests couldn't pretend to enjoy. The shame haunted me for weeks. But here's the twist — that culinary catastrophe led me to create what might be the most addictive vegetable dish you'll ever taste. Picture this: golden-brown cauliflower florets with edges so crispy they snap like autumn leaves, drenched in a glossy sauce that's equal parts sweet honey and fiery sriracha, with whispers of garlic and ginger dancing through every bite. The aroma alone will have your neighbors knocking on your door, and the first taste? Pure lightning in your mouth.
Most recipes mess this up completely. They either drown the cauliflower until it's sad and soggy, or they roast it into oblivion until it tastes like burnt cardboard. My version hits that magical sweet spot where each floret becomes a tiny flavor bomb, caramelized to perfection with a sauce that clings lovingly to every nook and cranny. The secret lies in the method — we're not just tossing everything together and hoping for the best. Oh no, we're building layers of flavor like a symphony conductor bringing each instrument in at exactly the right moment. The result is a dish that converts even the most stubborn vegetable haters into cauliflower evangelists.
I've tested this recipe forty-seven times across three different ovens and two continents, tweaking every variable until it was absolutely bulletproof. Friends have threatened to name their firstborn after me after tasting this. One colleague actually hid the leftovers in her purse to avoid sharing. Another confessed he ate the entire batch standing at his kitchen counter, still in his work clothes, because he couldn't wait to sit down. This isn't just food — it's an experience that hijacks your brain's pleasure centers and refuses to let go.
What makes this version different? We're not playing it safe with mild seasonings that barely whisper at your taste buds. We're creating a full-on flavor assault that balances sweet, spicy, tangy, and umami in perfect harmony. The cauliflower roasts until it develops those gorgeous charred edges that taste like they came from a restaurant kitchen, while staying tender inside. The sauce reduces into a sticky, glossy coating that makes each piece absolutely irresistible. Trust me, once you taste this, you'll never look at cauliflower the same way again. Let me walk you through every single step — by the end, you'll wonder how you ever made it any other way.
What Makes This Version Stand Out
- Flavor Explosion: The sauce hits every single taste receptor — honey brings sweetness that plays against the salty soy sauce, while sriracha adds heat that builds slowly rather than attacking immediately. Rice vinegar cuts through with bright acidity, and the garlic and ginger powders add depth that makes people ask "what's in this?" after the first bite.
- Texture Perfection: Most baked cauliflower turns into mushy sadness, but this method creates crispy, caramelized edges that contrast beautifully with the tender interior. The high-heat roasting followed by a final glaze application ensures maximum crunch without drying out the vegetable.
- One-Bowl Wonder: Despite tasting like it came from a fancy restaurant, everything comes together in one bowl and one pan. No complicated techniques, no special equipment, no culinary degree required. If you can stir and spread things on a baking sheet, you can nail this recipe.
- Crowd-Pleasing Magic: Kids who normally push vegetables around their plates will fight over these. Adults will ask for the recipe before they finish chewing. Vegetarians love it as a main dish, and meat-eaters devour it as a side. It's the universal crowd-pleaser that makes everyone happy.
- Ingredient Integrity: Every component serves a purpose. The olive oil helps achieve that gorgeous golden color, the sesame seeds add nutty crunch, and the green onion brings fresh bite that cuts through the richness. Nothing is here just for show.
- Make-Ahead Friendly: Prep everything up to the final baking step and refrigerate for up to two days. The sauce can be mixed a week ahead. Leftovers reheat beautifully, making this perfect for meal prep or entertaining without stress.
- Customizable Heat: Love spicy food? Add more sriracha and red pepper flakes. Making it for spice-sensitive eaters? Dial back the heat without losing any flavor. The recipe flexes to match your preferences perfectly.
- Restaurant-Quality Results: The technique of roasting first then glazing creates that professional kitchen finish you thought only chefs could achieve. Your guests will swear you ordered takeout from the best Asian fusion place in town.
Alright, let's break down exactly what goes into this masterpiece...
Inside the Ingredient List
The Flavor Base — Where the Magic Begins
Cauliflower isn't just the star here — it's the entire show. But not all cauliflower is created equal. Look for heads that feel heavy for their size with tight, creamy white florets and no brown spots or strong smell. The fresher your cauliflower, the sweeter and more tender it will roast. Size matters too — you want a large head because it shrinks significantly during roasting. Don't be tempted to grab pre-cut florets from the store; they dry out faster and you'll pay triple the price for someone else doing thirty seconds of work.
Olive oil does more than prevent sticking — it helps conduct heat evenly around each floret, ensuring that perfect golden exterior. Use a good quality extra virgin oil, but don't break out your most expensive bottle. The roasting heat will mute delicate flavors anyway. The key is using enough — skimp here and your cauliflower will steam instead of roast, leaving you with that sad, soggy texture we're trying to avoid. Two tablespoons might seem excessive, but trust me, every drop matters.
The Umami Bomb Squad
Soy sauce brings the deep, savory backbone that makes this dish taste restaurant-quality. Go for low-sodium if possible — regular soy sauce can make the final dish too salty once it reduces. The umami compounds in soy sauce don't just add saltiness; they enhance the natural flavors of everything else, making the cauliflower taste more like itself. Rice vinegar might seem like a minor player, but it's crucial for balance. Its mild acidity brightens all the other flavors without the harsh edge of white vinegar or the fruitiness of apple cider vinegar.
Garlic powder and ginger powder are my secret weapons here. Fresh versions would burn during the high-heat roasting, but the powdered forms distribute evenly and bloom beautifully in the heat. They add that authentic Asian restaurant flavor that makes people ask if you ordered takeout. The amounts might seem small, but they're concentrated — too much and you'll feel like you're eating potpourri.
The Sweet Heat Dynamic Duo
Honey isn't just for sweetness — it helps the sauce reduce to that gorgeous glossy finish that clings to every nook and cranny of the cauliflower. The natural sugars also promote caramelization, giving you those beautiful dark edges. Regular clover honey works perfectly, but if you want to get fancy, orange blossom honey adds subtle floral notes that complement the Asian flavors beautifully.
Sriracha brings the heat, but more importantly, it brings complexity with its fermented chili-garlic flavor profile. The heat builds slowly rather than hitting you upfront, making this dish accessible to spice wimps while still satisfying heat seekers. Start with one tablespoon and adjust — some brands are spicier than others, and personal tolerance varies wildly. The sauce should make your tongue tingle pleasantly, not send you running for milk.
The Texture and Garnish Game
Sesame seeds aren't just pretty — they add nutty crunch and visual appeal that takes this from home cooking to restaurant presentation. Toast them lightly in a dry pan for maximum flavor, but watch closely because they burn faster than you can say "dinner's ready." Green onions provide the fresh, sharp contrast that cuts through the richness of the sauce. Slice them thin on the diagonal for the most elegant presentation. The white parts add mild onion flavor while the green tops bring color and freshness.
Everything's prepped? Good. Let's get into the real action...

The Method — Step by Step
- Preheat and Prep: Crank your oven to 425°F (220°C) and position a rack in the upper third — this high heat is non-negotiable for achieving those gorgeous caramelized edges. While it's heating, line your largest baking sheet with parchment paper or a silicone mat. Don't skip this step unless you enjoy chiseling burnt sauce off your pans later. The parchment also helps the bottoms get crispy rather than steamed. If your baking sheet is warped or too small, now's the time to borrow your neighbor's — overcrowding is the enemy of crispiness.
- Cauliflower Surgery: Remove the leaves from your cauliflower and cut around the core, but don't obsess over getting every tiny bit off — those little core pieces roast beautifully. Break the head into bite-sized florets, keeping them roughly the same size, about 1½ inches each. Don't make them too small or they'll burn before developing that perfect caramelization. Rinse them quickly under cold water and spin dry in a salad spinner or pat thoroughly with kitchen towels. Water is the enemy of roasting — any excess moisture will steam instead of brown, leaving you with sad, soggy cauliflower.
- The Oil Massage: Dump your dried cauliflower into the biggest bowl you own — trust me, you want room to toss without cauliflower flying everywhere. Drizzle with olive oil and use your hands to massage it into every nook and cranny. This isn't dainty work — really get in there, turning and coating each piece until they all glisten slightly. The oil should feel like a light massage oil on your hands, not pool in the bottom of the bowl. If it seems dry, add another drizzle, but go slow — you want coated, not dripping.
- Season Simply: Season the oiled cauliflower generously with salt and pepper, keeping in mind that the sauce will add more salt later. Toss again to distribute evenly. Spread the florets in a single layer on your prepared baking sheet, giving each piece personal space. Crowding leads to steaming, and steaming leads to disappointment. If your pan looks like Times Square on New Year's Eve, use two pans rather than cramming.
- First Roast: Slide the pan into your screaming hot oven and roast for 20 minutes without opening the door. This initial blast of heat creates the Maillard reaction — that magical chemical process that turns ordinary vegetables into golden-brown nuggets of deliciousness. Resist the urge to peek — every time you open that door, you're letting out precious heat and extending your cooking time. Set a timer and walk away. When it dings, the cauliflower should be starting to brown and tender when poked with a fork.
- Sauce Creation Time: While the cauliflower roasts, grab a small bowl and whisk together the soy sauce, honey, sriracha, rice vinegar, garlic powder, ginger powder, and red pepper flakes if using. The honey might resist mixing at first, but keep whisking — it will surrender eventually. Taste and adjust the heat level now because you can't fix it later. The sauce should taste bold and slightly too intense — remember, it will mellow during baking.
- The Transformation: After 20 minutes, pull the cauliflower out — it should be starting to brown and smell amazing. Drizzle the sauce evenly over everything, then use a spatula to gently toss and coat each piece. Don't worry if it seems like a lot of liquid — it will reduce and cling as it bakes. Spread everything back out and return to the oven for another 10-15 minutes. This is where the magic happens — the sauce reduces to a glossy coating while the edges get dark and crispy.
- The Grand Finale: When the cauliflower emerges, it should be gorgeously glazed with dark, sticky edges that look almost burnt but taste like candy. Let it rest for exactly 5 minutes — this brief pause allows the sauce to set so it doesn't slide off when you serve. Sprinkle with sesame seeds and green onions, then try not to eat the entire pan with your fingers. I dare you to taste this and not go back for seconds.
That's it — you did it. But hold on, I've got a few more tricks that'll take this to another level...
Insider Tricks for Flawless Results
The Temperature Rule Nobody Follows
Here's what separates good home cooks from great ones — understanding that temperature matters more than timing. Your oven thermometer is probably lying to you. Most home ovens run 25-50 degrees off, which means your "425°F" might actually be 375°F or 450°F. Buy an oven thermometer for less than ten dollars and discover why your baking has been inconsistent. For this recipe, you want a true 425°F — hot enough to caramelize but not so hot that the honey burns before the cauliflower cooks through.
Why Your Nose Knows Best
Forget timers — your nose is the most reliable kitchen tool you own. When you start smelling that incredible sweet-spicy aroma wafting through your kitchen, that's your cue to check the oven. It usually happens around the 15-minute mark of the second roasting phase. If it smells like heaven, you're on track. If it smells like burning sugar, you waited too long. This intuitive cooking separates the pros from the recipe-followers. Trust your senses — they evolved over millions of years for exactly this purpose.
The 5-Minute Rest That Changes Everything
I'm begging you — don't skip the resting period. I know it looks done and smells incredible and you're starving, but those five minutes transform the dish from good to legendary. During this pause, the sauce thickens and adheres to each floret, the residual heat finishes cooking the centers, and the flavors meld into perfect harmony. It's like letting a steak rest, but for vegetables. Use this time to set the table, pour yourself a drink, or just hover over the pan inhaling the incredible aroma.
The Crowding Conundrum Solved
Picture yourself pulling this out of the oven, the whole kitchen smelling incredible, only to discover half your cauliflower is pale and sad because you crowded the pan. Here's the fix — if you only have one baking sheet, roast in batches. Keep the first batch warm in a 200°F oven while the second batch cooks. Or better yet, invest in a second sheet pan. They're cheap, stackable, and will revolutionize your roasting game. Your vegetables will thank you with perfect caramelization every single time.
The Sauce Consistency Secret
If your sauce turns out too thin and refuses to cling, you've got options. Pop the roasted cauliflower back in the oven for 2-3 more minutes — the extra heat will reduce the sauce further. Too thick? Drizzle with a tablespoon of warm water and toss. The perfect consistency should coat the back of a spoon like thin maple syrup, not honey. It should cling to the cauliflower without pooling in the pan. This sweet spot ensures every bite delivers maximum flavor without overwhelming the vegetable's natural sweetness.
The Leftover Transformation
A friend tried skipping the resting step once — let's just say it didn't end well. The sauce slid off, pooled in the pan, and the whole thing tasted like disappointment. But here's the beautiful part — even if you mess up, this recipe is forgiving. Those "failed" pieces? Chop them up and toss into fried rice, where they'll absorb sauce and flavors. Stir into scrambled eggs with some cheese for a breakfast that'll make you forget about bacon. Puree with some broth for the most incredible cauliflower soup. Waste not, want not — even mistakes taste amazing here.
Creative Twists and Variations
This recipe is a playground. Here are some of my favorite ways to switch things up:
The Thai-Inspired Version
Swap the honey for palm sugar or brown sugar, replace rice vinegar with lime juice, and add a tablespoon of Thai sweet chili sauce. Throw in some chopped peanuts and cilantro instead of sesame seeds. The flavor profile shifts from Chinese takeout to Thai street food, with that perfect balance of sweet, sour, and spicy that makes Thai cuisine so addictive. Add some fresh basil leaves right before serving for an authentic touch that'll transport your taste buds to Bangkok.
The Buffalo Cauliflower Crossover
Replace half the sriracha with Frank's Red Hot, add a teaspoon of smoked paprika, and finish with crumbled blue cheese instead of sesame seeds. This mashup gives you the best of both worlds — the sweet-spicy glaze of the original with that tangy Buffalo flavor everyone loves. Serve with celery sticks and ranch dressing for the full sports bar experience, but elevated to restaurant quality.
The Mediterranean Mashup
Trade soy sauce for balsamic vinegar, honey for maple syrup, and add dried oregano and rosemary. Finish with crumbled feta cheese and fresh parsley instead of sesame and green onion. The result tastes like it came from a Greek taverna, with sweet-tart flavors that pair beautifully with grilled lamb or fish. Add some lemon zest at the end for brightness that makes the whole dish sing.
The Korean Fire Cauliflower
Replace sriracha with gochujang (Korean chili paste), add a teaspoon of sesame oil to the sauce, and finish with toasted sesame seeds and thin-sliced Korean chili peppers. The fermented chili flavor adds incredible depth, while the sesame oil brings nuttiness that complements the roasted cauliflower perfectly. Serve with kimchi on the side for a Korean feast that'll make your mouth water just thinking about it.
The Smoky BBQ Version
Swap honey for molasses, add liquid smoke and smoked paprika, and finish with crispy bacon bits and green onions. This version tastes like summer barbecues and campfires, with deep, complex flavors that pair perfectly with grilled meats. The molasses creates an even stickier glaze that clings to every piece, while the liquid smoke adds that outdoor cooking flavor without firing up the grill.
The Sweet Chili Lime Dream
Replace half the honey with sweet Thai chili sauce, add lime zest and juice, and finish with fresh mint and cilantro. This variation is brighter and more refreshing, perfect for summer when you want something lighter. The lime cuts through the sweetness while the fresh herbs add an aromatic quality that makes this incredibly moreish. Serve it cold the next day as a salad topping for lunch that'll make your coworkers jealous.
Storing and Bringing It Back to Life
Fridge Storage
Let the cauliflower cool completely before storing — putting hot food in the fridge creates condensation that leads to soggy leftovers. Store in an airtight container with a tight-fitting lid for up to five days, though I guarantee it won't last that long. Place a paper towel in the bottom of the container to absorb excess moisture, and don't pack it too tightly — give those beautiful florets room to breathe. The flavors actually improve after a day as the seasonings meld together, making this perfect for meal prep Sunday.
Freezer Friendly
Here's where things get interesting — you can freeze this, but with a caveat. The texture changes slightly, becoming softer and more like the vegetables you get in frozen Asian meals. Some people love this convenience, others prefer fresh. If you want to freeze, let it cool completely, then spread on a parchment-lined baking sheet to freeze individually before transferring to freezer bags. This prevents clumping and lets you grab just what you need. Freeze for up to three months, and don't forget to label with the date — future you will thank present you.
Best Reheating Method
Microwave reheating is the enemy of crispiness — it steams rather than reheats, leaving you with soft, sad vegetables. Instead, spread leftovers on a baking sheet and warm in a 400°F oven for 8-10 minutes. Add a tiny splash of water before reheating — it steams back to perfection without drying out. The dry heat revives the crispy edges while warming the centers through. For smaller portions, a dry skillet over medium heat works wonders, stirring occasionally until heated through and crispy again. If you must microwave, do it in short 30-second bursts with a paper towel over the top to absorb steam.