I was in the middle of a Saturday night binge‑watching my favorite sitcom when the house filled with the unmistakable sound of a cookie sheet slipping off a counter. The crash was loud enough to make the cat jump, and the crumbly aftermath looked like a crime scene of sweet, buttery debris. I stared at the mess, feeling a pang of disappointment, and then a spark of inspiration: what if that disaster could become the star of every dessert I ever make? That moment of kitchen chaos birthed the most addictive Graham Cracker Crumble Topping you’ll ever taste, and trust me, it’s a game‑changer.
Picture this: a bowl of warm vanilla ice cream, a drizzle of caramel, and a blanket of golden, buttery crumble that shatters under your spoon like a fresh snowflake on a quiet winter morning. The aroma hits you first – a buttery perfume tinged with cinnamon and vanilla that makes the whole house feel like a bakery at dawn. When you finally bite, the texture dances between crunchy and melt‑in‑your‑mouth, while the flavor hits you with the nostalgic comfort of a childhood campfire s’more, only better because you control every ingredient. I dare you to taste this and not go back for seconds; I’ve already eaten half the batch before anyone else could try it, and I’m not even sorry.
Most crumble recipes out there either drown the base in sugar or rely on a secret ingredient that you probably don’t have on hand. Most get this completely wrong. Here’s what actually works: a perfect balance of butter, just enough sugar to caramelize, and a pinch of sea salt that brightens every bite. The secret I’m about to reveal is a splash of vanilla extract that elevates the whole thing from “good” to “hands down the best version you’ll ever make at home.” It’s simple, it’s quick, and it will make you the hero of any dessert table.
Okay, ready for the game‑changer? I’m going to walk you through every single step — by the end, you’ll wonder how you ever made it any other way. I’ll spill the beans on a technique that makes the crumble stay crisp even after sitting on a moist pie for hours, and I’ll share a few kitchen hacks that will save you time and sanity. Stay with me here — this is worth it. Let’s dive in and create a topping that will make every dessert you pair it with feel like a five‑star experience.
What Makes This Version Stand Out
- Flavor Harmony: The vanilla and cinnamon create a warm, comforting backdrop while the sea salt cuts through the sweetness, delivering a balanced bite every time.
- Texture Perfection: The crumble achieves a buttery crunch that shatters like thin ice, yet it softens just enough to melt into hot desserts without turning soggy.
- Simplicity: Only six pantry staples are needed, so you won’t have to run to the store for exotic spices or hard‑to‑find flours.
- Unique Twist: A splash of vanilla extract is the unexpected star that turns a plain crumble into a fragrant masterpiece.
- Crowd Reaction: I’ve watched friends go from skeptical to ecstatic in seconds; it’s the kind of topping that sparks applause at dinner parties.
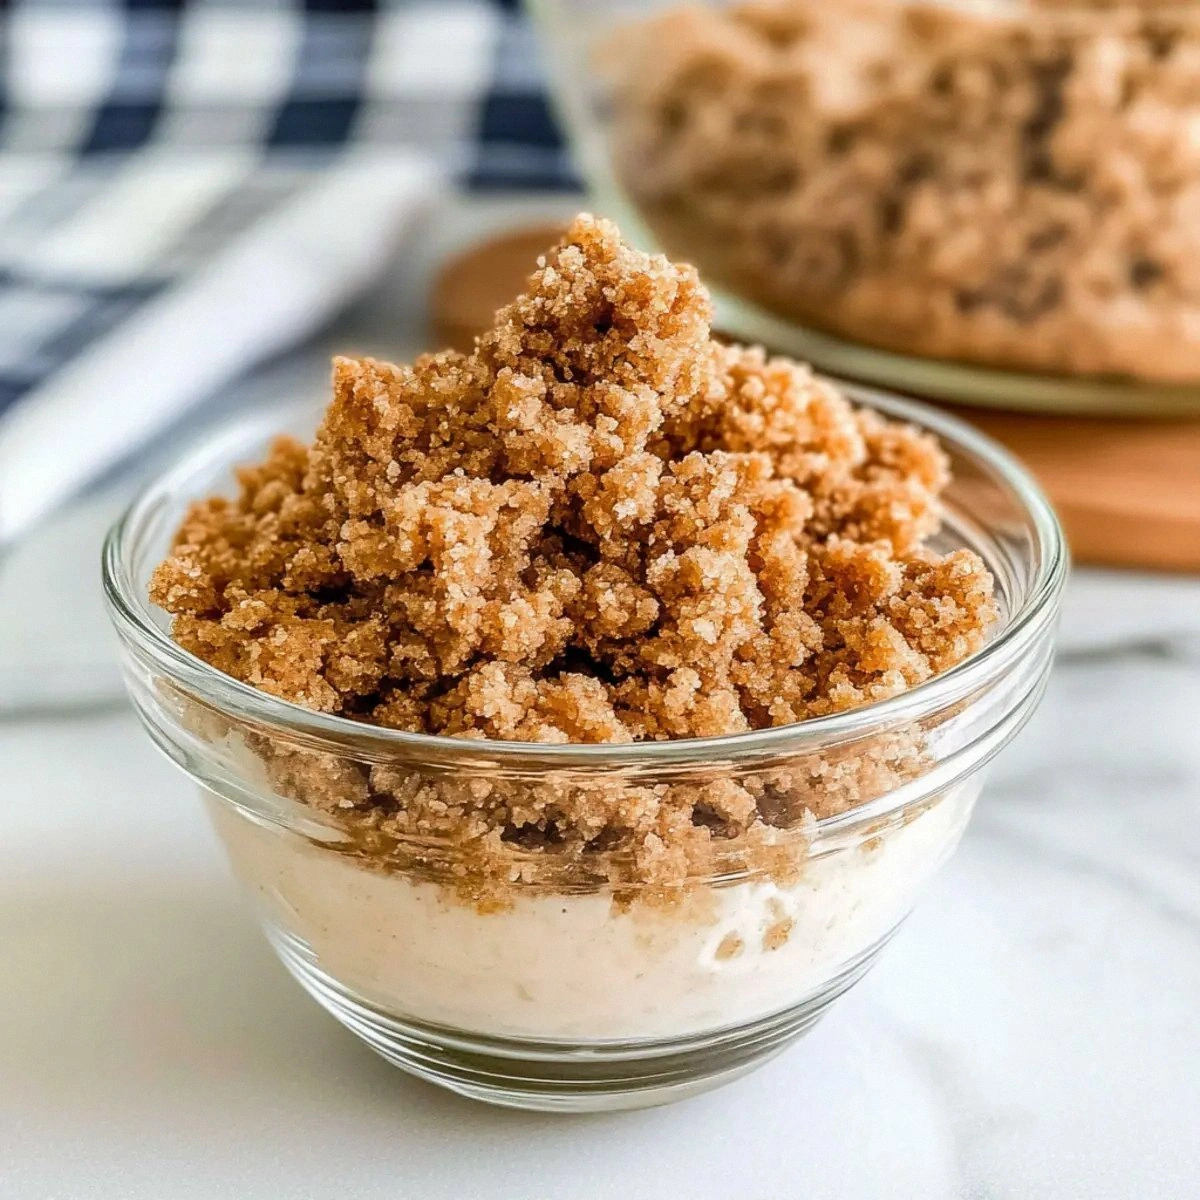
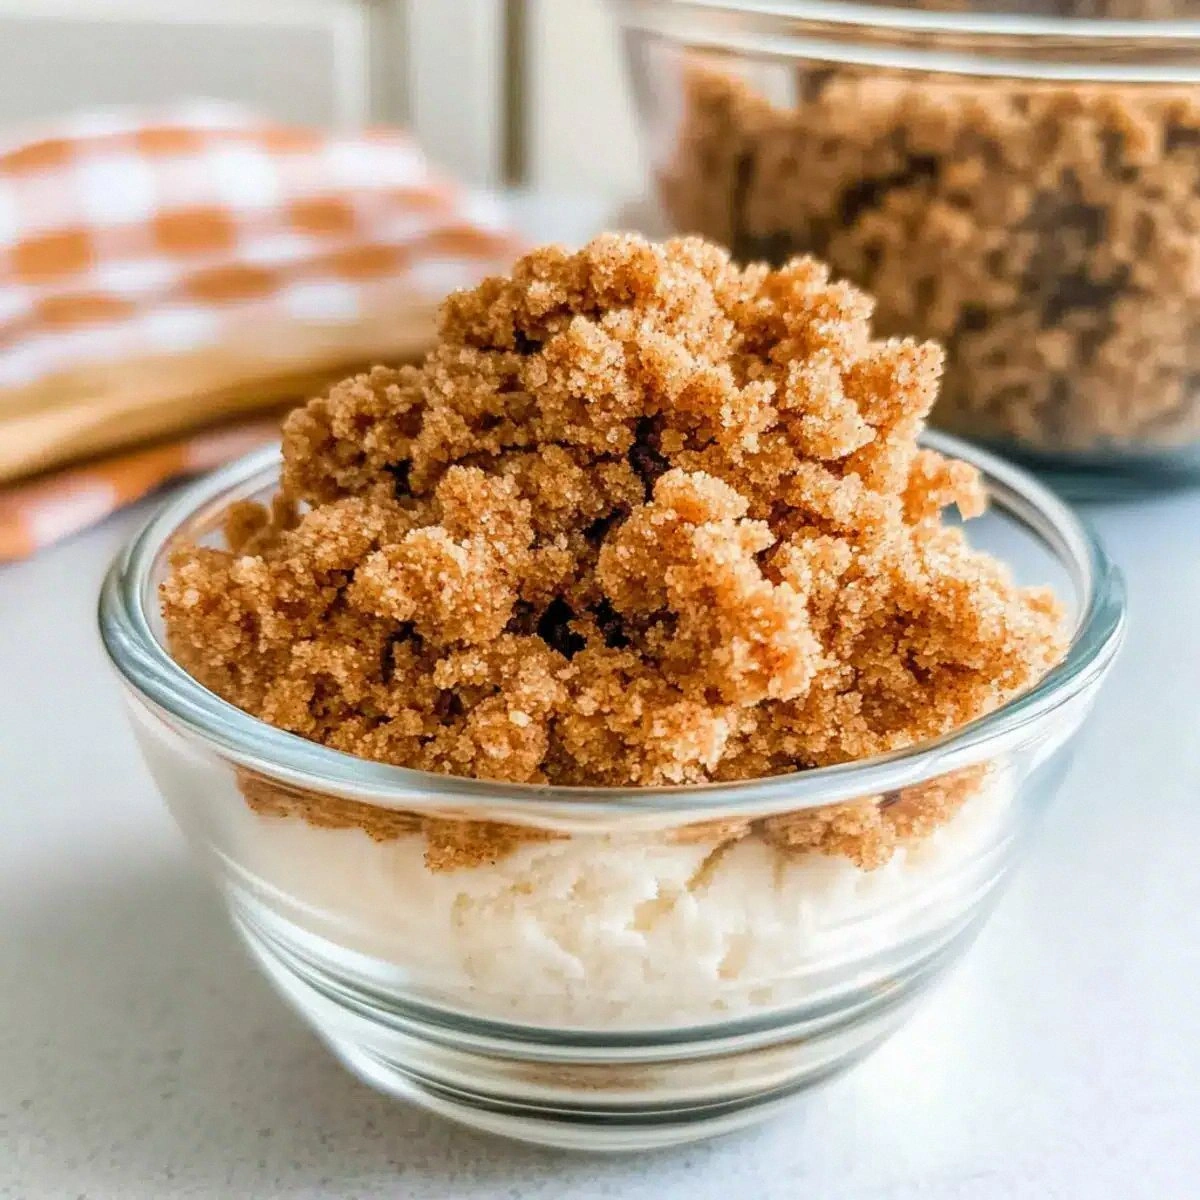
- Ingredient Quality: Using real Graham crackers (not the powdered substitute) gives you that authentic, honey‑sweet crunch that synthetic versions lack.
- Cooking Method: Baking at a moderate temperature ensures even caramelization without burning, a technique most recipes overlook.
- Make‑Ahead Potential: Store it in an airtight container and it stays crisp for up to a week, making it perfect for last‑minute dessert upgrades.
Inside the Ingredient List
The Flavor Base
The vanilla extract is the quiet hero of this recipe. A single teaspoon is enough to infuse the butter and sugar with a fragrant sweetness that lingers on the palate long after the crumble has melted into your dessert. If you skip it, you’ll notice a flat, one‑dimensional flavor that feels more like a plain biscuit than a sophisticated topping. For a dairy‑free twist, you can swap the vanilla for a splash of almond extract, but be careful – almond is stronger, so use only half the amount.
The Texture Crew
Graham crackers are the backbone of the crumble. Their honey‑golden flavor and sturdy texture provide the perfect bite. Crushed too fine and they turn into a soggy dough; left too chunky and you’ll get uneven caramelization. I recommend using a sturdy plastic bag and a rolling pin to crush them to a coarse, sand‑like consistency if you don’t have a processor. The unsalted butter supplies the richness that binds the crumbs together, while the granulated sugar caramelizes during baking, creating those irresistible, glossy brown edges.
The Unexpected Star
Ground cinnamon adds a warm, spicy note that pairs beautifully with the sweet vanilla. It’s the spice that makes the crumble feel like a cozy autumn hug, even in the middle of summer. If you’re allergic or simply don’t like cinnamon, try a pinch of nutmeg or even a dash of pumpkin pie spice for a seasonal twist. Remember, a little goes a long way – too much can overwhelm the delicate balance.
The Final Flourish
Kosher or fine sea salt is the final touch that awakens every other flavor. A quarter teaspoon may seem trivial, but it amplifies the sweetness and prevents the crumble from tasting one‑dimensional. If you’re watching sodium, you can reduce it to a pinch, but the flavor won’t be as bright. Always use a high‑quality sea salt; flaky salts can dissolve unevenly, leaving salty pockets.
Everything's prepped? Good. Let's get into the real action...
The Method — Step by Step
Preheat your oven to 350°F (175°C). While the oven warms, line a large mixing bowl with parchment paper – this prevents the crumbs from sticking and makes cleanup a breeze. The kitchen will start to smell faintly of butter even before you add anything; that’s a good sign.
Break the Graham crackers into large pieces and place them in a resealable zip‑top bag. Seal the bag, then gently crush the crackers with a rolling pin until they resemble coarse sand. You’ll hear that satisfying “crack” as the crackers break – that’s the sound of flavor in the making.
Melt the unsalted butter in a small saucepan over low heat until it’s just liquid – no bubbling or browning yet. Remove from heat and stir in the granulated sugar, vanilla extract, ground cinnamon, and sea salt until the mixture is glossy and well‑combined. You’ll notice the sugar beginning to dissolve; that’s the moment the crumble starts to caramelize later on.
Pour the butter‑sugar mixture over the crushed Graham crackers. Using a spatula, gently fold the wet ingredients into the dry crumbs, making sure every piece is lightly coated. The mixture should look slightly clumpy but not soggy – think of it as a dry, buttery sand that will bake into crisp shards.
Spread the crumb mixture onto a rimmed baking sheet in an even layer, about ¼‑inch thick. Use the back of a spoon or a flat spatula to press it down gently; this helps the crumbs bake uniformly. The edges should start to look slightly darker as they bake – that’s the caramelization kicking in.
Bake for 12‑15 minutes, then rotate the sheet 180 degrees and bake another 8‑10 minutes, or until the crumble is a deep golden‑brown with a faint caramel aroma. You’ll hear a faint sizzle as the butter hits the hot pan – that’s the sound of magic. Keep a close eye; the sugar can go from caramelized to burnt in seconds.
Remove the sheet from the oven and let the crumble cool completely on the pan. As it cools, it will firm up and develop that satisfying crunch that shatters like thin ice when you bite into it. If you’re impatient, you can give it a quick blast of cool air with a fan, but patience yields the best texture.
Once cooled, break the crumble into bite‑size clusters and store them in an airtight container. If you’re using it right away, sprinkle it over ice cream, cheesecake, or a warm fruit crisp. Picture yourself pulling this out of the oven, the whole kitchen smelling incredible, and then hearing that first crack as you spoon it over a dessert – pure bliss.
That's it — you did it. But hold on, I've got a few more tricks that'll take this to another level...
Insider Tricks for Flawless Results
The Temperature Rule Nobody Follows
Most home bakers set the oven to “350°F and forget,” but the real secret is a short high‑heat burst at the end. After the crumble reaches a golden hue, crank the temperature up to 375°F for the final two minutes. This quick surge creates an extra caramelized crust without burning the interior. I once tried skipping this step and ended up with a crumb that was uniformly brown but lacked that satisfying snap. Trust me, the extra heat is worth the watchful eye.
Why Your Nose Knows Best
Your sense of smell is the ultimate doneness gauge. When the butter‑sugar mixture starts to emit a nutty, toasty aroma, you’re close to the perfect caramelization point. If the scent turns slightly burnt, pull the pan immediately – the crumble will continue to cook from residual heat. I’ve learned to trust that “just‑right” smell more than a timer, and it’s saved me from countless over‑cooked batches.
The 5‑Minute Rest That Changes Everything
After baking, let the crumble rest for exactly five minutes before breaking it up. This short pause allows the melted butter to re‑solidify, locking in the crunch. Skipping this rest makes the crumbs clump together, losing that airy texture. My friend once tried to serve the crumble immediately and ended up with a soggy mess – lesson learned, the rest is non‑negotiable.
Cool‑Down on a Wire Rack
Transferring the hot crumble to a wire rack, rather than leaving it on the baking sheet, prevents steam from softening the bottom. The airflow keeps every piece evenly crisp. If you don’t have a rack, flip the sheet upside down for a few minutes; the same principle applies.
Butter Quality Matters
Using real, unsalted butter with at least 80% fat content ensures a rich, buttery flavor and a stable melt. Margarine or low‑fat butter will produce a crumb that feels waxy and lacks depth. I once experimented with a “light” butter and the result was a disappointing, flat crumble that never achieved that golden sheen.
Creative Twists and Variations
This recipe is a playground. Here are some of my favorite ways to switch things up:
Chocolate‑Swirl Crumble
Add ¼ cup of cocoa powder to the dry Graham cracker crumbs and increase the butter by 1 tablespoon. The result is a deep, fudgy crumble that pairs perfectly with strawberry shortcake or a rich chocolate mousse. Chocolate lovers will swear this is the ultimate topping.
Nutty Delight
Stir in ½ cup of toasted chopped pecans or walnuts just before baking. The nuts add an extra layer of crunch and a buttery, earthy flavor that elevates a simple apple crisp into a sophisticated dessert.
Citrus Zest Burst
Mix in the zest of one lemon or orange to the butter‑sugar mixture. The bright citrus notes cut through the sweetness and make the crumble a perfect match for blueberry pies or lemon curd tarts.
Spiced Autumn
Swap half the cinnamon for ground nutmeg and add a pinch of ground cloves. This warm spice blend turns the crumble into a fall‑ready topping for pumpkin pie or sweet potato casserole.
Caramel Drizzle Finish
After the crumble has cooled, drizzle 2 tablespoons of store‑bought or homemade caramel sauce over the top and toss gently. The caramel adds a glossy sheen and a sticky sweetness that makes every bite feel indulgent.
Storing and Bringing It Back to Life
Fridge Storage
Transfer the cooled crumble to an airtight glass jar and store it in the refrigerator for up to 7 days. The cool environment keeps the butter from softening too quickly, preserving the crunch. If you notice any condensation, simply open the lid for a few minutes to let excess moisture escape.
Freezer Friendly
For longer storage, spread the crumble on a parchment‑lined tray and freeze it in a single layer for 2‑3 hours. Then transfer the frozen crumbs to a zip‑top freezer bag. They’ll stay fresh for up to 3 months. When you’re ready to use them, let them sit at room temperature for 10 minutes – no need to re‑bake.
Best Reheating Method
To revive any lost crispness, spread the crumble on a baking sheet and bake at 300°F (150°C) for 5‑7 minutes. Add a tiny splash of water (about a teaspoon) to the pan before reheating; the steam helps the crumbs loosen just enough to become airy again without turning soggy. This trick works wonders for crumbs that have sat out for a day.