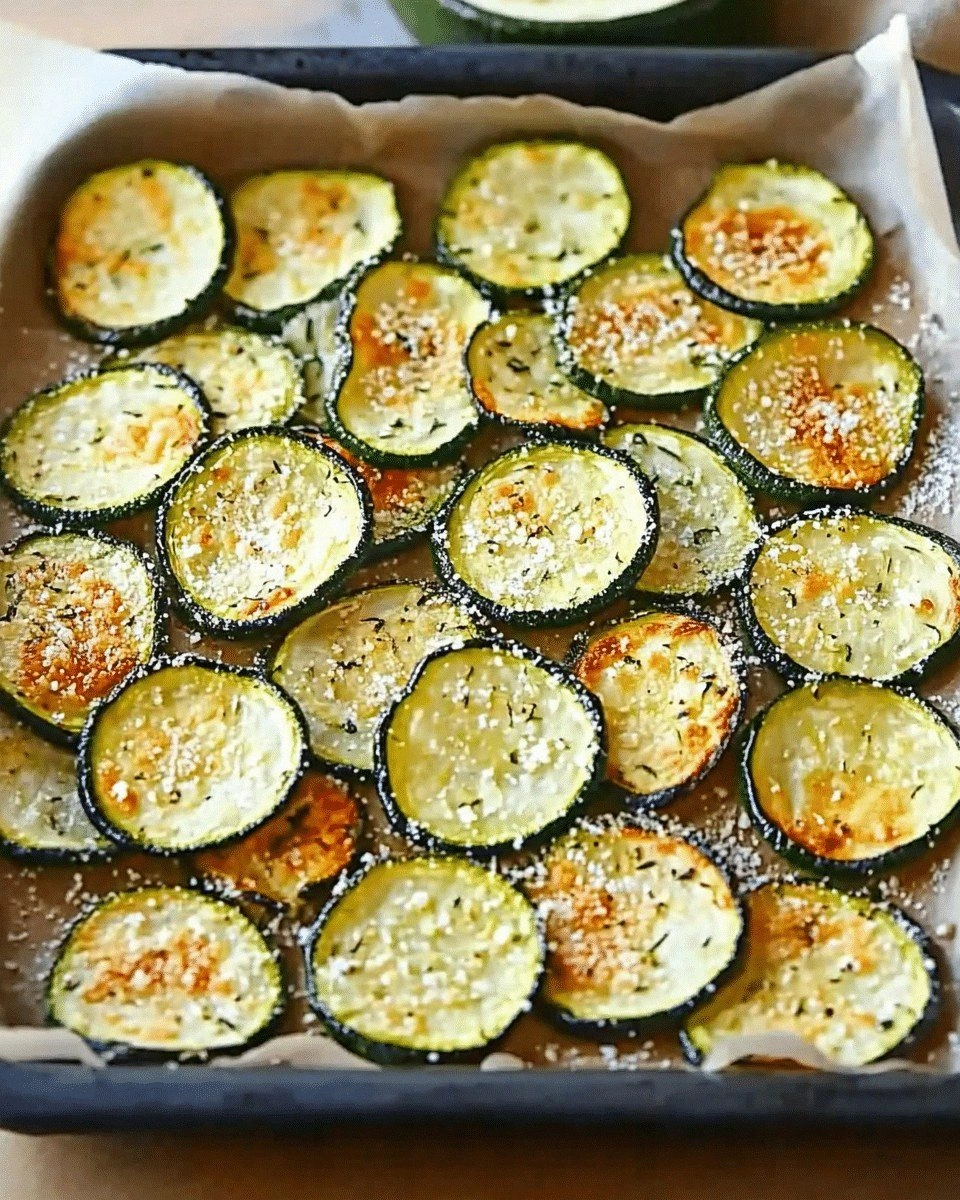
I was halfway through a week of bland, overcooked veggies when the kitchen clock ticked 2:00 am and I found myself staring at a handful of zucchini that looked more like green snowflakes than dinner. I had sliced them thin, tossed them with a splash of olive oil, and then, in a moment of culinary desperation, I decided to bake them until they were crisp. The first bite was a revelation: a light, airy crunch that cracked like brittle snow, followed by a burst of fresh, green flavor that made my taste buds do a happy dance. That moment was the spark that turned an ordinary zucchini into the star of what would become my ultimate crispy zucchini chip recipe.
Picture this: the kitchen is bathed in the warm glow of a late‑afternoon sun, the scent of fresh herbs hanging in the air, and the sound of a sizzling pan that whispers “I’m ready.” I feel the cool, smooth surface of the zucchini in my hands, the faint papery scent of the vegetable, and the anticipation of that first crackle when it hits the oven. My mouth waters at the thought of the subtle peppery bite, the buttery undertones of parmesan, and the faint nutty crunch from breadcrumbs. Every sense is primed for a snack that will leave you reaching for more—yes, I dare you to taste this and not go back for seconds.
What sets this version apart from the endless list of “crispy zucchini” recipes circulating online is the meticulous balance of texture, flavor, and simplicity. I’ve refined the coating to create a multi‑layered crunch that’s both airy and dense, achieved by combining a light flour batter with a buttery breadcrumb crust. The seasoning isn’t just a scatter of salt and pepper; it’s a carefully calibrated blend of garlic powder, smoked paprika, and a hint of lemon zest that elevates the zucchini’s natural sweetness. And the secret? A quick, high‑heat bake that locks in moisture without turning the chips soggy—this is hands down the best version you'll ever make at home.
I’m not just telling you a recipe; I’m inviting you into a kitchen experiment where the ordinary becomes extraordinary. I’ll walk you through each step—how to slice, season, coat, bake, and plate—so that by the time you finish, you’ll wonder how you ever made it any other way. Let me guide you through every single step, and by the end, you’ll be ready to impress friends, family, and even your own taste buds.
What Makes This Version Stand Out
- Texture: A two‑layer coating creates an airy crunch that shatters like thin ice, followed by a buttery, breadcrumb‑laden bite that satisfies the craving for depth.
- Flavor: A balanced blend of garlic, smoked paprika, and lemon zest gives the zucchini a bright, savory punch that lingers on the palate.
- Speed: From prep to plate in under 45 minutes, this snack is perfect for a midnight craving or a last‑minute appetizer.
- Versatility: The base recipe works for any season, and the flavor profile can be tweaked with spices, cheeses, or herbs to suit any mood.
- Make‑ahead: The chips can be baked ahead and stored in an airtight container for up to a week, making them ideal for busy days.
- Healthful: With only a light coating and no deep frying, these chips offer a lower‑fat alternative that still delivers on crunch.
Alright, let's break down exactly what goes into this masterpiece…
Inside the Ingredient List
The Flavor Base
The foundation of our crispy zucchini chips starts with the zucchini itself. Fresh, firm zucchini harvested at peak ripeness offers the best balance of moisture and structure. When sliced thinly—about 1/8 inch thick—the zucchini slices hold up during baking, preventing sogginess. If you’re in a pinch and only have zucchini stems, peel them and shred them finely; the texture will still come through, but the flavor profile will shift slightly toward a more earthy tone.
Another key player is the olive oil. A light drizzle of high‑quality extra‑virgin olive oil not only adds a subtle fruity note but also helps the coating adhere evenly. If you’re watching calories, a spray bottle can give you the same effect with fewer drops—just be sure to coat each slice lightly.
The Texture Crew
The coating is where the magic happens. We use a combination of all‑purpose flour, finely ground breadcrumbs, and a pinch of salt to create a light, airy base. The flour provides structure, while the breadcrumbs add crunch. If you’re gluten‑free, swap the flour for almond flour or a gluten‑free blend; the texture will be slightly denser but still delicious.
Eggs act as a binder, keeping the coating together and giving the chips a golden, slightly crisp edge. For a vegan version, a tablespoon of aquafaba or a flaxseed‑egg mixture will work, but the final crunch will be a touch softer. Finally, grated Parmesan cheese adds umami and a subtle nutty flavor that elevates the overall taste. If you’re lactose intolerant, try nutritional yeast for a cheesy hit without dairy.
The Unexpected Star
Smoked paprika is the secret sauce that gives these chips a smoky depth without the need for an actual smoker. The paprika’s sweet, slightly peppery profile complements the zucchini’s natural sweetness and balances the sharpness of the Parmesan. If you prefer a milder taste, reduce the paprika by half; if you’re a spice enthusiast, add a pinch of cayenne for a kick.
The Final Flourish
A squeeze of fresh lemon juice right before serving brightens the dish and cuts through the richness of the cheese and breadcrumbs. The citrus notes lift the flavor profile, making each bite feel lighter. For an extra burst of freshness, sprinkle chopped fresh parsley or basil on top—just before serving—to add a pop of color and a subtle herbaceous note.
Everything's prepped? Good. Let's get into the real action…
The Method — Step by Step
- Before you start, preheat your oven to 425°F (220°C). Line a large baking sheet with parchment paper or a silicone mat to prevent sticking. While the oven heats, wash the zucchini and pat it dry with a clean towel. Slice the zucchini into 1/8‑inch thick rounds using a mandoline for uniformity—this ensures even baking and a consistent crunch. If you prefer, you can also slice them into thin strips for a different texture. This step is crucial because uneven slices can lead to uneven cooking and soggy chips.
- In a shallow bowl, whisk together 1 cup of all‑purpose flour, 1/2 cup of finely ground breadcrumbs, 1/2 teaspoon of salt, 1/4 teaspoon of black pepper, 1/2 teaspoon of garlic powder, and 1/2 teaspoon of smoked paprika. This dry mix will form the base of the coating. The flour provides structure, while the breadcrumbs add that essential crunch. If you’re looking for a gluten‑free version, replace the flour with a gluten‑free blend or almond flour; the texture will change slightly but remain delightful. Stir the mixture until it’s well combined and set aside. This is where the flavor begins to build.
- In a separate bowl, whisk 2 eggs until the yolks and whites are fully blended. The eggs act as a binder, ensuring the coating sticks to the zucchini. For a vegan version, replace the eggs with 2 tablespoons of aquafaba or a flaxseed‑egg mixture. Dip each zucchini slice into the egg mixture, letting any excess drip off, then roll it in the dry coating mixture. Press gently to ensure the coating adheres well. Place the coated slices onto the prepared baking sheet, leaving a small gap between each to allow for even heat distribution. This step is the heart of the recipe—each slice is a canvas waiting to become crispy.
- Drizzle a light spray of olive oil over the coated slices. This not only adds flavor but also helps the coating brown evenly. If you’re watching calories, a light spray is sufficient; just make sure each slice receives a thin, even layer. Place the sheet in the preheated oven and bake for 12–15 minutes, or until the edges are golden and the chips start to crackle. Keep an eye on them—oven temperatures can vary, and you want a crisp finish without burning. At the 8‑minute mark, flip the slices to ensure both sides crisp up uniformly. This is the moment of truth: the first crackle signals that the chips are on the brink of perfection.
- Remove the baking sheet from the oven and let the chips cool on a wire rack for about 5 minutes. The residual heat will continue to crisp them up, and the cooling process will firm them to the perfect bite. While they’re cooling, zest a lemon and set it aside for later. The zest will add a bright, citrusy aroma that complements the savory coating. If you’re in a hurry, you can also transfer the hot chips to a bowl and toss them with the zest right away; the heat will release the oils from the zest, enhancing the flavor.
- Once cooled, sprinkle the chips with a light dusting of grated Parmesan cheese and a pinch of fresh black pepper. The cheese melts slightly, adding a creamy layer that contrasts with the crunchy exterior. If you’re vegan, substitute the Parmesan with nutritional yeast or a dairy‑free cheese alternative. For an extra burst of flavor, add a handful of chopped fresh herbs—parsley, basil, or cilantro—right before serving. This step turns the chips from snack to a party‑ready appetizer that’s sure to impress.
- Serve immediately for maximum crispiness, or store in an airtight container at room temperature for up to 3 days. If you need to reheat, pop the chips in a preheated 350°F (175°C) oven for 3–5 minutes—this will restore their crunch without drying them out. For a quick fix, a few seconds in a hot skillet will also revive the crisp. Remember, the secret to lasting crispness lies in preventing moisture buildup, so keep the container sealed tightly when not serving.
- And that’s it—your crispy zucchini chips are ready to conquer taste buds and snack cravings alike. But hold on, I've got a few more tricks that will take this to another level. These tips will help you tailor the recipe to your taste, keep the crunch alive, and even turn the chips into a versatile base for dips and sauces.
Insider Tricks for Flawless Results
The Temperature Rule Nobody Follows
Many people bake at a moderate temperature, but the secret to a truly crisp chip is high heat. Set your oven to 425°F (220°C) and preheat it for at least 10 minutes before placing the chips inside. The high temperature ensures the coating dries quickly, creating a crunchy shell that doesn’t turn soggy. If your oven runs hot, reduce the temperature by 25°F (15°C) and extend the bake time by 2 minutes to avoid burning. I once baked at 450°F and ended up with a slightly charred exterior—definitely not the texture I was after. Keep the oven door closed during baking to maintain consistent heat.
Why Your Nose Knows Best
The aroma of baking is a powerful indicator of doneness. When the chips start to emit a nutty, toasty scent, you’re in the sweet spot. If the smell is more like burnt sugar, you’re over‑baked. The first crackle you hear is a reliable cue that the coating is crisping up. Trust your senses—taste and smell are your best allies in achieving the perfect chip. I’ve learned to pause, inhale, and listen for that crackle before pulling the chips from the oven.
The 5‑Minute Rest That Changes Everything
After baking, let the chips rest on a wire rack for exactly 5 minutes. During this brief period, the residual heat continues to cook the interior, while the surface dries out further, locking in crispness. If you move them too early, they’ll be soft and chewy. If you wait too long, they’ll start to lose their crunch. I always set a timer—five minutes is the sweet spot. The rest also allows the coating to set, making the chips easier to handle and less likely to break.
The Light‑Spray Trick
Using a spray bottle to lightly coat the chips with olive oil before baking gives an even distribution of fat, which helps the coating brown uniformly. A heavy drizzle can lead to greasy chips, while no oil can cause the coating to stick to the pan. Spray just a few minutes before baking, and then spread the chips out so the oil doesn’t pool. This simple step elevates the flavor and texture without adding extra calories.
The Parmesan Boost
Adding Parmesan after baking gives the chips a fresh, cheesy finish. If you sprinkle the cheese before baking, it can melt into the coating, losing the distinct cheesy bite. Instead, wait until the chips have cooled slightly, then dust them with cheese. This technique keeps the cheese crisp and flavorful. For a vegan version, try nutritional yeast or a dairy‑free cheese alternative to achieve a similar umami kick.
The Lemon Zest Finale
A pinch of fresh lemon zest right before serving brightens the overall flavor profile, cutting through the richness of the cheese and breadcrumbs. The zest releases essential oils that add a bright, citrusy aroma. If you’re feeling adventurous, squeeze a tiny bit of lemon juice over the chips for an extra zing. I’ve found that the citrus note transforms the snack from simple to spectacular.
Creative Twists and Variations
This recipe is a playground. Here are some of my favorite ways to switch things up:
Spicy Chipotle Crunch
Swap the smoked paprika for chipotle powder and add a pinch of cayenne. The result is a smoky, spicy chip that pairs wonderfully with a cool avocado dip. The heat level can be adjusted to taste—just keep the rest of the seasoning the same.
Herb‑Infused Mediterranean
Add dried oregano and basil to the coating mix. After baking, sprinkle chopped fresh parsley or mint on top. This version feels like a fresh salad in chip form—perfect for a Mediterranean‑themed gathering.
Cheesy Gouda Delight
Replace Parmesan with shredded Gouda for a richer, sweeter cheese flavor. The Gouda melts into a silky coating that still retains a crunch. This twist is ideal for a cozy, comfort‑food vibe.
Vegan Coconut Crunch
Use a blend of coconut flour and almond flour for the coating, and replace the eggs with a flaxseed‑egg mixture. Sprinkle toasted coconut flakes over the finished chips for extra texture. This version offers a tropical twist that’s both vegan and gluten‑free.
Sweet & Salty Maple Glaze
Brush the baked chips with a thin layer of maple syrup and a pinch of sea salt. The sweetness balances the savory coating, creating a sweet‑salty snack that’s irresistible. Serve with a light yogurt dip to cut through the maple richness.
Garlic Parmesan Bites
Add a generous amount of minced garlic to the coating mix, and sprinkle extra Parmesan on top before baking. The garlic infuses each chip with a robust flavor, while the Parmesan provides a crisp, savory finish. This variation is perfect for garlic lovers.
Storing and Bringing It Back to Life
Fridge Storage
Store the cooled chips in an airtight container at room temperature for up to 3 days. Keep the container sealed tightly to prevent moisture from settling on the chips, which would cause them to lose crunch. If you notice any softness, place the container in the refrigerator for a couple of hours; the cold can help firm them up slightly.
Freezer Friendly
For longer storage, place the chips in a single layer on a baking sheet and freeze for 1–2 hours. Once solid, transfer them to a freezer‑proof bag or container. They can be stored for up to 2 months. When ready to enjoy, let them thaw at room temperature for 15 minutes before reheating.
Best Reheating Method
Preheat your oven to 350°F (175°C). Spread the chips on a baking sheet and bake for 3–5 minutes, or until the edges crisp up again. For a quick fix, pop a handful in a hot skillet for 30 seconds on each side. A tiny splash of water before reheating can create steam that restores the chips’ original crispness.