The first time I made pull-apart pizza bread, I was supposed to be hosting a sophisticated game night. You know the kind — charcuterie boards, artisanal olives, maybe some fancy wine. Instead, I ended up with flour in my hair, mozzarella stuck to my ceiling, and a kitchen that looked like a tornado hit a pizzeria. But when that golden, cheesy bread emerged from the oven, something magical happened. The sophisticated game night transformed into what I now call "Pizza Bread Pandemonium," where grown adults were literally fighting over the last piece like it was the last lifeboat on the Titanic.
That night changed everything. My friends still talk about that bread more than any fancy dinner I've ever served them. There's something primal and joyful about pulling apart those buttery, garlicky pieces, watching the cheese stretch into impossible strings, and catching that first whiff of herbs and tomato sauce. It's like pizza decided to have an identity crisis and became the most fun version of itself — no slices, no rules, just pure interactive eating joy.
I've spent the last two years perfecting this recipe, testing countless variations, and eating way more than any human should. I've discovered the exact moment when the dough transforms from sticky mess to smooth perfection. I know the precise temperature that makes the cheese bubble without burning, and I've unlocked the secret to getting that perfect crust that's crispy outside but cloud-soft inside. This isn't just another pizza bread recipe — this is the one that'll ruin all others for you.
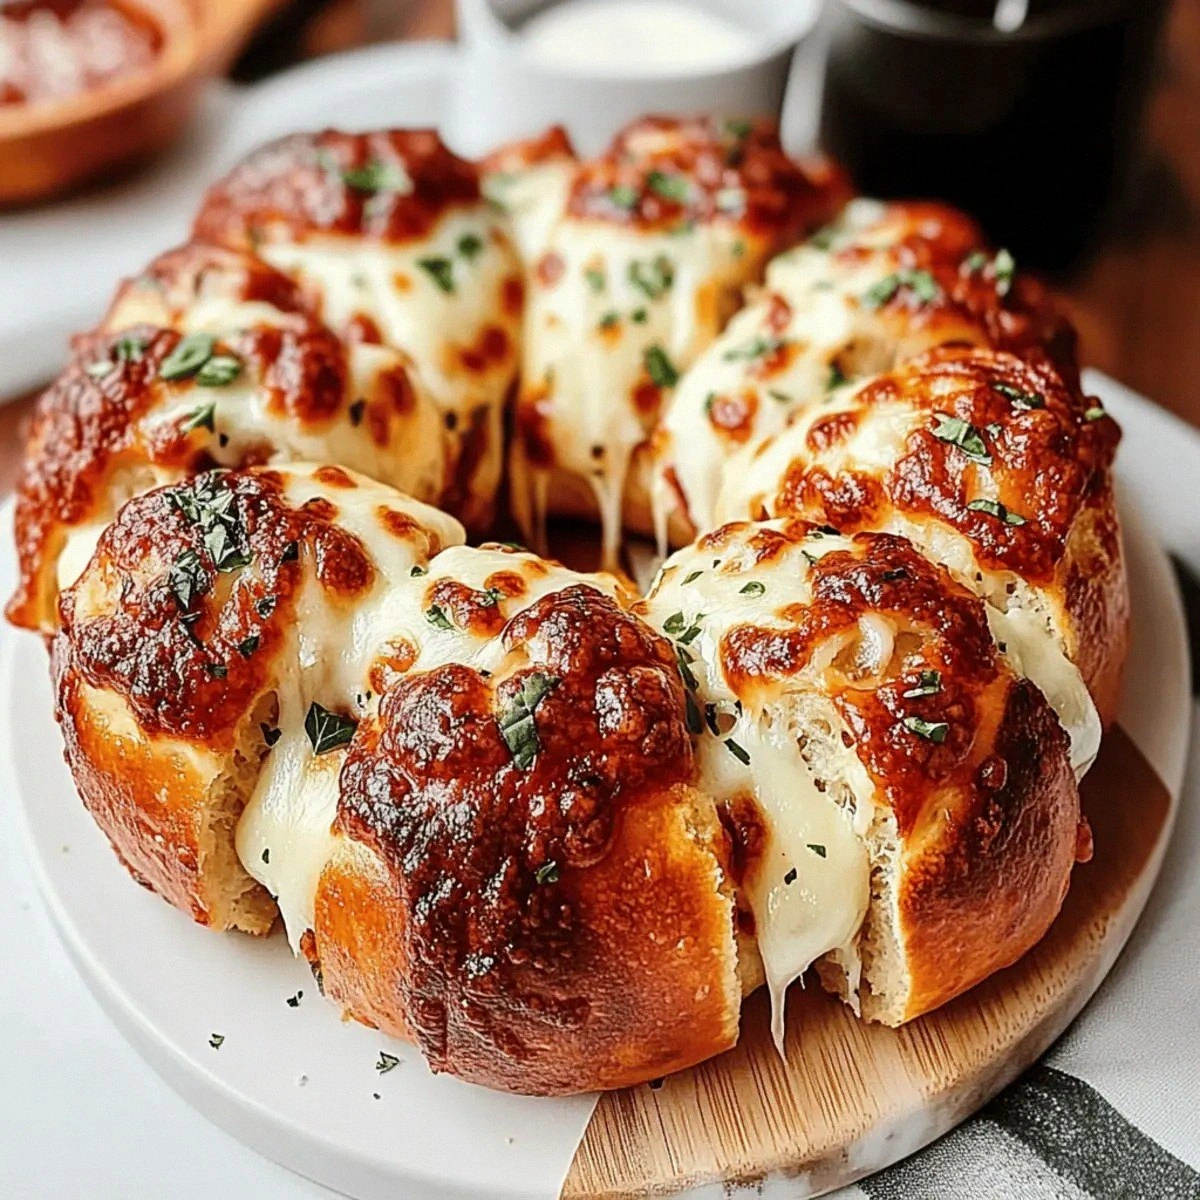
Picture yourself pulling this masterpiece from the oven. The aroma hits first — that intoxicating blend of garlic, herbs, and melting cheese that makes everyone in the house suddenly appear in the kitchen. The golden crust crackles slightly as you set it down, and you can see the cheese bubbling between the seams of dough. Your family gathers around, hands reaching, laughter bubbling up as someone inevitably burns their fingers because they couldn't wait. This is what comfort food dreams are made of, and I'm about to hand you the keys to the kingdom.
What Makes This Version Stand Out
Cheese Strategy: Most recipes just throw cheese in and hope for the best. I've developed a three-cheese layering system that ensures every single pull reveals molten mozzarella, sharp parmesan, and just enough of that addictive umami hit that keeps you coming back for more. The cheese doesn't just melt — it creates these incredible bridges between dough pieces that snap satisfyingly when pulled apart.
Garlic Infusion: Forget just sprinkling garlic on top. We're infusing the olive oil with fresh garlic first, creating a flavor base that permeates every single bite. When that garlic hits the hot oil, it releases these nutty, slightly sweet compounds that make your kitchen smell like an Italian grandmother's wildest dreams.
Herb Harmony: Dried oregano and basil aren't just for show here. They bloom in the oil, releasing essential oils that transform from dusty flakes into flavor bombs. The timing is crucial — add them too early and they burn, too late and they stay papery. I've nailed the perfect moment when they sizzle and become aromatic without turning bitter.
Texture Contrast: The real magic happens in the temperature dance. We start high to create that initial rise and golden crust, then drop it down to let the inside cook through without burning the outside. The result? Edges that shatter like thin ice revealing soft, pillowy centers that practically melt on your tongue.
Interactive Eating: This isn't food you politely serve on plates. This is hands-on, fingers-messy, fight-for-the-cheesy-middle-piece eating. It's designed for maximum interaction — every pull reveals a new combination of cheese, sauce, and herbs. Kids love it, adults become kids again, and everyone ends up with happy bellies and orange fingers.
Make-Ahead Magic: Here's where I get sneaky. You can prep this entire thing up to the final bake, wrap it tight, and refrigerate for up to 24 hours. When you're ready, just pop it in the oven. It's my secret weapon for game days and potlucks — people think you're a genius, but really, you just planned ahead.
Customizable Canvas: While the classic version is perfection, this recipe is begging for your personal touch. Want to add pepperoni? Go for it. Prefer a white pizza version? I've got you covered. The base technique works with any pizza-inspired combination you can dream up.
Alright, let's break down exactly what goes into this masterpiece...
Inside the Ingredient List
The Flavor Base
Pizza dough isn't just a vehicle for toppings — it's the foundation of flavor that makes or breaks this entire experience. I use exactly one pound of dough because it's the sweet spot for filling a standard bundt pan without overflowing. The dough should feel soft and pliable, not tough or rubbery. If your dough snaps back when you try to stretch it, it's too cold — give it another 20 minutes on the counter. The protein content matters more than you'd think; dough with 12-13% protein creates those beautiful gluten strands that give each piece its satisfying chew.
Olive oil isn't just for greasing the pan — we're using two full tablespoons to create a flavor bath that transforms everything it touches. I reach for a good quality extra virgin oil because we're heating it just enough to bloom the garlic and herbs without reaching its smoke point. The oil carries all those aromatic compounds into every crevice of the dough, ensuring no bite is bland. Don't even think about using that old bottle that's been sitting in your pantry since 2019 — rancid oil will ruin everything. Fresh oil should smell bright and peppery, not waxy or crayon-like.
The Aromatic Powerhouses
Three cloves of garlic might seem excessive, but trust me on this one. When you mince garlic and let it sizzle gently in olive oil, something miraculous happens. The harsh, sharp compounds mellow into this nutty, almost sweet flavor that permeates the entire dish. The key is mincing it finely but not crushing it into a paste — you want those little bits that get crispy and golden. If you're a garlic lover like me, you might even sneak in a fourth clove, but three hits that perfect balance where garlic lovers are satisfied but garlic-haters don't run screaming.
Dried oregano and basil are the unsung heroes here. Most people just throw them in raw, but we're going to toast them in that garlic oil for exactly 30 seconds — long enough to wake up their essential oils but short enough to prevent burning. The oregano brings that unmistakable pizza parlor aroma, while the basil adds a touch of sweetness that rounds everything out. If you've only got Italian seasoning, it'll work, but the individual herbs give you more control over the final flavor profile.
The Heat Factor
Red pepper flakes are optional, but honestly, they're what separates good pizza bread from legendary pizza bread. I use a full tablespoon because I want that gentle warmth that builds as you eat, not an overwhelming burn that kills your taste buds. The heat should be like a cozy blanket, not a punch in the face. Sprinkle them into the oil with the herbs and watch them sizzle and bloom, releasing capsaicin into the oil that will distribute evenly throughout the bread.
The Cheese Dream Team
Parmesan cheese is our first layer of umami magic. I grate it fresh because pre-grated stuff is often coated with cellulose that prevents it from melting properly. A half-cup might seem like overkill, but we're creating a savory base that'll make your taste buds do a happy dance. The parmesan adds that nutty, salty depth that makes people say "I don't know what you did, but this tastes like restaurant-quality." It also helps create those crispy, lacy edges that provide textural contrast to the soft interior.
Mozzarella is where things get serious. Two cups of shredded mozzarella might seem excessive, but remember — we're not just topping pizza here, we're creating cheese bridges between every piece of dough. I use low-moisture mozzarella because fresh would make everything soggy, and part-skim gives you that perfect stretch without becoming rubbery. The key is shredding it yourself; pre-shredded cheese is coated with starch that prevents that Instagram-worthy cheese pull we all secretly want.
The Fresh Finish
Fresh parsley isn't just a pretty garnish — it's our palate cleanser and flavor brightener. A quarter cup chopped adds a pop of color and that fresh, green flavor that cuts through all that richness. Chop it just before using because parsley starts losing its vibrancy the moment you cut it. The stems actually have more flavor than the leaves, so don't be afraid to include them.
Pizza sauce is our final flourish, but we're not just dumping it on top. We warm it slightly so it flows better and doesn't shock the dough, creating cold spots that won't cook properly. One cup is perfect for dipping — each person gets exactly enough sauce to customize their experience without drowning out the other flavors. Warm sauce also helps keep the bread from cooling down too quickly when you're serving it straight from the oven.
Everything's prepped? Good. Let's get into the real action...
The Method — Step by Step
Start by preheating your oven to 375°F (190°C) and positioning the rack in the center. This temperature might seem low compared to pizza's usual 500°F blast, but we're playing the long game here. Lower heat ensures the dough cooks through without burning the outside, and gives the cheese time to melt into those perfect pools. While the oven heats, take a bundt pan or similar tube pan and grease it thoroughly with butter or non-stick spray. Don't be shy here — every nook and cranny needs to be coated, or you'll be chiseling out stuck pieces later. I learned this the hard way when I had to sacrifice half my bread to the pan gods.
Now for the flavor base that'll make your kitchen smell like heaven. Heat the olive oil in a small skillet over medium heat until it shimmers and moves like liquid silk. Add the minced garlic and watch it dance in the oil for exactly 30 seconds — you're looking for it to turn fragrant and just start to color. Too pale and it's raw, too dark and it becomes bitter. This is the moment of truth where you become the maestro of flavor. The garlic should sizzle gently, not furiously; if it's popping and jumping, your heat's too high.
Here comes the aromatic magic. Sprinkle in the oregano, basil, and red pepper flakes all at once. Stir constantly for another 30 seconds — this is where most recipes get it wrong. They either dump the herbs in raw (papery and dull) or cook them too long (bitter and burnt). You're looking for the herbs to darken slightly and become intensely fragrant, almost like someone opened a pizza parlor in your kitchen. The red pepper flakes will bloom in the oil, turning it a gorgeous amber color and releasing their gentle heat.
Remove the skillet from heat and let the oil cool for about 2 minutes. This isn't dead time — it's crucial for flavor development. As the oil cools slightly, the herbs continue to infuse it with their essence. While it cools, tear your pizza dough into roughly 1-inch pieces. Don't stress about making them perfect — irregular pieces create better nooks for cheese to hide in. The dough should feel soft and stretchy, not tough or elastic. If it springs back when you tear it, it's still too cold.
In a large bowl, toss the dough pieces with the herb oil until every piece is glossy and coated. This is where the flavor really penetrates — the oil carries all those aromatic compounds into the dough itself. Use your hands (they're your best kitchen tool) and really massage the oil into the dough. You want each piece to be seasoned, not just the ones on the surface. The dough should look like it's been kissed by Italian sunshine, glistening but not drowning in oil.
Now for the cheese symphony. Add the parmesan first and toss to coat — it acts like a savory seasoning that sticks to the oiled dough. Then comes the mozzarella, and here's where I get particular. Don't just dump it in and stir — layer it strategically. Add half the cheese, toss gently, then add the other half. This ensures even distribution and prevents all the cheese from sinking to the bottom of the pan. The mozzarella should start to stick to the dough pieces, creating little cheesy patches.
Time to build our pull-apart masterpiece. Start layering the dough pieces into your prepared pan, but don't just dump them in — we're creating a cheese distribution system. Add a layer of dough, then sprinkle some mozzarella pieces in the gaps, then more dough. Think of it like building a cheesy lasagna where every layer gets its fair share of the good stuff. Press down gently as you go to eliminate air pockets but don't compact it too much — you want space for the dough to expand.
Cover the pan with plastic wrap and let it rise for 20 minutes. This isn't about doubling in size — we're just giving the dough a chance to relax and puff slightly. During this time, the cheese starts to warm up, and the flavors begin to meld. If your kitchen is cold, place the pan on top of the preheating oven for a gentle warmth. You should see the dough pieces start to look plumper and more relaxed, like they've had a nice stretch after a workout.
Bake for 25-30 minutes, but here's the secret — start checking at 20 minutes. You're looking for the top to be golden brown and the cheese to be bubbling up between the cracks. The edges should be pulling away from the pan slightly, and when you tap the top, it should sound hollow. If the top is browning too quickly, tent it with foil for the last 10 minutes. The smell at this point will be absolutely maddening — resist the urge to open the oven door too often or you'll let all that hot air escape.
The hardest part — waiting. Let the bread rest for exactly 5 minutes before inverting it onto a serving plate. This isn't just torture — it's science. The cheese needs time to set slightly so it doesn't all slide off when you flip it. Run a thin knife around the edges first to loosen any stuck bits, then place your serving plate upside down on top and flip in one confident motion. If a few pieces stick, don't panic — just pry them out and patch them back on. No one will know except you.
That's it — you did it. But hold on, I've got a few more tricks that'll take this to another level...
Insider Tricks for Flawless Results
The Temperature Rule Nobody Follows
Here's what separates the pizza bread legends from the amateurs: temperature awareness. Your dough, cheese, and even your pan temperature all matter more than you'd think. Cold dough won't absorb the herb oil properly, resulting in bland patches that taste like plain bread. Cold cheese doesn't melt evenly, leaving you with rubbery chunks instead of that perfect cheese pull. And a cold pan can shock the dough, preventing proper rising. I keep everything at room temperature for at least 30 minutes before starting, and I warm my pan by running it under hot water for a few seconds before greasing.
The resting temperature after baking is equally crucial. I know it's torture, but those five minutes of rest time allow the cheese to set just enough that it doesn't all slide off when you invert the bread. It's like letting a steak rest — the difference between good and restaurant-quality. A friend tried skipping this step once and ended up with a pile of naked dough pieces and a solid cheese disk on the plate. Don't be that friend.
Why Your Nose Knows Best
Your sense of smell is your most underrated kitchen tool for this recipe. When the garlic hits the oil, you're looking for that sweet spot where it smells nutty and inviting, not sharp and raw. If it makes your eyes water, you've gone too far. The same goes for the herbs — when they bloom properly, your kitchen should smell like the best pizza parlor you've ever visited. If you can't smell anything, your heat's too low. If it smells burnt, start over — there's no saving burnt garlic.
During baking, your nose becomes your timer. When you start smelling that deep, complex aroma of bread, cheese, and herbs mingling together, you're about 5 minutes from done. It's like having a built-in kitchen timer that's never wrong. I've baked hundreds of these loaves, and my nose has never let me down.
The 5-Minute Rest That Changes Everything
I cannot stress this enough — do not skip the resting time. I know it's hard when you're staring at bubbling cheese and golden crust, but patience here is what separates good pizza bread from legendary pizza bread. During these five minutes, the cheese firms up just enough to hold its shape, the bread structure sets so it doesn't collapse when you cut it, and the flavors redistribute themselves evenly. Think of it like letting a good red wine breathe — it just gets better.
During this rest, I prepare my dipping sauce and call everyone to the table. By the time the bread is ready to flip, everyone has their napkins ready and their appetites fully engaged. It's like the drumroll before the big reveal, and trust me, the anticipation makes it taste even better.
The Flip Technique That Prevents Disasters
Flipping the bread is where most people panic, but it's actually simple with the right technique. First, run a thin knife around the entire edge, not just the top. Get right down to where the bread meets the pan, releasing any cheese that might have welded itself during baking. Place your serving plate upside down on top of the pan, then grip both together firmly. The key is confidence — a hesitant, slow flip often results in half the bread sliding out while the other half stays stuck.
Invert in one smooth motion, then give the bottom of the pan (now on top) a few gentle taps. This helps release any stubborn pieces. If you hear a satisfying plop, you're golden. If not, don't panic — just leave it inverted for another minute. The steam building up between the bread and pan will often do the work for you. I've never lost a loaf to sticking, but I've had a few that needed some gentle persuasion.
The Serving Temperature Sweet Spot
Pizza bread is best served warm but not molten. Too hot and the cheese just stretches into unmanageable strings that burn your tongue. Too cool and it becomes dense and heavy. The perfect temperature is when you can comfortably touch the crust with your fingers, but the cheese still stretches into those Instagram-worthy pulls. This usually happens about 10 minutes after it comes out of the oven — five minutes resting in the pan, five minutes cooling on the serving plate.
If you need to hold it for longer, tent it loosely with foil. This keeps it warm without trapping steam that would make the crust soggy. Never wrap it tightly — you're not trying to steam it, just keep it cozy. I've held pizza bread for up to 30 minutes this way for parties, and it stays perfectly in that ideal temperature zone.
Creative Twists and Variations
This recipe is a playground. Here are some of my favorite ways to switch things up:
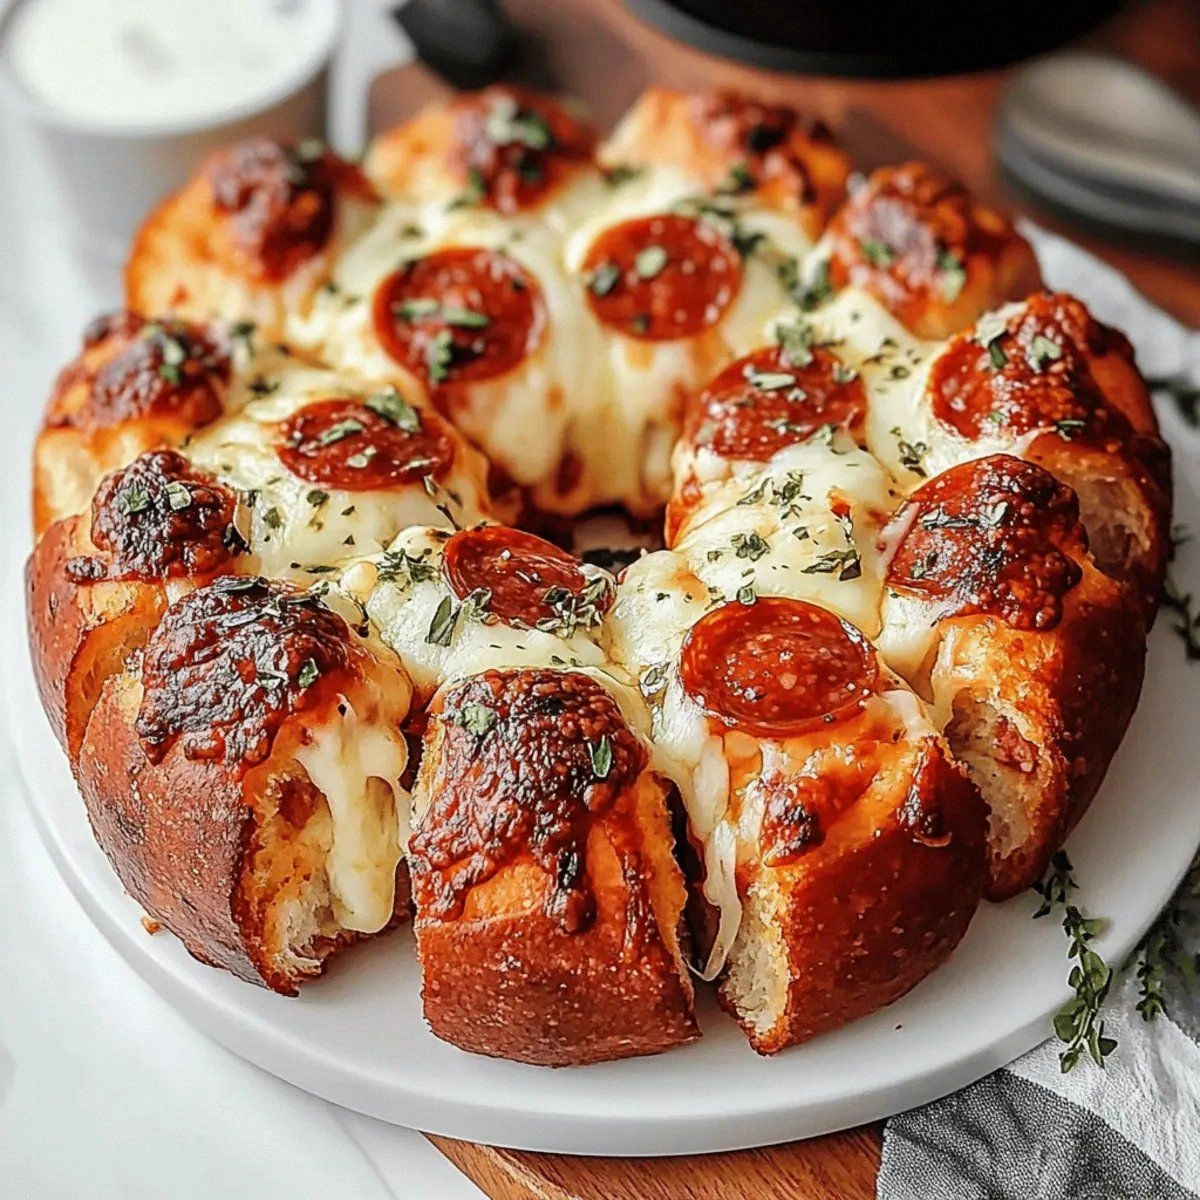
The Meat Lover's Dream
Transform this into a carnivore's paradise by adding 1/2 cup of mini pepperoni slices and 1/4 cup of crispy bacon bits to the dough along with the cheese. The pepperoni releases its spicy oils as it bakes, creating these incredible flavor pockets throughout the bread. Use turkey pepperoni if you want to feel slightly virtuous, but regular gives you that classic greasy-in-the-best-way flavor. The bacon adds a smoky depth that makes the whole thing taste like a pizza shop exploded in the best possible way.
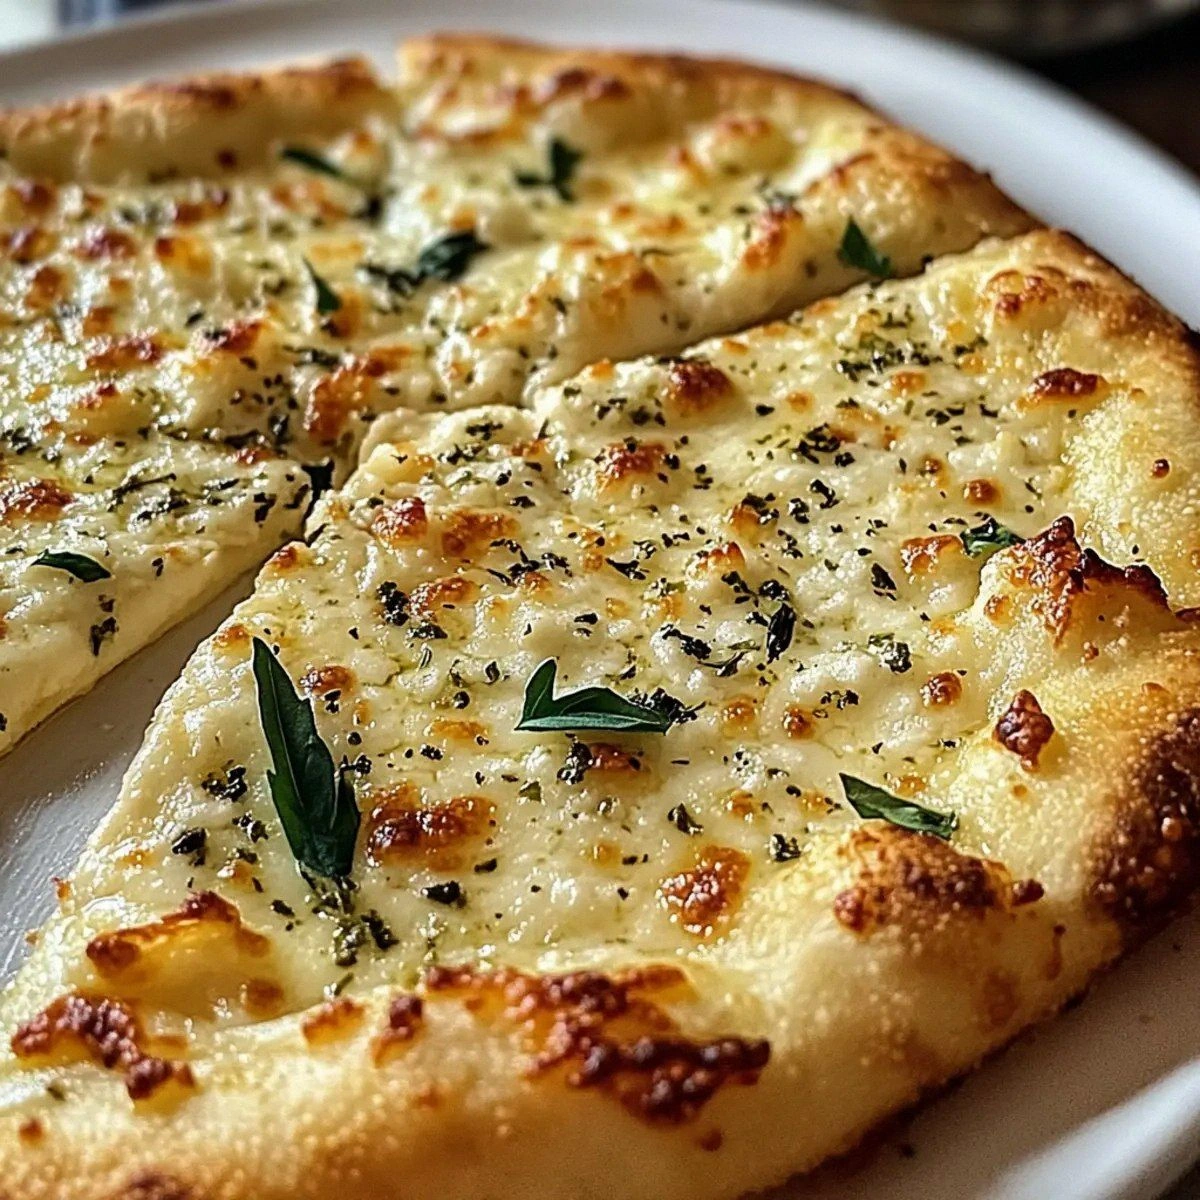
White Pizza Wonder
Skip the pizza sauce and instead add 1/4 cup of ricotta cheese and 2 tablespoons of pesto to the herb oil. The ricotta creates these creamy pockets that contrast beautifully with the crispy edges. Use a mix of mozzarella and provolone for extra meltiness, and finish with a sprinkle of lemon zest right before serving. It's like pizza bread went on vacation to the Italian coast and came back sophisticated.
Veggie Supreme
Add 1/2 cup of finely diced bell peppers, onions, and mushrooms that you've sautéed until just softened. The key is keeping the pieces small so they distribute evenly and don't create soggy spots. I also like to add a tablespoon of sun-dried tomato paste to the herb oil for an extra umami punch. Even devoted meat lovers go crazy for this version — the vegetables add sweetness and texture that makes each bite interesting.
Buffalo Wing Transformation
Replace the red pepper flakes with 2 tablespoons of buffalo sauce, and add 1/3 cup of crumbled blue cheese along with the mozzarella. The buffalo sauce gives you that tangy heat that builds slowly, while the blue cheese adds those funky, salty pockets that make your taste buds dance. Serve with ranch dressing for dipping, and you've got game day covered. I dare you to taste this and not go back for thirds.
Mediterranean Escape
Add 1/4 cup each of chopped kalamata olives, artichoke hearts, and roasted red peppers. Replace the oregano with herbes de Provence, and add a tablespoon of lemon zest to brighten everything up. Use a mix of mozzarella and feta cheese — the feta doesn't melt completely, creating these salty, creamy surprises throughout. It's like the Mediterranean vacation you can't afford, but in bread form.
Breakfast Pizza Bread
Add 1/2 cup of cooked breakfast sausage and 1/4 cup of shredded cheddar to the mix. Replace the pizza sauce with warm maple syrup for dipping — trust me on this one. The sweet-savory combination is absolutely addictive, and it's become my go-to for brunch gatherings. The cheddar adds a sharpness that plays beautifully with the Italian herbs, creating this fusion that shouldn't work but absolutely does.
Storing and Bringing It Back to Life
Fridge Storage
If you somehow manage to have leftovers (and that's a big if), let the bread cool completely before storing. Wrap it tightly in plastic wrap, then in foil, and refrigerate for up to 3 days. The key is preventing it from drying out — pizza bread's mortal enemy is the refrigerator's dehumidifying effect. I like to wrap individual pieces so I can grab one for a quick snack without exposing the whole loaf to air.
Freezer Friendly
This bread freezes beautifully, making it perfect for emergency comfort food situations. Cool completely, then wrap individual pieces in plastic wrap, followed by foil, and freeze for up to 2 months. Label it with the date because trust me, you'll forget how long it's been in there. To reheat, unwrap and microwave for 30 seconds to take the chill off, then crisp it up in a 350°F oven for 8-10 minutes. It won't be quite as good as fresh, but it's about 90% there, which is better than 0% pizza bread.
Best Reheating Method
The microwave is your enemy here — it'll turn your beautiful creation into a rubbery, soggy mess. Instead, wrap the bread in foil and warm it in a 350°F oven for 10-12 minutes. Add a tiny splash of water to the foil packet before sealing — it creates steam that rehydrates the bread without making it soggy. For individual pieces, I use my air fryer at 350°F for 3-4 minutes. It comes out almost as good as fresh, with crispy edges and melty cheese that'll make you wonder why you ever bothered with delivery pizza.