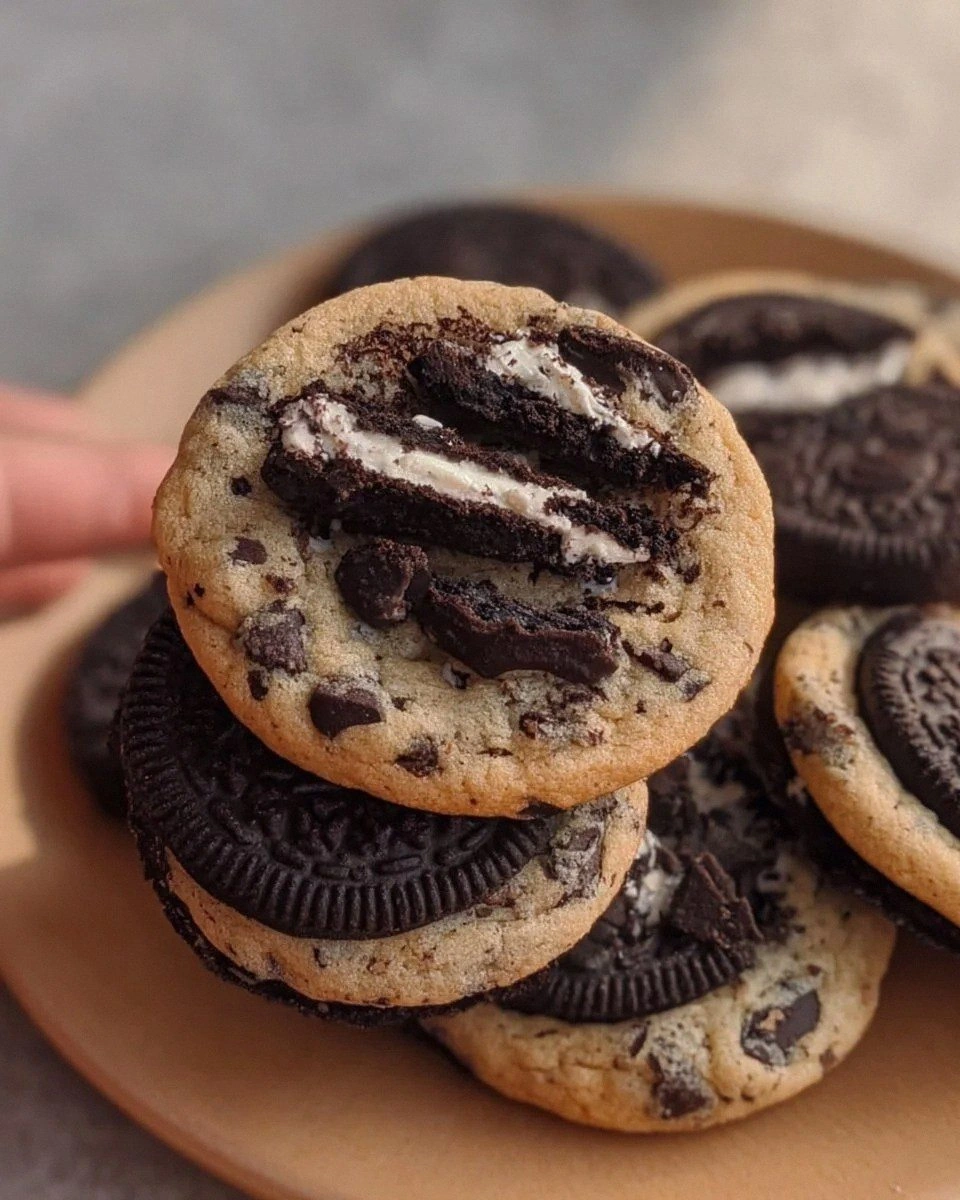
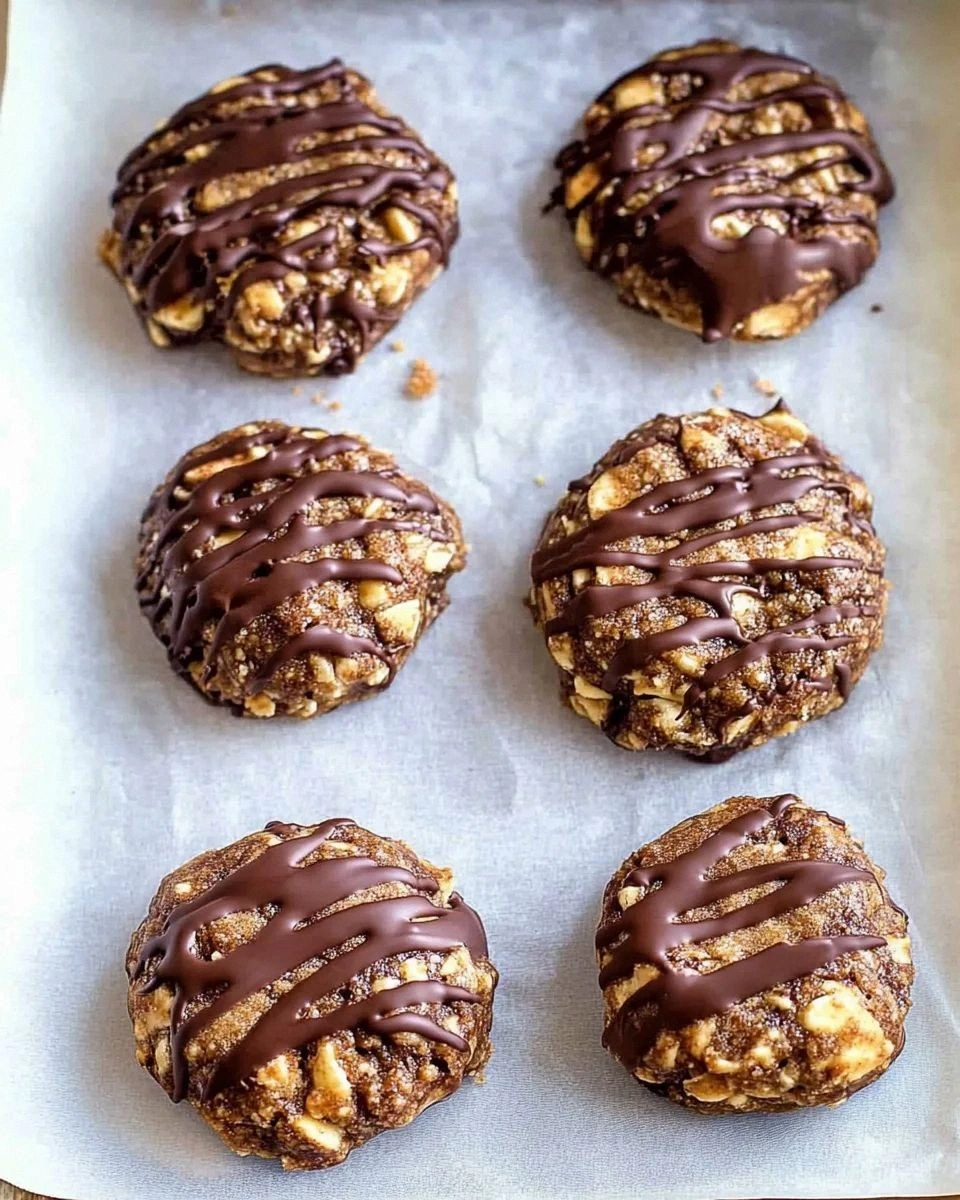
I still remember the day my oven died on me. It was a sweltering July afternoon, the kind where your kitchen feels like a sauna and the thought of turning on any appliance makes you want to move to Antarctica. My neighbor had just dropped off a container of homemade cookies that were so perfectly chewy, so intensely chocolatey, that I immediately texted her for the recipe. When she replied with "Oh, I never bake them," I nearly dropped my phone. No-bake cookies? That actually taste good? I was skeptical, to say the least. But desperation makes us do crazy things, so I gathered the ingredients and prepared myself for disappointment.
What happened next changed my cookie game forever. The mixture came together in minutes on my stovetop, filling my kitchen with the most intoxicating aroma of melted chocolate and peanut butter. As I dropped spoonfuls onto parchment paper, I'll admit I was already stealing tastes of the warm, fudgy batter. But the real magic happened twenty minutes later when I tried the first set cookie. The texture was absolutely perfect — firm enough to hold together but with this delightful chew that made it impossible to stop at just one. I ate six before my husband got home, and then had to pretend I'd only made a small batch. He still doesn't know about the cookies I hid in the vegetable crisper.
Since that fateful day, I've made these no-bake chocolate and peanut butter cookies at least once a week. They're my go-to for potlucks, late-night cravings, and those moments when you need something sweet but can't face the prospect of preheating an oven. I've perfected the technique, tested every possible variation, and discovered the secrets that make these cookies absolutely foolproof. Picture yourself standing at your stove, wooden spoon in hand, watching this magical concoction come together. The way the peanut butter melts into the cocoa creates this glossy, irresistible mixture that you'll want to eat with a spoon. Trust me, I've been there.
Let me walk you through every single step — by the end, you'll wonder how you ever made it any other way.
What Makes This Version Stand Out
After testing dozens of no-bake cookie recipes (and eating way more than my fair share of failures), I've discovered the exact formula that transforms simple pantry ingredients into something extraordinary. These aren't your grandmother's dry, crumbly no-bakes that taste like sweetened cardboard. No, these cookies achieve that perfect balance of chocolate intensity and peanut butter richness that makes grown adults hide cookies from their own families.
- Texture Perfection: Most no-bake cookies end up either rock-hard or fall-apart crumbly. This version achieves that elusive chewy texture that feels like it came from a professional bakery. The secret lies in the precise timing and temperature control that creates cookies with slightly crisp edges and a fudgy center.
- Double Chocolate Impact: While other recipes rely solely on cocoa powder, we're using both Dutch-processed cocoa for deep chocolate notes and adding chocolate chips at the perfect moment for those delightful pockets of melted chocolate throughout.
- Speed Demon Status: From pantry to plate in under fifteen minutes, this recipe is faster than ordering takeout. I dare you to taste this and not go back for seconds before the first batch has even fully set.
- Pantry Staple Magic: Everything you need is probably sitting in your kitchen right now. No special trips to specialty stores, no expensive ingredients that you'll use once and forget about. Just honest, humble ingredients that transform into something spectacular.
- Fail-Proof Formula: I've made these cookies in a tiny dorm kitchen, at high altitude, and even during a power outage using a camping stove. The method is bulletproof, and I'll share exactly how to adjust for any situation.
- Make-Ahead Champion: These cookies actually taste better the next day, making them perfect for entertaining. I'll be honest — I ate half the batch before anyone else got to try it, but the cookies I managed to save were even more incredible after an overnight rest.
- Customizable Canvas: Want to add coconut? Go for it. Prefer almond butter? It works beautifully. This recipe is your playground, and I'll show you exactly how to make it your own without ruining the magic.
- Crowd-Pleasing Power: I've never met anyone who could resist these cookies. Kids love them, adults hoard them, and that friend who claims they don't like sweets? They'll ask for the recipe.
Alright, let's break down exactly what goes into this masterpiece...
Inside the Ingredient List
Understanding your ingredients is like knowing your dance partner's moves — once you get the rhythm right, everything flows beautifully. Each component in this recipe plays a crucial role, and knowing why they matter will transform you from a recipe follower into a cookie whisperer.
The Flavor Foundation
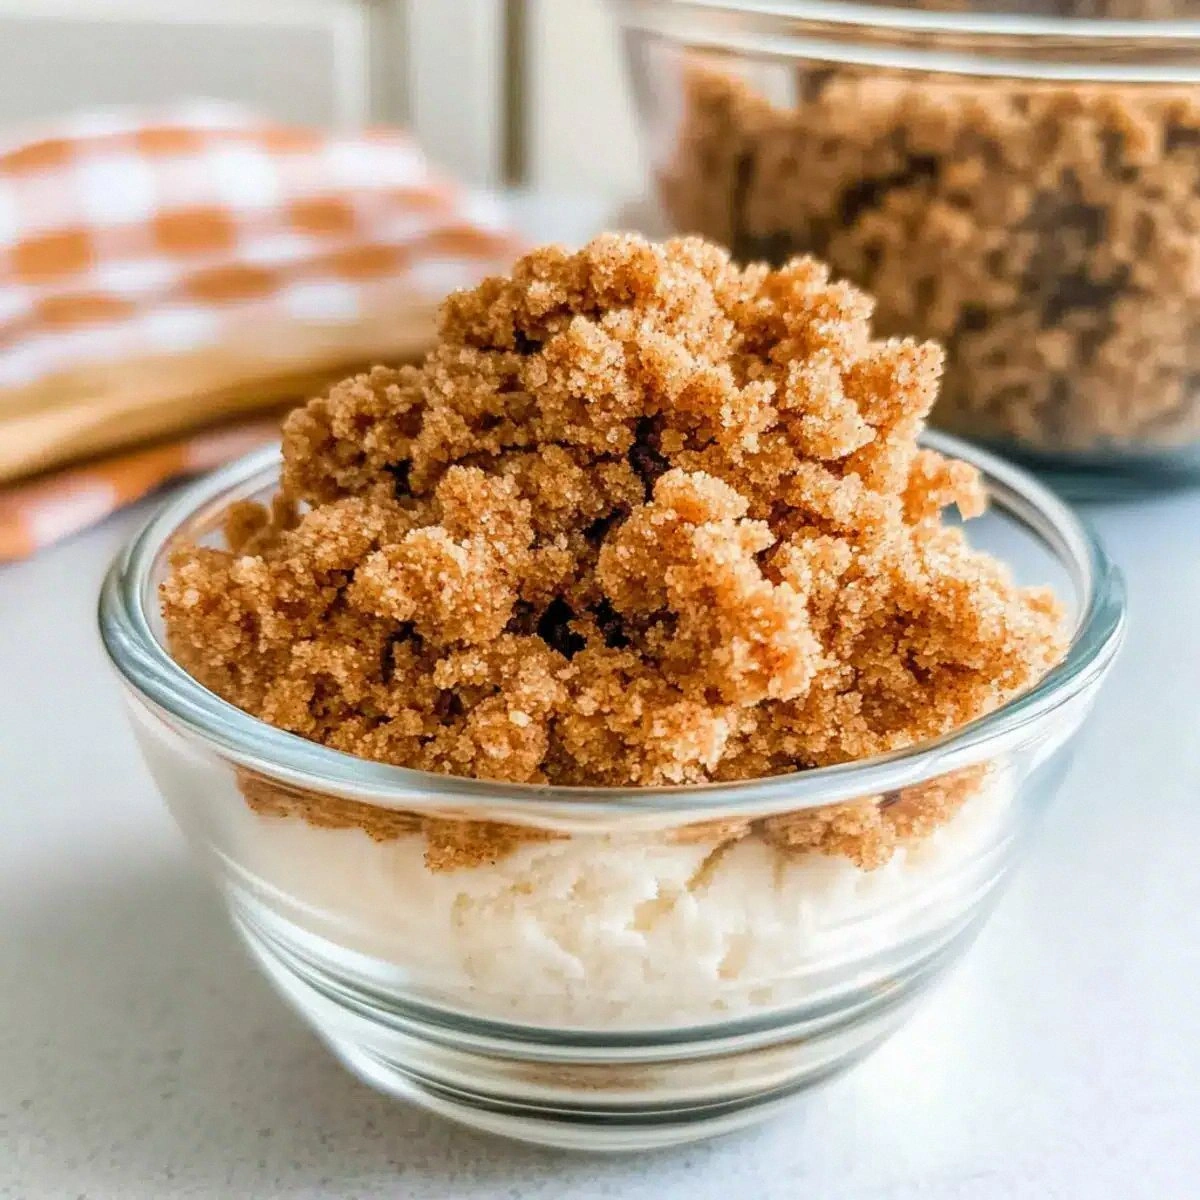
Granulated Sugar: This isn't just for sweetness, folks. Sugar provides the structure that holds these cookies together as they cool. Using the right amount creates that perfect crystallization that gives you cookies with chew rather than candy that shatters. Too little and your cookies won't set; too much and you'll need dental work. I've found that exactly two cups creates the ideal balance — any less and you're making chocolate peanut butter soup.
Unsweetened Cocoa Powder: Here's where most recipes go wrong. They grab whatever cocoa is on sale and wonder why their cookies taste flat. I'm telling you, splurge on the good Dutch-processed cocoa. It costs maybe two dollars more but gives you this incredible depth of flavor that makes people ask what bakery you bought these from. Natural cocoa works in a pinch, but Dutch-processed creates that rich, complex chocolate flavor that makes grown men weep.
Whole Milk: Don't even think about using skim milk here. You need the fat content to create that luxurious texture and help everything come together smoothly. The proteins in whole milk also help prevent the sugar from crystallizing too quickly, giving you that perfect window to get all your cookies portioned out before they set up in the pan.
The Texture Crew
Unsalted Butter: Butter is where the magic happens, people. It carries all the flavors and creates that melt-in-your-mouth sensation that makes these cookies so addictive. I always use unsalted because we're already adding salt separately, and this way you control exactly how much goes in. Make sure it's good quality butter — this isn't the place to cheap out. That sizzle when it hits the pan? Absolute perfection.
Creamy Peanut Butter: Now, I know someone's going to ask about natural peanut butter. Save it for your toast, okay? For these cookies, you want the classic creamy stuff that doesn't separate. The stabilizers in commercial peanut butter help the cookies set properly and give you that smooth, uniform texture. Crunchy peanut butter works if you want texture, but I prefer adding chopped peanuts at the end for better control.
Quick-Cooking Oats: This is non-negotiable. Old-fashioned oats are too tough and won't absorb the mixture properly, while instant oats turn to mush. Quick-cooking oats give you that perfect chewy texture and help absorb excess moisture so your cookies don't weep chocolate tears all over your storage container. Trust me on this one — I've tried every oat variety known to mankind.
The Unexpected Star
Vanilla Extract: Most people skip this in no-bake recipes, but that's like forgetting to wear pants to a wedding. Just a teaspoon of good vanilla extract rounds out all the flavors and adds this subtle warmth that makes people say "I can't quite put my finger on it, but these are incredible." Don't use imitation vanilla here — this is your chance to use the good stuff you save for special occasions.
Sea Salt: We're adding salt at two crucial moments here. A pinch in the cooking process enhances all the sweet flavors, but the real game-changer is that tiny sprinkle of flaky sea salt on top of each cookie. It creates this sweet-salty contrast that makes your taste buds do a happy dance. Most recipes get this completely wrong. Here's what actually works: use fine salt during cooking for even distribution, then finish with flaky salt for texture and pops of flavor.
The Final Flourish
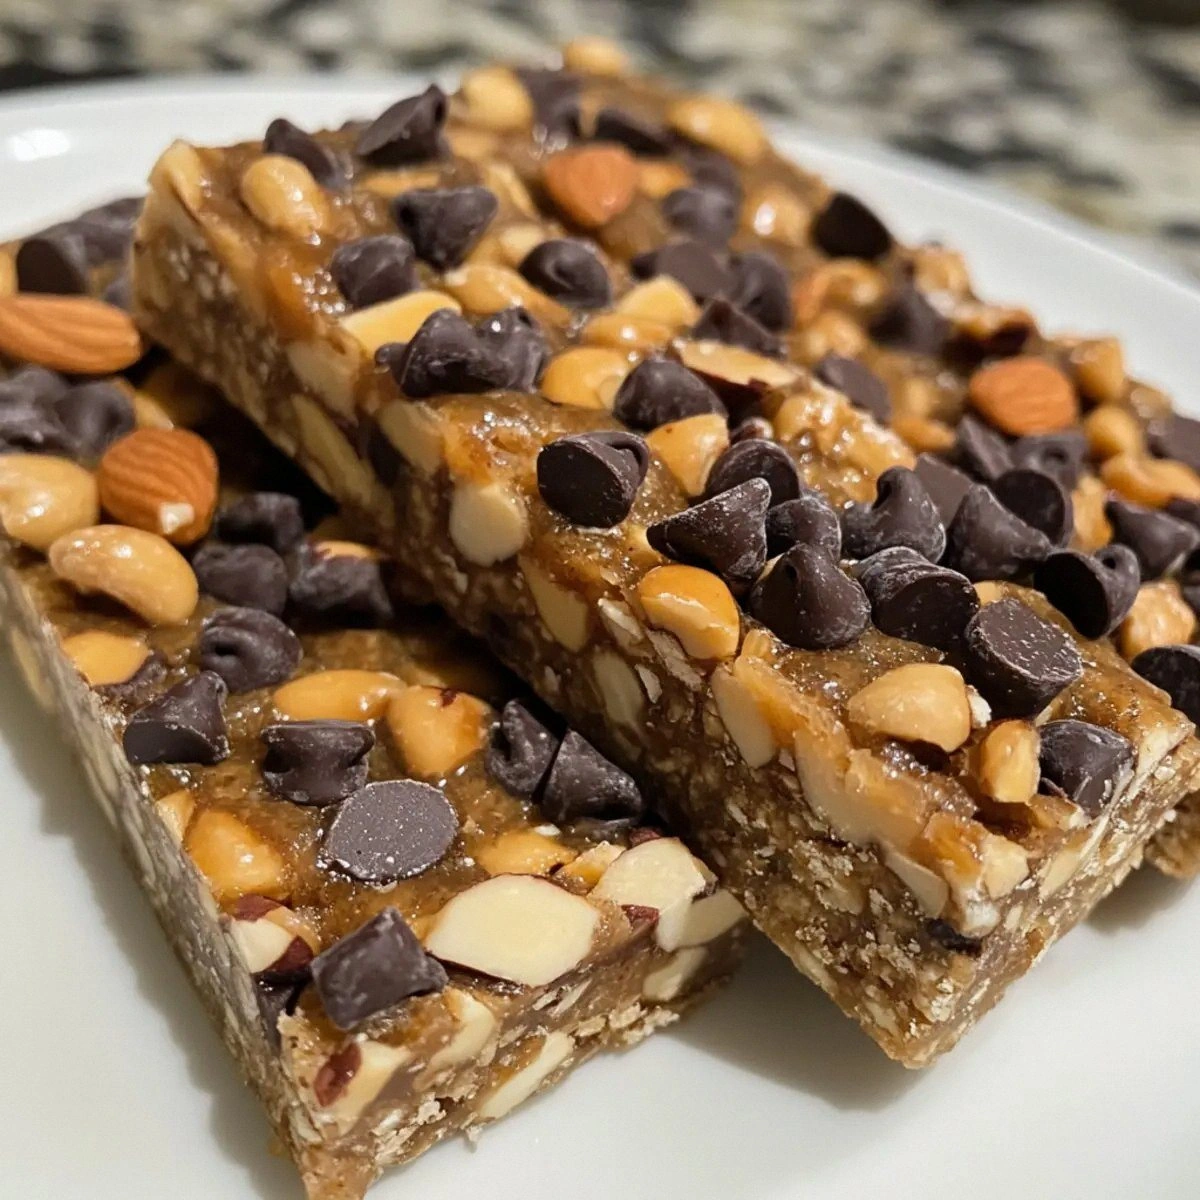
Semi-Sweet Chocolate Chips: Adding these at just the right moment creates pockets of melted chocolate throughout your cookies. The key is waiting until the mixture has cooled slightly so the chips don't completely melt into oblivion. You want them to hold their shape just enough to give you those delightful bursts of chocolate in every bite. Dark chocolate chips work too if you want a more sophisticated flavor, but semi-sweet is what makes kids' eyes light up.
Everything's prepped? Good. Let's get into the real action...
The Method — Step by Step
Okay, ready for the game-changer? Making these cookies is like conducting a symphony — every movement matters, but once you know the rhythm, you'll be cranking out perfect cookies while dancing around your kitchen. I've taught this recipe to everyone from college students with one pot to grandmothers who've been making cookies for fifty years, and they all agree: this method just works.
- Prep Your Station: Before you even think about turning on the heat, get everything ready to go. Line two baking sheets with parchment paper and clear some counter space — you're going to need it. Measure out your oats into a large heatproof bowl and have your peanut butter jar open and ready. This recipe moves fast once it gets going, and you don't want to be fumbling with measuring cups while your sugar mixture burns. Think of it like a cooking show where everything's prepped and waiting. Trust me, watching someone try to open a new jar of peanut butter while their sugar mixture turns into volcanic lava is not a pretty sight.
- Start the Sugar Dance: In a heavy-bottomed saucepan, combine your sugar, cocoa, milk, and butter. Use a wooden spoon — metal spoons conduct heat and you'll burn your hand. Place this over medium heat and start stirring immediately. Don't walk away, don't check your phone, don't even think about multitasking. This is the moment of truth where most people mess up. You want to stir constantly until the butter melts and everything comes together in a glossy, chocolatey pool. It should take about 3-4 minutes and will smell like the best hot chocolate you've ever had.
- Bring to a Boil: Once everything's melted and combined, stop stirring and let the mixture come to a rolling boil. This next part? Pure magic. You're looking for big bubbles that break the surface consistently — not the tiny simmering bubbles around the edges. When it reaches this point, set your timer for exactly one minute. No more, no less. This is where the candy-making happens, and timing is everything. Too short and your cookies won't set; too long and you'll need a chisel to eat them.
- Add the Peanut Butter: Remove the pan from heat immediately when your timer goes off. Add the peanut butter and vanilla all at once and stir like your life depends on it. The mixture will seize up a bit — that's exactly what you want. Keep stirring until the peanut butter is completely incorporated and you have a thick, glossy mixture that looks like it could be the filling for the world's best candy bar. This should take about 30-45 seconds of vigorous stirring. Your arm might ache, but that's the price of perfection.
- Fold in the Oats: Pour this chocolate peanut butter mixture over your waiting oats. Now comes the fun part — fold everything together with your wooden spoon until every oat is coated in that glorious chocolate mixture. Work quickly but gently; you want to combine everything before it starts setting up. The mixture should be thick but still pourable. If you've ever made rice crispy treats, it's a similar consistency. Don't overmix or you'll break down the oats and end up with chocolate oatmeal.
- Portion with Purpose: Working quickly (seriously, don't dawdle here), drop heaping tablespoons of the mixture onto your prepared baking sheets. I like to use two spoons — one to scoop and one to push it off. Space them about 2 inches apart; they won't spread much, but you want room to work. If the mixture starts getting too thick to work with, that's normal. Just keep going and don't try to reheat it — you'll ruin the texture. Aim for about 24-30 cookies depending on how generous you're feeling.
- Add Chocolate Chips: Here's where timing becomes everything. Wait about 2-3 minutes until the cookies are just warm but not hot. If you add the chips too soon, they'll melt completely and disappear. Too late, and they won't adhere to the surface. Sprinkle them on top and gently press down so they stick. You want them partially embedded but still visible — like chocolate polka dots on your cookie canvas.
- The Salt Finish: While everything's still slightly tacky, add your final flourish. A tiny pinch of flaky sea salt on top of each cookie might seem unnecessary, but this is what separates good cookies from legendary ones. The salt crystals create these little flavor bombs that make each bite more interesting than the last. Use about 3-4 crystals per cookie — you're not trying to make them salty, just highlighting all the sweet flavors.
- Patience, Young Grasshopper: Now comes the hardest part — waiting. Let your cookies sit at room temperature for at least 20 minutes to set completely. If you're impatient (and I usually am), you can pop them in the fridge for 10 minutes, but room temperature setting gives you the best texture. They should firm up but still have a slight give when you press them gently. This is when you sample one for "quality control" and immediately understand why this recipe will become your new obsession.
That's it — you did it. But hold on, I've got a few more tricks that'll take this to another level...
Insider Tricks for Flawless Results
After making these cookies more times than I care to admit, I've discovered some game-changing techniques that separate amateur cookie makers from the pros. These aren't just tips — they're the secrets that will make people think you went to pastry school when you really just know how to read a candy thermometer (or in this case, a kitchen timer).
The Temperature Rule Nobody Follows
Here's the thing about sugar — it has a mind of its own, and it's usually in a bad mood. Most people think that as long as they follow the timing, they're golden. Wrong! Your kitchen temperature affects everything. If it's a humid summer day, add an extra 30 seconds to your boil time. If it's winter and your house is dry, reduce it by 15 seconds. I learned this the hard way after making rock cookies during a heatwave and soupy messes during a snowstorm. The mixture should coat your spoon like thick paint and when you drop a bit into ice water, it should form a soft ball that you can flatten with your fingers. Master this test and you'll never make bad cookies again.
Why Your Nose Knows Best
Your sense of smell is your secret weapon here. When the sugar mixture is ready, it will smell like the most intense hot chocolate mixed with caramel — rich, deep, and slightly nutty. If it smells sharp or burnt, you've gone too far and need to start over. A friend tried skipping this sensory check once — let's just say it didn't end well for her cookie sheet (or her ego when she had to explain the blackened mess to her mother-in-law). Trust your nose; it's been evolving for millions of years to detect exactly this kind of thing.
The 5-Minute Rest That Changes Everything
After you mix in the oats, let the mixture rest for exactly 5 minutes before portioning. I know, I know — you're thinking the mixture will set up too much. But here's the genius part: this brief rest allows the oats to absorb some moisture, which prevents your cookies from weeping (that weird liquid that pools around no-bake cookies as they sit). It also helps the flavors meld together into something more complex than the sum of their parts. I discovered this by accident when my doorbell rang mid-cookie-making session, and those cookies turned out to be the best batch I'd ever made.
The Spoon Trick That Saves Your Sanity
Use two spoons to portion your cookies, but here's the pro move: keep a cup of very hot water next to your baking sheet. Dip your spoons in the hot water between each cookie — the heat prevents the mixture from sticking, giving you perfectly round, professional-looking cookies. Shake off excess water (you don't want water in your cookies), and you'll have cookies that look like they came from a fancy bakery. This small step takes an extra 30 seconds but makes the difference between rustic home cookies and show-stopping desserts.
Storage Secrets of Cookie Ninjas
Here's where most people go wrong — they store these cookies in an airtight container immediately. Don't do it! Let them sit uncovered for the first hour to develop that perfect outer texture. Then store them with just a corner of the container cracked open. They'll stay fresh for up to a week (though they never last that long in my house). If you must stack them, place a piece of parchment paper between layers or you'll end up with one giant cookie blob. Not that I've ever eaten an entire blob of stuck-together cookies while watching Netflix or anything...
Creative Twists and Variations
This recipe is a playground. Here are some of my favorite ways to switch things up:
Almond Joy Explosion
Replace the peanut butter with almond butter, add 1/2 cup of shredded coconut to the oat mixture, and top with chopped almonds instead of chocolate chips. The result tastes like your favorite candy bar but better because you made it yourself. My sister requests these for every birthday, and she's not even gluten-free.
Salted Caramel Dream
Swap out 1/4 cup of the sugar for brown sugar, add 2 tablespoons of heavy cream to the milk, and drizzle with homemade caramel sauce before adding the chocolate chips. The brown sugar adds depth, the cream makes them richer, and that caramel drizzle? Let's just say I hide these from my husband and pretend I never made them.
White Chocolate Raspberry
Use white chocolate chips instead of semi-sweet, add 1/2 cup of freeze-dried raspberries to the oat mixture, and finish with a dusting of powdered sugar instead of sea salt. These look gorgeous and taste like summer in cookie form. They're my go-to for bridal showers and fancy brunches where you want to impress without looking like you tried too hard.
Coffee Lover's Paradise
Dissolve 1 tablespoon of instant espresso powder in the milk before adding it to the pan, use dark chocolate chips, and add 1/4 cup of espresso-soaked chopped nuts to the oat mixture. These give you that perfect coffee shop vibe without the overpriced latte. I make these for my book club, and they're always the first thing to disappear.
Tropical Escape
Replace half the butter with coconut oil, add 1/2 cup of toasted coconut flakes and 1/4 cup of chopped dried mango to the oats, and top with white chocolate chips. Close your eyes when you eat these and you'll swear you're on a beach somewhere. They're my winter blues cure when I need sunshine in cookie form.
Pretzel Crunch Surprise
Reduce the oats to 2 1/2 cups and add 1 cup of crushed pretzels to the oat mixture. The pretzels add this incredible salty crunch that makes the sweet chocolate and peanut butter pop. These are dangerous — I've eaten an entire batch while standing at my kitchen counter telling myself I'd just have one more.
Storing and Bringing It Back to Life
Fridge Storage
These cookies keep beautifully in the refrigerator for up to two weeks. Store them in a container with a tight-fitting lid, but here's the key: place a paper towel on the bottom to absorb any excess moisture, and don't stack them more than two layers high. They'll actually develop a deeper flavor after a day or two as the chocolate and peanut butter have time to meld together. I often make a double batch on Sunday and enjoy them throughout the week. Pro tip: they're incredible cold on a hot day, like a healthy-ish version of a candy bar.
Freezer Friendly
These cookies freeze like champions. Arrange them in a single layer on a baking sheet and freeze until solid, then transfer to a freezer bag with parchment paper between layers. They'll keep for up to three months, though I've never tested that limit because they disappear too fast. To enjoy, let them sit at room temperature for about 10 minutes — they'll thaw quickly and taste just as good as fresh. I keep a bag in my freezer for emergencies, which in my house means Tuesday.
Best Reheating Method
If your cookies have been in the fridge and you want that fresh-made experience, let them sit at room temperature for 5-10 minutes. For an extra treat, microwave one cookie for exactly 8 seconds — it softens the chocolate chips and makes the peanut butter all melty. Don't go longer or you'll have a puddle. I've also been known to sandwich two cookies around a scoop of vanilla ice cream and call it dinner. No judgment here.