I was standing in my kitchen, surrounded by the aftermath of a failed brunch experiment, when the idea hit me like a thunderclap. My friends had dared me to make a pumpkin French toast that could stand shoulder‑to‑shoulder with the legendary holiday plates on the internet. I stared at the pile of stale bread, the single jar of pumpkin puree, and the empty milk carton, and thought, “This is my chance to rewrite the rulebook.” The moment the oven lights flickered on, I knew this was the beginning of something extraordinary.
The first thing you notice is the aroma—spiced pumpkin mingling with butter and a hint of vanilla, rising like a warm blanket on a crisp fall morning. As the bread soaks, you hear the gentle sizzle as the first slice hits the pan, and the sound becomes a metronome for the rest of the batter. The texture is a paradox: a crispy crust that crackles like freshly fallen leaves, beneath which lies a custard‑like interior that melts in your mouth. The flavor is layered—sweet, earthy pumpkin, a whisper of nutmeg, and a caramelized finish that lingers on the tongue. I swear, that first bite feels like a hug from a grandma who’s always been a bit too generous with cinnamon.
What makes this version stand out isn’t just the combination of flavors; it’s the way every element is elevated. The bread is toasted before soaking, giving it a sturdy base that resists sogginess. The pumpkin puree is pure, not blended with spices, so it stays bright and vibrant. The custard is thickened with a touch of flour, giving the French toast a silky, almost custard‑like body that’s more substantial than the usual fluffy pancake. And the final glaze—maple syrup mixed with a splash of orange zest—adds a citrusy brightness that cuts through the richness. I dare you to taste this and not go back for seconds.
This isn’t just another pumpkin French toast recipe. It’s a reimagining of comfort food that takes the humble breakfast staple and turns it into an edible masterpiece. The secret? A blend of techniques borrowed from pastry chefs, a dash of culinary curiosity, and a whole lot of love. If you’ve ever struggled to get the right balance of sweetness and spice, you’re not alone—this recipe is the fix you’ve been searching for. Picture yourself pulling this out of the oven, the whole kitchen smelling incredible, and watching as the golden slices steam in the air. It’s a moment of pure culinary triumph.
Let me walk you through every single step—by the end, you’ll wonder how you ever made it any other way. I’ll share the exact measurements, the precise timing, and the little hacks that will transform a good breakfast into an unforgettable experience. Stay with me here—this is worth it.
What Makes This Version Stand Out
- Texture: The pre‑toasted bread and flour‑enriched custard combine to give a crisp exterior and a silky interior that feels like a slice of cloud.
- Flavor Depth: A trio of spices—cinnamon, nutmeg, and vanilla—layered with a splash of orange zest to brighten the pumpkin’s earthiness.
- Ingredient Quality: Using 100% pure pumpkin puree and whole‑grain bread ensures authentic flavor and a healthier profile.
- Make‑Ahead Potential: The soaked batter can rest for 30 minutes, allowing the flavors to marry without compromising texture.
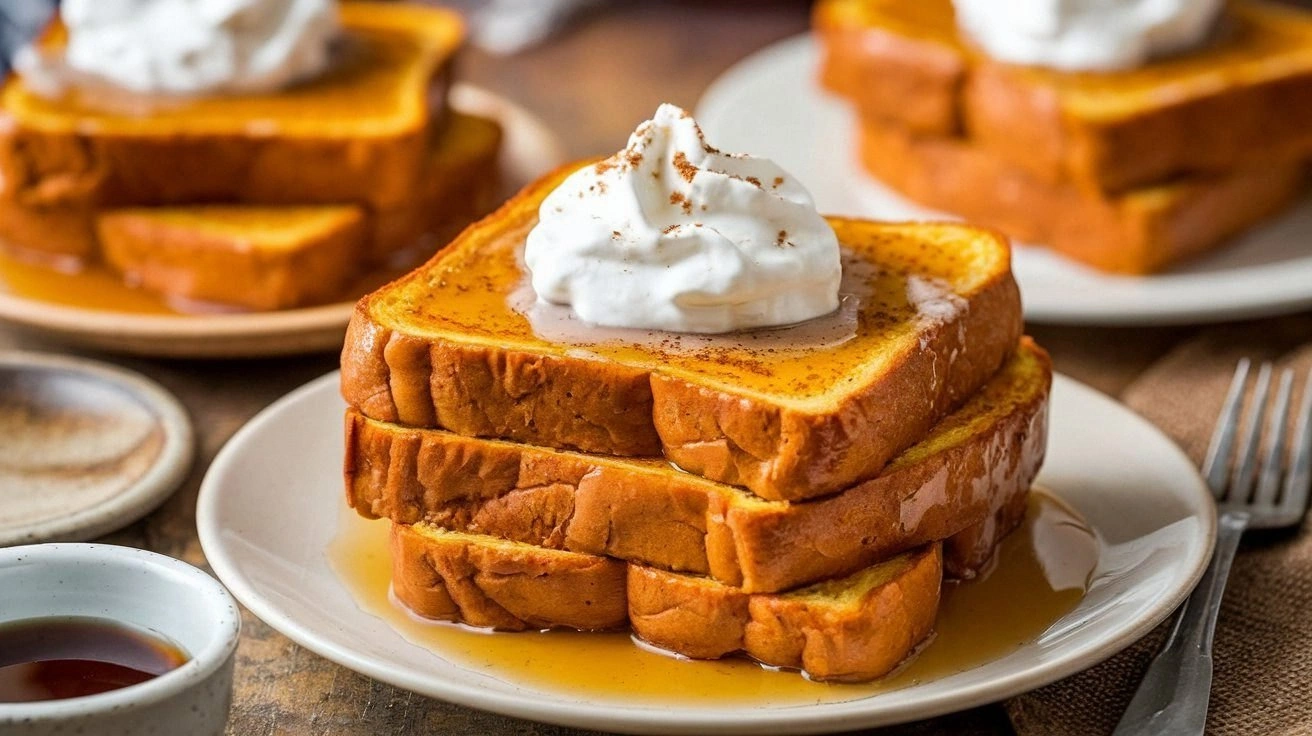
- Visual Appeal: The golden crust and dusting of powdered sugar create a presentation that’s Instagram‑ready.
- Versatility: Swap the bread for brioche, add a drizzle of caramel, or top with toasted pecans for endless variations.
- Time Efficiency: Prep is under 15 minutes, and the cooking time is just 30 minutes—perfect for a busy weekday.
- Kid‑Friendly: The recipe is simple enough for children to help with, making breakfast a fun family activity.
Alright, let's break down exactly what goes into this masterpiece...
Inside the Ingredient List
The Flavor Base
At the heart of this recipe is the pumpkin puree, the star that brings warmth and color. Use a puree that’s 100% pumpkin, not a mix of pumpkin and sweetener. It delivers a natural sweetness that doesn’t overwhelm the spices. If you can’t find pure pumpkin puree, a homemade blend of roasted pumpkin cubes and a touch of maple syrup works beautifully.
The Texture Crew
The custard that coats each slice is thickened with a small amount of flour—just enough to give structure without turning the batter into a pancake. This technique, borrowed from classic French toast recipes, creates a custard that is both creamy and firm. The flour also helps the bread absorb the liquid evenly, preventing sogginess. If you’re gluten‑free, substitute the flour with cornstarch or a gluten‑free blend.
The Unexpected Star
A splash of orange zest is the secret weapon that lifts the dish. The citrus oils add a bright, fresh note that balances the earthiness of the pumpkin and the richness of the butter. Grate the zest finely to avoid bitterness, and stir it into the custard just before dipping the bread. This small addition turns a familiar dish into something memorable.
The Final Flourish
The finishing touch is a drizzle of maple syrup mixed with a pinch of sea salt. The salt enhances the natural sweetness, while the maple syrup adds depth and a glossy sheen. Finish with a dusting of powdered sugar for a sweet contrast to the savory crust. If you prefer a sweeter finish, replace the maple with honey or a flavored syrup.
Everything's prepped? Good. Let's get into the real action...
The Method — Step by Step
- Pre‑Toast the Bread: Place the bread slices on a baking sheet and toast them in a preheated oven at 350°F for 6–8 minutes, flipping halfway. The goal is a lightly browned surface that can hold the custard without becoming mushy. While the bread toasts, prepare the custard base.
- Whisk the Custard: In a large bowl, whisk together 2 eggs, 1 cup milk, 1 cup pumpkin puree, 1 tablespoon maple syrup, 1 teaspoon vanilla extract, 1 teaspoon cinnamon, ¼ teaspoon nutmeg, and a pinch of salt. Add 2 tablespoons of flour to thicken. Beat until smooth, ensuring no lumps remain. The batter should be thick enough to coat the bread without dripping.
- Soak the Bread: Dip each toasted slice into the custard, letting it absorb for 20–30 seconds on each side. The bread should be moist but not soaked through. This step is critical—too little time and the bread will be dry; too much and it will fall apart.
- Heat the Skillet: Melt 2 tablespoons of butter in a large skillet over medium heat. Once the butter foams, reduce the heat to low to prevent burning. This low‑to‑medium setting allows the bread to cook evenly and develop a golden crust.
- Cook the First Side: Place the soaked slices in the skillet, cooking for 3–4 minutes until golden brown. The edges should pull away slightly from the pan, indicating a crisp crust. Flip carefully to avoid tearing.
- Cook the Second Side: Cook the other side for another 3–4 minutes. The interior should be warm and the custard should have set. If you like a slightly darker crust, increase the heat for the last 30 seconds.
- Add Orange Zest: While the final side cooks, sprinkle a light dusting of fresh orange zest over the toast. The citrus will steam slightly, releasing its aroma and adding a bright contrast to the richness.
- Finish with Maple Drizzle: Remove the toast from the skillet and arrange on a platter. Drizzle each slice with maple syrup mixed with a pinch of sea salt. Dust with powdered sugar for a sweet finish. Serve immediately while the crust is still crisp.
That's it — you did it. But hold on, I've got a few more tricks that'll take this to another level...
Insider Tricks for Flawless Results
The Temperature Rule Nobody Follows
Many cooks set the skillet to high heat and rush the cooking. The truth is, a lower, steady heat allows the custard to set evenly and the butter to brown without burning. Test the skillet by sprinkling a few drops of water; if they sizzle and evaporate quickly, the temperature is right.
Why Your Nose Knows Best
As the toast cooks, listen for the aroma shift from buttery to caramelized. That sweet scent signals the perfect moment to flip. If you wait too long, the crust will become overly brown and the custard may dry out.
The 5‑Minute Rest That Changes Everything
After cooking, let the toast rest on a wire rack for five minutes. This brief pause lets the steam redistribute, preventing soggy bottoms while keeping the crust crisp. I’ve seen people skip this step and end up with a chewy texture.
Use Fresh Bread for the Best Bite
Even if you’re using pre‑made bread, make sure it’s not stale. Fresh bread absorbs custard more evenly and yields a lighter interior. If you’re using a bakery loaf, consider cutting it into thicker slices for a heartier bite.
Finish with a Sweet‑Savory Splash
A small splash of orange juice or a dash of Grand Marnier in the custard adds depth. The citrus acidity cuts through the richness and gives the toast a bright, celebratory feel.
Creative Twists and Variations
This recipe is a playground. Here are some of my favorite ways to switch things up:
Brioche Bomb
Swap the regular bread for brioche for a richer, buttery bite. The dough’s natural sweetness complements the pumpkin, creating a decadent treat that’s perfect for brunch.
Nutty Crunch
Add toasted pecans or walnuts between the layers of custard before cooking. The crunch adds texture and the nutty flavor pairs wonderfully with the spices.
Maple‑Honey Fusion
Replace maple syrup with honey or a mixture of both for a subtle floral sweetness. Honey’s viscosity also gives the glaze a thicker, more indulgent finish.
Chocolate‑Covered Delight
After cooking, dip the toast in melted dark chocolate and let it set on parchment. The chocolate coating adds a luxurious element that’s sure to impress.
Vegan Variation
Use plant‑based milk, flaxseed eggs, and vegan butter. The result is a completely dairy‑free version that still delivers on flavor and texture.
Spiced Latte Topping
Whisk a shot of espresso with cinnamon and a touch of vanilla, then drizzle over the finished toast. The coffee undertone gives a sophisticated twist that’s ideal for an adult breakfast.
Storing and Bringing It Back to Life
Fridge Storage
Cool the toast completely, then place it in a single layer on a parchment‑lined tray. Cover loosely with foil and store in the refrigerator for up to 3 days. The crust may soften slightly, but it remains delicious.
Freezer Friendly
Wrap each slice individually in plastic wrap, then place them in a freezer bag. They’ll keep for up to 2 months. To reheat, thaw at room temperature for 15 minutes before warming.
Best Reheating Method
Reheat frozen or refrigerated slices in a preheated oven at 350°F for 8–10 minutes. Add a splash of water to the pan before heating to create steam, which restores moisture and crispness. A quick toast in a skillet also works, but be careful not to overcook.