I was in the middle of a midnight snack raid when my roommate dared me to combine three of our most guilty pleasures into one single, unstoppable dessert. I grabbed a jar of peanut butter, a bag of marshmallow fluff, and a half‑eaten block of bittersweet chocolate, and the kitchen instantly turned into a battlefield of aromas and anticipation. The moment the butter hit the pan, it sang a sizzle that sounded like applause, and the chocolate melted into a glossy river that promised pure decadence. I’ll be honest — I ate half the batch before anyone else got a chance to try it, and that’s exactly why I’m shouting this recipe from the rooftops: it’s the ultimate crowd‑pleaser you never knew you needed.
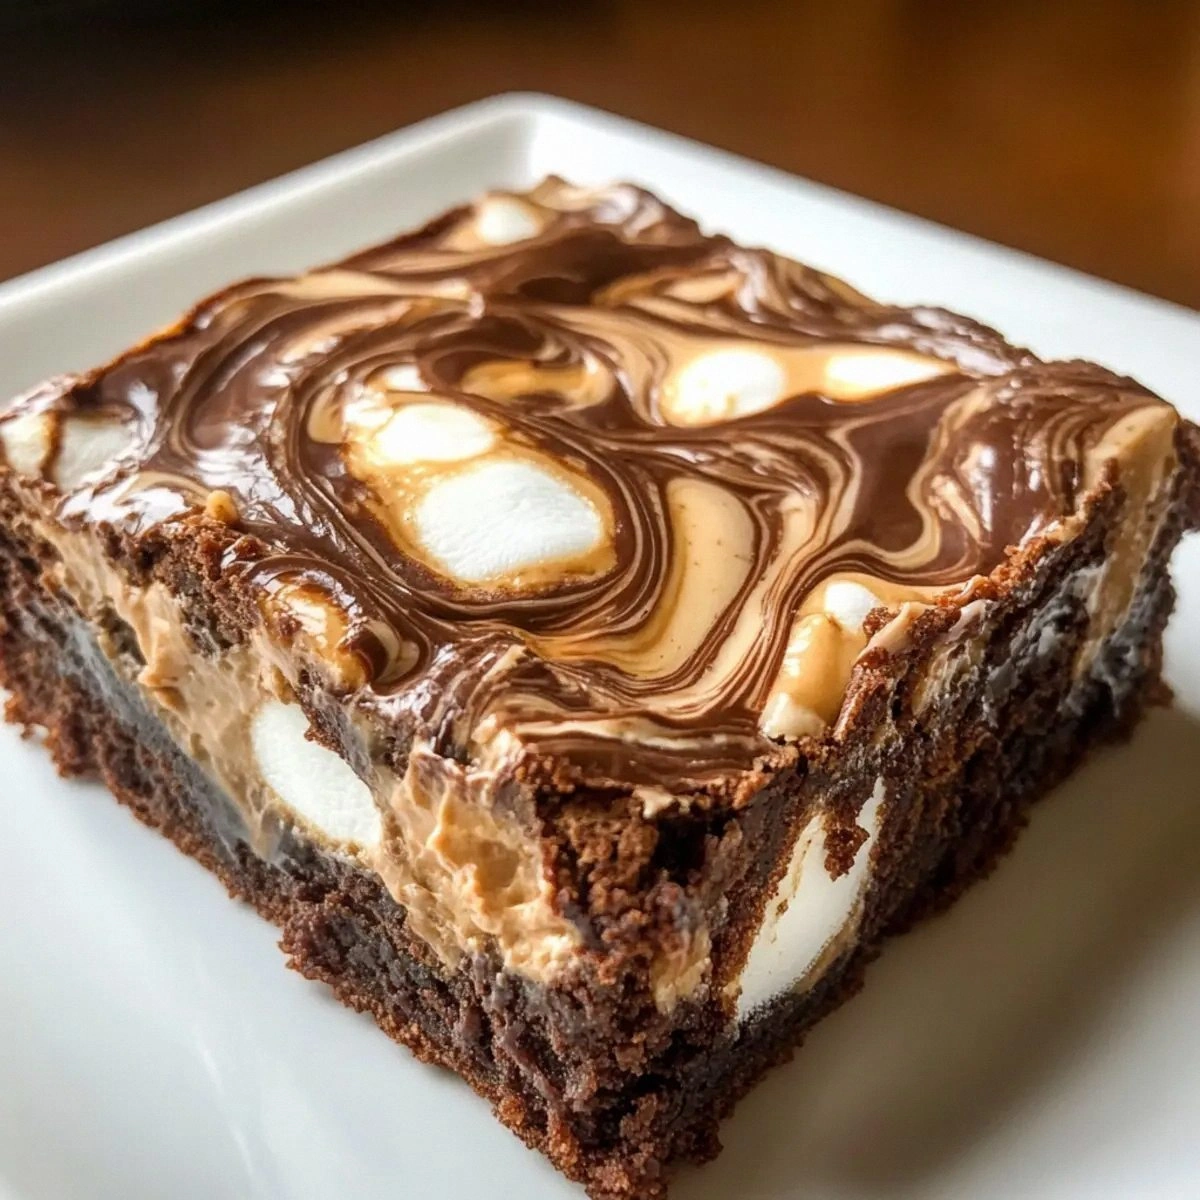
Picture yourself pulling this out of the oven, the whole kitchen smelling like a carnival of roasted peanuts, toasted cocoa, and sweet marshmallow clouds. The top is a glossy, crackly crust that shatters like thin ice when you cut into it, while the interior stays fudgy, chewy, and studded with pockets of fluffy marshmallow that melt in your mouth like a dream. Most recipes get the texture wrong—either too cakey or too dry—but this version hits that perfect balance of dense brownie richness and airy marshmallow lightness. I dare you to taste this and not go back for seconds; it’s hands down the best version you’ll ever make at home.
What truly sets this treat apart is a secret technique I stumbled upon while scrolling through a vintage cookbook: a thin layer of peanut butter‑sugar mixture baked first, then a chocolate‑marshmallow swirl on top. This creates a flavor sandwich that’s both crunchy and melt‑in‑your‑mouth, a contrast most recipes completely miss. The peanut butter adds a salty‑sweet depth that anchors the chocolate, while the marshmallow fluff crowns the whole thing with a cloud‑like finish that’s impossible to resist. If you’ve ever struggled with brownies that turn out dry or overly sweet, you’re not alone — and I’ve got the fix right here.
Okay, ready for the game‑changer? I’m about to walk you through every single step — from selecting the perfect chocolate to mastering the marshmallow swirl — and by the end, you’ll wonder how you ever made brownies any other way. Stay with me here — this is worth it.
What Makes This Version Stand Out
- Texture: A crunchy peanut butter crust meets a fudgy brownie core and a pillowy marshmallow top, creating a triple‑layer experience that’s both satisfying and surprising.
- Flavor Balance: The salty depth of peanut butter perfectly counteracts the bittersweet chocolate, while the marshmallow adds just enough sweetness without overwhelming.
- Simplicity: Only twelve ingredients, all of which you likely have on hand, and no fancy equipment beyond a good mixing bowl and a baking pan.
- Uniqueness: Most brownie recipes either ignore the marshmallow or treat it as a topping; here it’s integrated into the batter for an even distribution of gooey pockets.
- Crowd Reaction: Expect immediate “wow” moments when you cut a slice—people will ask for the recipe before the first bite is even taken.
- Ingredient Quality: Using real butter and high‑quality bittersweet chocolate elevates the flavor profile from “just okay” to “restaurant‑grade.”
- Cooking Method: The two‑stage bake (first the peanut butter base, then the chocolate‑marshmallow layer) guarantees even cooking and prevents sogginess.
- Make‑Ahead Potential: These brownies keep beautifully for up to a week, and they even freeze like a charm for longer storage.
Inside the Ingredient List
The Flavor Base
The duo of creamy peanut butter and powdered sugar creates a smooth, velvety spread that forms the crunchy foundation of our brownies. Peanut butter brings a natural nuttiness and a subtle salty edge that amplifies the chocolate’s bitterness, while powdered sugar dissolves completely, preventing any gritty texture. If you skip the peanut butter, you’ll lose that essential savory‑sweet contrast, and the brownies will feel flat. For a twist, try almond butter for a slightly fruity note, but be sure it’s unsweetened so the balance stays intact.
The Texture Crew
Butter, both in the base and the brownie batter, is the real hero here—its melted form coats the flour and cocoa, creating that tender crumb we all crave. The two types of sugar (granulated and brown) provide structure and moisture; brown sugar adds a hint of molasses that deepens the flavor. Eggs act as the binding agent, giving the brownies their lift without making them cake‑like. If you’re allergic to eggs, a flax‑egg (1 tbsp ground flaxseed + 3 tbsp water) works surprisingly well, though the texture will be a touch denser.
The Unexpected Star
Marshmallow fluff is the surprise guest that turns a regular brownie into a cloud‑kissed masterpiece. Its high sugar content means it melts into pockets of gooey sweetness that contrast beautifully with the salty peanut butter crust. If you can’t find store‑bought fluff, you can whip up a quick version by beating egg whites, sugar, and a splash of vanilla until glossy. Just remember: the fluff must be at room temperature before you fold it in, or it will seize up.
The Final Flourish
All‑purpose flour provides the structural backbone, while Dutch‑process cocoa powder gives a deep, earthy chocolate flavor without acidity. Baking powder adds a gentle lift, ensuring the brownies stay tender rather than dense as a brick. The bittersweet chocolate, melted into the batter, delivers that luxurious richness you associate with premium brownies. If you’re aiming for a darker, more intense chocolate note, increase the chocolate to 10 oz and reduce the cocoa powder by a tablespoon.
Everything's prepped? Good. Let’s get into the real action…
The Method — Step by Step
Preheat your oven to 350°F (175°C) and line a 9×13‑inch baking pan with parchment paper, allowing the edges to hang over for easy removal. While the oven warms, melt ½ cup of unsalted butter and ½ cup of bittersweet chocolate together in a double boiler, stirring until the mixture is glossy and smooth. This glossy base will later coat the brownies, creating that coveted crackly top.
In a medium bowl, whisk together 1 cup of all‑purpose flour, ⅓ cup Dutch‑process cocoa powder, 1 teaspoon baking powder, and ½ teaspoon salt. The cocoa powder should be sifted to avoid lumps; think of it as dusting the batter with a fine veil of chocolate. Set this dry mix aside while you tackle the wet ingredients.
Now for the peanut butter base: combine 1 cup creamy peanut butter, 1 cup powdered sugar, and ½ cup unsalted butter in a large mixing bowl. Beat on medium speed until the mixture is light, fluffy, and just a shade darker than caramel. Pro tip: If the mixture looks too thick, add a splash of milk (no more than 1 tablespoon) to loosen it without diluting the flavor.
Press the peanut butter mixture firmly into the bottom of the prepared pan, creating an even layer about ¼‑inch thick. Bake this crust for 8‑10 minutes, just until it starts to set and a faint golden edge appears. Watch Out: Over‑baking the crust will make it too hard, and the marshmallow won’t be able to seep through later.
While the crust is in the oven, whisk together 3 large eggs, ½ cup granulated sugar, ½ cup brown sugar, ⅓ cup canola oil, and 1 teaspoon vanilla extract in a separate bowl. Beat until the mixture is pale and slightly thickened, which indicates that the sugar has begun to dissolve into the eggs.
Gradually fold the dry flour‑cocoa mixture into the wet egg mixture, stirring just until no streaks remain. Then, gently swirl in the melted chocolate‑butter blend, creating ribbons of chocolate throughout the batter. Finally, fold in 1 cup of marshmallow fluff, being careful not to over‑mix; you want those fluffy pockets to stay intact.
Pour the brownie batter over the pre‑baked peanut butter crust, spreading it gently with a spatula. The batter should sit about ½‑inch above the crust, leaving room for the top to rise. Slide the pan back into the oven and bake for 25‑30 minutes, or until a toothpick inserted into the center comes out with a few moist crumbs but no wet batter. The edges will start pulling away from the pan, and the top will develop a thin, crackly sheen—that’s your cue.
Once cooled, use the overhanging parchment to lift the whole slab onto a cutting board. Slice with a warm, wet knife (dip the blade in hot water, wipe dry, then cut) to achieve clean, glossy edges. Serve warm for maximum gooeyness, or at room temperature for a firmer bite. And now the fun part—watch your friends’ faces light up as they discover the hidden marshmallow core.
That's it — you did it. But hold on, I've got a few more tricks that'll take this to another level...
Insider Tricks for Flawless Results
The Temperature Rule Nobody Follows
Never bake brownies in a cold kitchen; the oven’s ambient temperature can affect how the crust sets. I always let the oven fully preheat for at least 10 minutes, and I keep the door closed until the timer dings. This consistency ensures the peanut butter crust doesn’t become rubbery and the top develops that perfect crackle. A friend once tried baking at 325°F to “slow cook” the brownies and ended up with a soggy mess—don’t make that mistake.
Why Your Nose Knows Best
The moment you smell that toasty, nutty aroma wafting from the oven, the brownies are almost done. Trust your nose more than the clock; if the scent turns caramel‑sweet, pull them out a minute early to keep the interior fudgy. Overbaking is the most common cause of dry brownies, and it’s easy to avoid if you stay alert to that buttery perfume.
The 5‑Minute Rest That Changes Everything
After removing the pan from the oven, let the brownies rest for exactly five minutes before cutting. This short pause lets the marshmallow fluff settle and the crumb structure tighten, resulting in cleaner slices. Skipping this step leads to a “melted” mess where the fluff oozes everywhere. I’ve seen novices rush to plate and end up with a sticky disaster—patience truly pays off.
The Butter‑Chocolate Emulsion Secret
When melting chocolate with butter, use a double boiler rather than a microwave. The gentle heat prevents scorching, and the butter emulsifies with the chocolate, creating a silky sheen that coats the brownies like a mirror. If you ever notice grainy spots, you’ve likely overheated the chocolate; simply stir in a teaspoon of hot water to bring it back to gloss.
The “Double‑Layer” Cooling Trick
Place the baked pan on a wire rack, then set a second rack upside down on top of the pan. This creates an air gap that allows steam to escape evenly, preventing a soggy bottom. It’s a tiny adjustment that makes a massive difference in texture, especially when you’re aiming for that crisp‑edge, soft‑center contrast.
Creative Twists and Variations
This recipe is a playground. Here are some of my favorite ways to switch things up:
Salted Caramel Swirl
Swap half of the marshmallow fluff for a thick caramel sauce, then drizzle a pinch of flaky sea salt over the top before baking. The caramel adds a buttery richness that pairs beautifully with the peanut butter, while the salt amplifies every flavor note.
Espresso Infusion
Add 1 tablespoon of finely ground espresso to the dry cocoa‑flour mix. The coffee deepens the chocolate’s bitterness and gives the brownies a subtle mocha undertone—perfect for brunch or an after‑dinner pick‑me‑up.
Nutty Crunch
Fold in ½ cup of toasted, chopped peanuts or hazelnuts just before spreading the batter. The added crunch provides textural contrast, and the nutty aroma makes the brownies smell even more inviting.
White Chocolate & Raspberry
Replace the bittersweet chocolate with 8 oz white chocolate and swirl in ¼ cup of raspberry puree. The bright fruit tang cuts through the richness, creating a sophisticated flavor profile that’s great for special occasions.
Vegan Version
Swap the butter for coconut oil, use flax‑egg replacer (1 tbsp ground flaxseed + 3 tbsp water per egg), and choose a dairy‑free chocolate. The result is a plant‑based treat that still delivers that iconic texture and flavor punch.
Storing and Bringing It Back to Life
Fridge Storage
Place the cooled brownies in an airtight container and store them in the refrigerator for up to five days. The cool environment keeps the marshmallow fluff from becoming overly sticky, and the brownies retain their fudgy interior.
Freezer Friendly
Wrap the entire slab tightly in plastic wrap, then add a layer of foil before placing it in a freezer‑safe bag. They’ll stay fresh for up to three months. When you’re ready to enjoy, let them thaw in the fridge overnight, then bring them to room temperature for the best texture.
Best Reheating Method
To revive that fresh‑out‑of‑the‑oven melt, microwave a single slice for 10‑15 seconds, but first sprinkle a tiny splash of water (about a teaspoon) over the top. The steam generated re‑hydrates the marshmallow fluff and restores the glossy crust without drying out the interior.