Picture this: it's July and the air conditioning just gave up the ghost. You're standing in your kitchen, sweat dripping down your back, and the last thing you want to do is turn on the oven. But you've got a dinner party in three hours and promised to bring dessert. Your guests are expecting something spectacular, something that'll make them forget the sweltering heat outside. That's exactly where I found myself last summer, frantically scrolling through my grandmother's recipe cards while my shirt stuck to me like plastic wrap. Most of her desserts required baking, beating, and generally heating up my already-sauna of a kitchen. But then I spotted it — her lemon icebox pie recipe, written in her spidery handwriting on an index card stained with what I can only assume were decades of kitchen adventures. The note at the bottom said "Perfect for hot days — no oven required!" I nearly cried with relief.
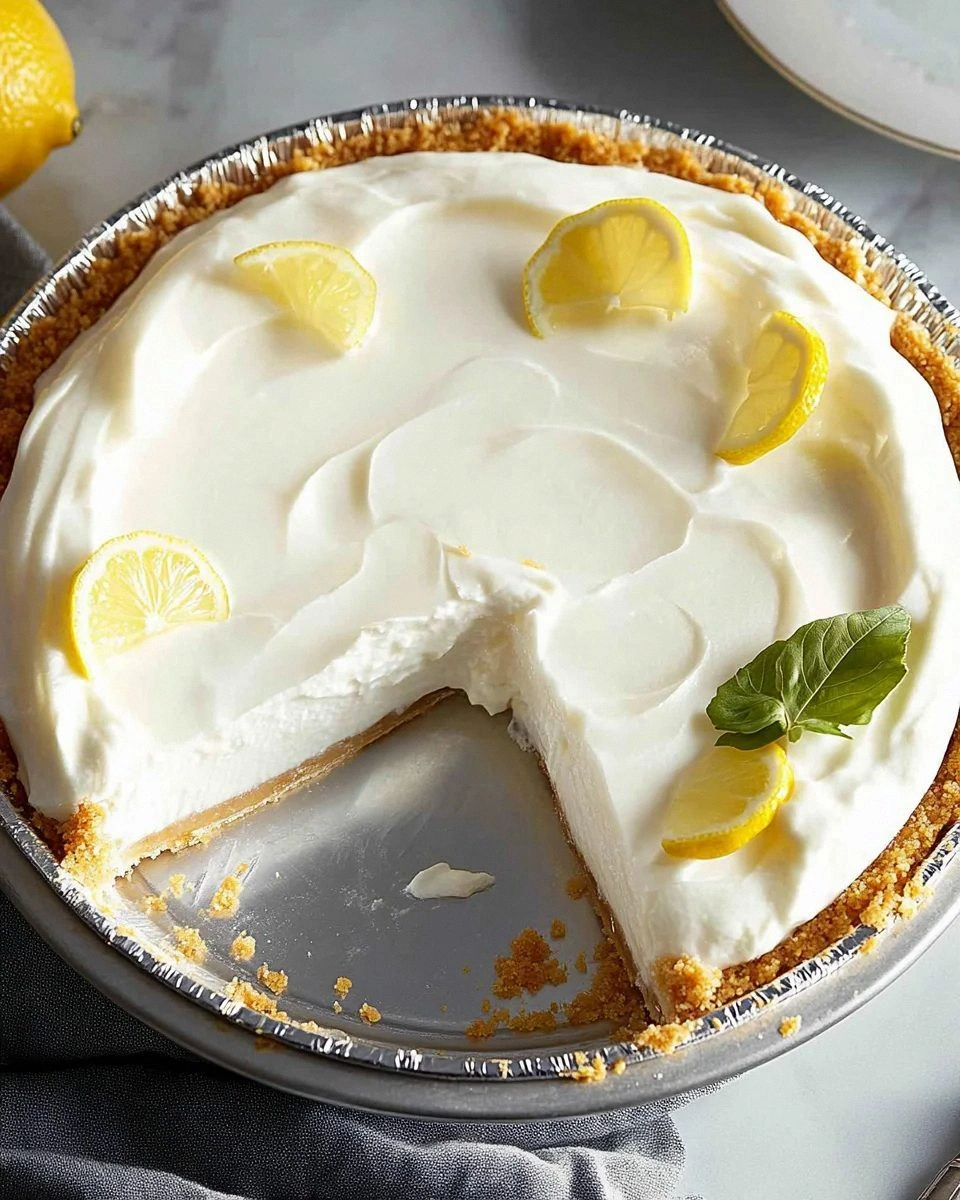
What happened next changed my summer dessert game forever. This wasn't just any lemon icebox pie — this was the kind of dessert that makes people close their eyes and sigh with the first bite. The filling was silkier than a luxury bedsheet, tart enough to make your lips pucker just right, and sweet enough to feel like pure sunshine. The graham cracker crust held together like a dream, buttery and crisp against the cloud-like filling. But here's the real kicker — I made the whole thing in fifteen minutes flat, popped it in the freezer, and by the time my guests arrived, it was perfectly chilled and ready to steal the show. They raved about it all evening, begged for the recipe, and one friend actually offered to pay me to make one for her birthday party the following week.
Now, I've made this pie at least twenty times since that fateful day, tweaking and perfecting every element. I've discovered the exact ratio of lemon juice to condensed milk that creates the perfect balance of sweet and tart. I've figured out the precise temperature for whipping cream that gives you peaks so stiff they could hold up a small child. I've even unlocked the secret to preventing that dreaded watery layer that ruins so many no-bake pies. This version I'm about to share with you? It's hands down the best lemon icebox pie you'll ever make at home, and I dare you to taste it and not go back for seconds. Actually, I dare you to taste it and not eat half the pie before anyone else even knows it exists — I speak from delicious, shameless experience.
Let me walk you through every single step — by the end, you'll wonder how you ever made it any other way. This isn't just a recipe; it's your new secret weapon for dinner parties, potlucks, and those "I need dessert but it's too hot to think" days. Picture yourself pulling this golden beauty out of the fridge, the condensation beading on the pie plate like morning dew, while your guests gather around with forks at the ready. That first slice slides out clean as a whistle, revealing layers of sunshine-yellow filling against the honey-brown crust. The scent of fresh lemon hits their noses, and you haven't even served it yet. Ready for the game-changer?
What Makes This Version Stand Out
Ultra-Smooth Texture: Most lemon icebox pies end up with tiny lumps or a grainy texture that feels like you're eating sweetened sand. Not this one. The filling is so smooth it practically melts on your tongue like lemon-flavored velvet. The secret lies in how we combine the ingredients — no more whisking until your arm falls off or dealing with cream cheese that's still lumpy no matter what you do.
Perfect Sweet-Tart Balance: Too many recipes taste like lemon candy or, worse, like you're sucking on a lemon wedge. This version hits that sweet spot where your taste buds do a happy dance. The tartness makes you pucker just enough to feel alive, while the sweetness rounds everything out so you're not reaching for water between bites.
No-Bake Magic: I cannot stress this enough — you will not turn on your oven. Not even for the crust. The graham cracker base sets up beautifully in the fridge, becoming crisp and buttery without any baking required. In the middle of summer, this is pure kitchen wizardry.
Make-Ahead Champion: This pie actually gets better after a day in the fridge. The flavors meld together like old friends at a reunion party. You can make it up to three days ahead of your event, which means less stress and more time to focus on other things — like what wine pairs with lemon pie (spoiler: it's prosecco).
Ingredient Simplicity: Every single ingredient is something you can find at any grocery store. No specialty items, no obscure extracts, no "where the heck do I find Meyer lemons in February" problems. Just good, honest ingredients that transform into something extraordinary.
Crowd-Pleasing Power: I've served this to kids who hate lemon desserts, adults who claim they don't like sweet things, and that one friend who critiques everything. They all come back for seconds. The pie disappears faster than free samples at Costco, and someone always asks for the recipe.
Alright, let's break down exactly what goes into this masterpiece — because understanding your ingredients is half the battle in creating dessert perfection.
Inside the Ingredient List
The Flavor Base
Fresh lemons are absolutely non-negotiable here — bottled juice will make your pie taste like a cleaning product, and not in a good way. You need the real deal, bright yellow lemons that feel heavy for their size. Those heavy ones are juice bombs, packed with that sunshine flavor that makes this pie sing. When you're zesting, only take the bright yellow part — the white pith underneath is bitter enough to ruin your whole dessert. One large lemon typically gives you about 3 tablespoons of juice and 1 tablespoon of zest, which is exactly what we need for this recipe. If you can only find small lemons, grab two just to be safe.
Sweetened condensed milk is the backbone of our filling, providing that luxurious texture and sweetness that makes this pie feel like eating a lemon cloud. Don't you dare try to substitute evaporated milk — they're completely different beasts. The condensed milk has had water removed and sugar added, creating that thick, syrupy consistency that sets up perfectly when chilled. When you're shopping, check the expiration date — older cans can develop a slight metallic taste that'll ruin all your hard work.
The Texture Crew
Cream cheese needs to be at room temperature, and I mean really room temperature. Not "I left it out for twenty minutes while I checked Instagram" room temperature. We're talking soft enough that your finger leaves a deep indent when you press it. Cold cream cheese will give you lumps that no amount of mixing will eliminate, turning your silky filling into cottage cheese. If you're in a rush, cut the block into small cubes and spread them on a plate — they'll soften in about 15 minutes instead of an hour.
Heavy cream should be cold, straight from the fridge. This seems counterintuitive when we want soft cream cheese, but cold cream whips up into those beautiful peaks that lighten our filling. The fat content matters here — look for cream that's at least 36% fat. Anything less won't hold its shape, and your pie will deflate like a sad balloon. When you're whipping, stop as soon as you see soft peaks that curl over when you lift the beaters. Over-whipped cream turns grainy and will make your filling feel like you're eating lemon-flavored butter.
The Unexpected Star
Graham crackers for the crust need to be the regular honey graham variety, not those cinnamon sugar ones that taste like breakfast cereal. You want the neutral honey flavor that lets the lemon shine. When crushing, aim for mostly fine crumbs with a few pea-sized pieces for texture. The butter you mix with these crumbs should be fully melted but not hot — hot butter will make your crumbs greasy and they won't hold together properly. If you're feeling fancy, swap out 2 tablespoons of butter for cream cheese in the crust. It adds a subtle tang that complements the lemon beautifully.
The Final Flourish
Powdered sugar in the whipped cream topping dissolves instantly, preventing that grainy texture you get with granulated sugar. Sift it first to avoid those tiny sugar lumps that feel like sand between your teeth. Vanilla extract might seem odd in a lemon dessert, but just a whisper rounds out the flavors and makes everything taste more complex. Use real vanilla, not the imitation stuff — your taste buds can tell the difference, especially in a dessert with so few ingredients.
Everything's prepped? Good. Let's get into the real action — because this is where the magic happens.
The Method — Step by Step
- Start with your crust because it needs time to firm up while you make the filling. Combine your graham cracker crumbs with the melted butter in a bowl, using a fork to mix until every crumb is coated and the mixture looks like wet sand. Dump this into a 9-inch pie plate and press it firmly into the bottom and up the sides — really pack it in there like you're trying to win a compaction contest. The back of a measuring cup works perfectly for getting those corners tight and even. Slide this into the freezer for 15 minutes while you prep everything else; this no-bake method works because the cold butter firms up and holds everything together.
- In your stand mixer (or with a hand mixer if you're feeling ambitious), beat the cream cheese on medium speed until it's completely smooth and fluffy — this should take about 2 minutes. Scrape down the sides of the bowl at least once because nothing ruins a smooth filling like surprise cream cheese lumps. The mixture should look like clouds at this point, all pale and billowy. If you still see any lumps, keep beating — we're not moving on until this is smoother than a pickup artist's lines.
- Reduce the speed to low and add your sweetened condensed milk in a slow, steady stream. This gradual addition prevents the cream cheese from seizing up and getting grainy — chemistry in action, folks. Once it's all incorporated, bump the speed back up to medium and beat for another minute. The mixture should be thick but pourable, like heavy pancake batter. Stop the mixer and scrape down the bowl again, making sure no cream cheese is hiding in the corners plotting against you.
- Now for the lemon juice — and this is where the magic happens. With the mixer on low, slowly pour in the fresh lemon juice. Watch as the mixture thickens before your eyes, transforming from liquid to almost pudding-like consistency. The acid in the lemon juice reacts with the proteins in the cream cheese and condensed milk, thickening everything up naturally. It's like a science experiment you can eat, and trust me, you'll want to eat all of it.
- Add the lemon zest and vanilla, mixing just until combined. The zest adds those little bursts of lemon oil that make each bite taste like you're biting into sunshine. Don't overmix at this point — you want to distribute the zest evenly without deflating the mixture. Take a quick taste (I won't tell) and adjust if needed — some lemons are more tart than others, and you might want to add a pinch of salt to balance things out.
- In a separate bowl (yes, we're dirtying another dish, but I promise it's worth it), whip your cold heavy cream until soft peaks form. This means when you lift the beaters, the peaks should curl over like they're doing a gentle wave. Add the powdered sugar and continue whipping just until you see stiff peaks — they'll stand up straight but still look glossy and smooth. Over-whipped cream becomes grainy and separates, turning your beautiful filling into a buttery mess.
- Gently fold about one-third of the whipped cream into your lemon mixture to lighten it up. Use a rubber spatula and make figure-eight motions, turning the bowl as you go. This isn't a race — take your time and be gentle. Once incorporated, fold in the remaining whipped cream in two batches. The final mixture should be light and airy, with no streaks of white cream remaining. It should feel like you're folding clouds into sunshine.
- Pour this heavenly mixture into your chilled graham cracker crust, smoothing the top with an offset spatula or the back of a spoon. Give the pie plate a gentle tap on the counter to release any air bubbles that might be hiding inside. Cover loosely with plastic wrap, making sure it doesn't touch the surface of the filling — nobody wants plastic-flavored pie. Into the fridge it goes for at least 4 hours, but overnight is even better. The filling needs time to set up properly, and trust me, the wait is torture but necessary.
- For the topping (which is optional but highly recommended), beat together more heavy cream, powdered sugar, and vanilla until soft peaks form. You want this slightly less stiff than the cream you folded into the filling — it should dollop nicely but still hold its shape. Spread or pipe this over the chilled pie, then add a sprinkle of lemon zest for that "I totally meant to make it look this beautiful" touch. Return to the fridge for another 30 minutes to let everything meld together.
That's it — you did it. But hold on, I've got a few more tricks that'll take this to another level...
Insider Tricks for Flawless Results
The Temperature Rule Nobody Follows
Your cream cheese temperature is make-or-break here, and I learned this the hard way after serving a pie with cream cheese pebbles throughout. The cream cheese should be so soft that when you press it with a spoon, it offers no resistance whatsoever. If you're impatient (and I usually am), cube it and microwave on 50% power for 10-second bursts, turning between each burst. But here's the real secret — once it's soft, let it sit for another 5 minutes. This extra time allows the very center to soften completely, eliminating any surprise cold spots that'll ruin your smooth filling.
Why Your Nose Knows Best
Fresh lemons make all the difference, and your nose is the best tool for picking winners at the store. Pick up the lemon and scratch the skin with your fingernail — you should immediately smell bright, citrusy oil. If you don't smell anything, put it back. The lemon should feel heavy for its size and have smooth, thin skin. Thick-skinned lemons are older and drier inside, giving you less juice and zest. And please, for the love of all things citrus, don't use those sad, dried-out lemons that have been rolling around in your fridge for weeks. They taste like disappointment and will ruin your pie.
The 5-Minute Rest That Changes Everything
After you fold in the whipped cream, let the filling rest for exactly 5 minutes before pouring it into the crust. This brief pause allows the air bubbles to rise to the surface and pop, preventing those annoying holes that appear when you slice the pie. During this time, the filling will thicken slightly, making it easier to spread evenly. Use these 5 minutes to clean up your workspace or lick the beaters — I won't judge. When you do pour it in, work from the center outward, letting the filling find its own level. Resist the urge to over-smooth the top — a few gentle swirls with your spatula are all you need.
The Freezer vs Fridge Debate
While this is called an "icebox" pie, don't actually freeze it solid. The ideal temperature is between 35-38°F, which means your refrigerator is perfect. Freezing makes the filling too hard to slice cleanly, and you'll end up with cracked pieces that look like a dessert crime scene. However, if your fridge runs warm or you're making this in summer, 30 minutes in the freezer right before serving can help it slice more cleanly. Just don't forget about it — I once left a pie in the freezer overnight and had to wait two hours for it to thaw enough to cut.
Clean Cuts Every Time
Here's how to get restaurant-quality slices: fill a tall container with hot water and keep it next to your pie. Dip your knife in the hot water, wipe it dry with a paper towel, then cut. The heat helps the knife glide through the filling without dragging or tearing. Between each cut, clean and reheat the knife. Yes, it's a bit fussy, but the results are worth it. You'll get perfect wedges that show off those beautiful layers — crust, filling, and topping all distinct and gorgeous. A friend tried skipping this step once — let's just say it didn't end well, and she ended up serving "rustic lemon crumble" instead of pie.
Creative Twists and Variations
This recipe is a playground. Here are some of my favorite ways to switch things up:
Lime-Coconut Paradise
Swap the lemon juice and zest for an equal amount of lime, then fold 1/2 cup of toasted coconut into the filling before pouring it into the crust. Top with sweetened whipped cream and a sprinkle of more toasted coconut. This version tastes like a tropical vacation in pie form — bright, refreshing, and somehow even more perfect for summer. The coconut adds texture and a subtle nuttiness that plays beautifully against the tart lime.
Raspberry Swirl Dream
Before adding the filling to the crust, dollop 1/3 cup of seedless raspberry jam randomly over the bottom. Pour the lemon filling over top, then use a skewer to swirl the jam up through the filling in figure-eight patterns. The raspberry adds a gorgeous magenta swirl and a berry note that makes the lemon taste even brighter. Kids go absolutely wild for this version, and it looks like you spent hours on the presentation.
Key West Inspired
Use a combination of lime and lemon juice (2 tablespoons lime, 1 tablespoon lemon) and add the zest of both. Mix 2 tablespoons of cream of coconut into the filling for that authentic key lime pie flavor. For the crust, replace 1/4 cup of the graham crackers with crushed vanilla wafers. Top with a dollop of lightly sweetened whipped cream and a tiny mint leaf for that "I just stepped out of a Florida restaurant" vibe.
Strawberry Lemon Cloud
Fold 1/2 cup of finely diced fresh strawberries into the finished filling just before pouring it into the crust. The berries add little pockets of sweetness and a beautiful pink confetti throughout the pie. You could also puree a handful of strawberries and swirl it through the filling for a marbled effect. This is my go-to for spring brunches — it looks like Easter on a plate and tastes like strawberry lemonade in pie form.
Adult-Only Limoncello Version
Replace 1 tablespoon of the lemon juice with Limoncello liqueur for a grown-up twist. The alcohol doesn't cook off since there's no baking, so this one's strictly for the 21+ crowd. The Limoncello adds depth and a subtle boozy note that makes this perfect for dinner parties. You could also brush a little Limoncello over the crust before adding the filling — it soaks in and adds an extra layer of lemon flavor that'll make your guests wonder what your secret is.
Ginger Snap Crust Surprise
Replace the graham crackers with crushed ginger snaps for a spicy kick that complements the lemon beautifully. The ginger adds warmth and complexity, making this feel more sophisticated than the original. I like to add 1/4 teaspoon of ground ginger to the filling too, just to echo the crust flavor. This version is especially good around the holidays — it tastes like Christmas and summer had a delicious baby.
Storing and Bringing It Back to Life
Fridge Storage
Wrap the pie tightly in plastic wrap, pressing the wrap directly against the surface if you haven't topped it with whipped cream yet. This prevents the filling from forming a skin that turns rubbery and unappetizing. Stored this way, the pie will keep for up to 5 days, though I doubt it'll last that long. If you've already added the whipped cream topping, use toothpicks to create a tent with the plastic wrap so it doesn't touch the cream and create bald spots. The pie will taste best within the first 3 days, when the crust is still crisp and the flavors are bright and fresh.
Freezer Friendly (Sort Of)
While I don't recommend freezing the finished pie, you can freeze the unfilled crust for up to a month. Wrap it tightly in plastic wrap, then aluminum foil, and label it so you don't forget what it is. When you're ready to use it, let it thaw in the fridge for about 30 minutes before adding the filling. The filling itself doesn't freeze well — the cream cheese becomes grainy and watery when thawed, and the whipped cream deflates into a sad, separated mess. If you must freeze leftover pie (though I can't imagine why you'd have leftovers), wrap individual slices tightly and eat them semi-frozen, like lemon ice cream pie.
Best Reheating Method
Here's the beautiful thing — you don't reheat this pie. In fact, you want to keep it as cold as possible right up until serving. If it's been sitting out during dinner, pop it back in the freezer for 10-15 minutes before slicing. This firms everything up and makes cutting cleaner. If you've added fresh fruit as a garnish, add it right before serving so it doesn't weep and make the topping soggy. For the crispiest crust, serve the pie on chilled plates — they keep everything cold longer and add that extra touch that makes you look like a dessert professional.