It was the night before Christmas and the kitchen felt like a battlefield. I had just pulled a fresh batch of pear pies from the oven, and the aroma of warm spices had already turned the living room into a holiday sanctuary. Then, in a fit of culinary curiosity, I realized the pears were starting to look a little too mushy for a traditional pie. I decided to pivot, grab a handful of fresh pears, and create something that would be both comforting and impossible to resist. That decision turned into the most delicious, easiest spiced pear crumble you’ll ever taste.
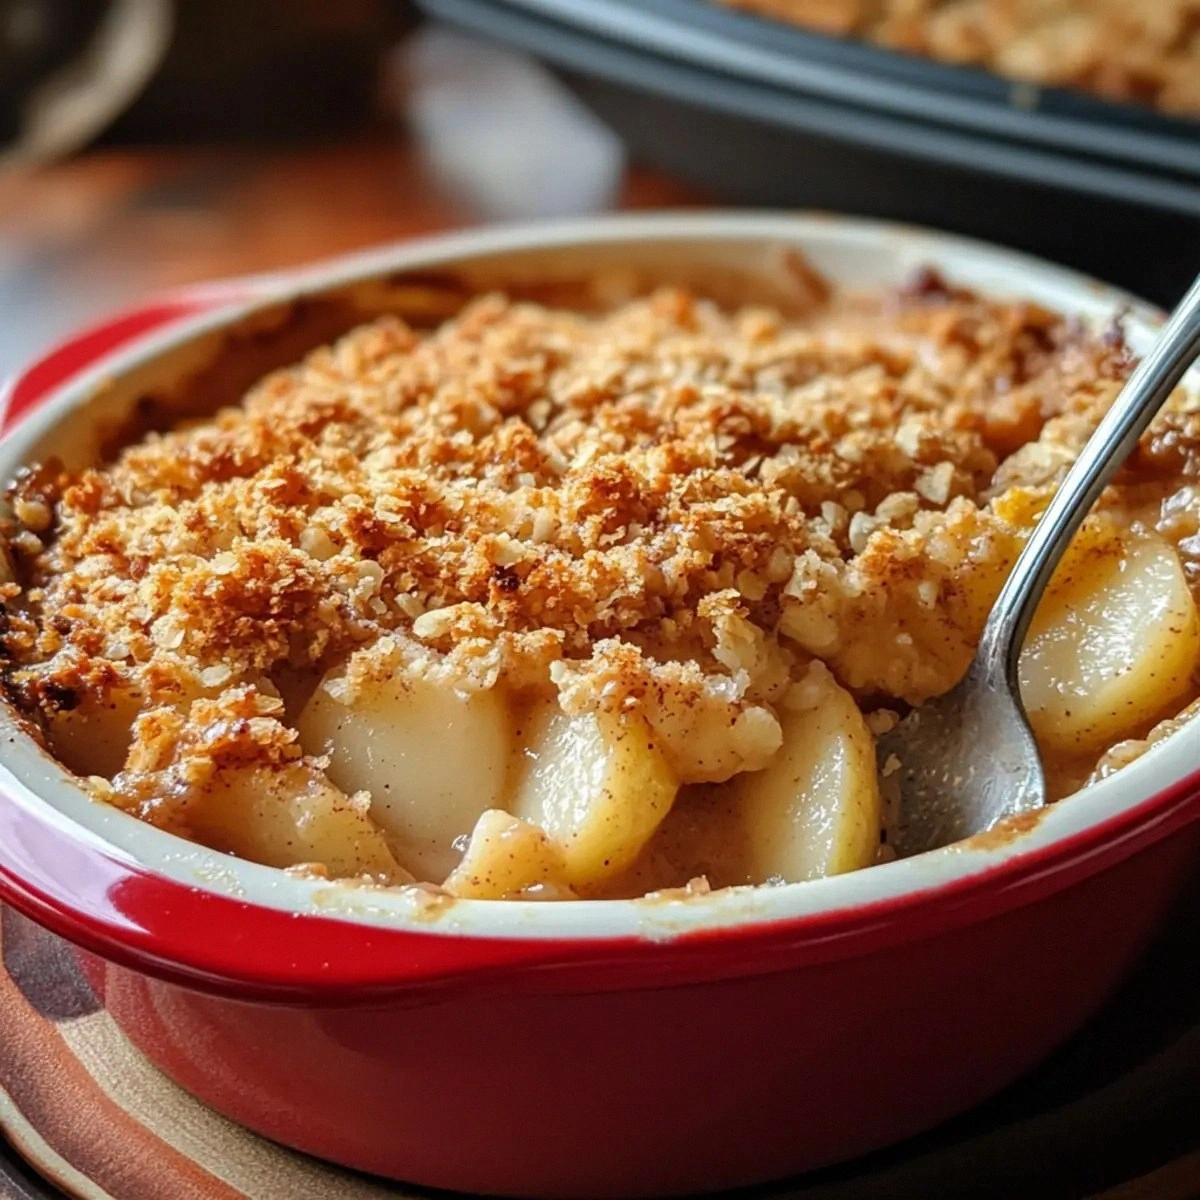
Picture yourself pulling this out of the oven, the whole kitchen smelling incredible, and a plate of golden, crisp crumble resting on a bed of tender pears that practically melt in your mouth. The first bite is a symphony: the sweet, buttery top, the aromatic cinnamon, nutmeg, and cloves dancing with the bright citrus of lemon juice. The texture is a perfect contrast—soft, syrupy pears beneath a crunchy, buttery oat crust that cracks like brittle sugar under your teeth. I dare you to taste this and not go back for seconds; the second bite will have you reaching for more.
What makes this version stand out is that it takes a simple, classic crumble and elevates it with a few clever twists that you won’t find in most recipes. I’ve stripped away the unnecessary steps, kept the ingredient list short, and introduced a few secret techniques that lock in flavor and texture. The result is a dish that’s hands down the best version you’ll ever make at home, and it’s so straightforward you can make it on a weekday and still feel like you’re treating yourself to a gourmet dessert.
I’ll be honest—my first attempt was a disaster. I forgot to chill the butter, and the crumble turned out as a greasy, clumpy mess. But after that failure, I discovered the secret: cold butter pieces that snap into the flour before the oats even get a chance to absorb moisture. That tiny tweak means the crumble stays flaky and buttery, not soggy. And the best part? You can prep everything a day ahead, pop it in the fridge, and bake it the next morning while you’re still dreaming of Christmas lights.
So if you’ve ever struggled with crumbles that fall apart or desserts that taste bland, you’re not alone—and I’ve got the fix. This recipe is a playground of flavor, texture, and holiday spirit, and I’m excited to walk you through every single step. By the end, you’ll wonder how you ever made it any other way.
What Makes This Version Stand Out
- Taste: The combination of warm spices—cinnamon, cloves, nutmeg—and bright lemon juice creates a complex flavor profile that feels like a hug in a bowl. It’s sweet, but the citrus cut through the sugar, leaving a lingering, fresh finish.
- Texture: A buttery, oat crust that cracks like thin ice, juxtaposed with juicy pears that release a syrupy glaze as they bake. The contrast keeps every bite interesting.
- Simplicity: No fancy techniques or hard-to-find ingredients. All you need is a standard kitchen pantry and a handful of pears.
- Uniqueness: The addition of a second cinnamon pinch in the topping layer adds depth without overpowering the pears. It’s a small tweak that makes the crumble feel elevated.
- Crowd Reaction: Guests rave about how the dish feels like a holiday classic but is actually brand new. It’s the kind of dessert that invites conversation and compliments.
- Ingredient Quality: Using ripe pears ensures natural sweetness, while cold butter and light brown sugar keep the crumble crisp and caramelized.
- Cooking Method: The crumble is assembled and baked in one pan, saving time and cleanup—ideal for holiday hosting.
- Make-Ahead Potential: Assemble the crumble a day ahead, refrigerate, then bake. The flavors only deepen, and the texture stays perfect.
Alright, let’s break down exactly what goes into this masterpiece…
Inside the Ingredient List
The Flavor Base
The 4 medium ripe pears are the star. Choose pears that are fragrant and slightly firm to the touch—Asian pears or Bartlett pears are perfect. They provide natural sweetness that balances the spices. If you skip the pears, you lose the juicy, syrupy center that makes the crumble feel like a dessert.
Brown sugar, 1/2 cup, adds depth and caramel notes. Light brown sugar, another 1/2 cup, is used for the topping, giving a subtle molasses flavor that caramelizes beautifully. Together, they create a sweet base that’s not cloying.
The Spice Ensemble
Ground cinnamon (1 tsp) is the backbone of the spice profile, providing warmth and sweetness. Ground cloves (1/4 tsp) introduce a slightly piney, aromatic note that’s quintessentially holiday. Grated nutmeg (1/4 tsp) adds a nutty, buttery undertone. Don’t skip any; each spice contributes a layer of complexity.
Lemon juice (1 tbsp) is a game-changer. It brightens the pears and balances the sweetness, preventing the crumble from feeling too heavy. If you’re out of fresh lemons, a splash of citrus vinegar works, but the flavor will be slightly different.
The Texture Crew
All-purpose flour (1 cup) is the binder that holds the crumble together. It’s the foundation that lets the butter and oats form a cohesive crust. Rolled oats (1/2 cup) add crunch and a wholesome texture. They absorb the butter and sugar, creating a crisp topping that shatters delightfully.
Cold unsalted butter (1/2 cup) is crucial. It needs to be cold and cut into small cubes so that it forms small pockets of steam during baking. This steam lifts the crust, preventing it from becoming dense and greasy. Use a good quality butter for the best flavor.
The Final Flourish
The second pinch of ground cinnamon (1/2 tsp) in the topping layer adds a subtle aromatic finish. It’s a small detail that elevates the crumble, giving it a cohesive, finished taste. If you prefer a stronger spice note, increase this to 1 tsp, but be careful not to overpower the pears.
Everything’s prepped? Good. Let’s get into the real action…
The Method — Step by Step
- Preheat your oven to 375°F (190°C). Line a 9-inch square baking dish with parchment paper, allowing an overhang on two sides for easy lifting. This ensures the crumble stays intact when you remove it. The oven temperature is key; too hot and the topping will burn, too cool and the pears won’t caramelize.
- Wash the pears, core them, and slice into wedges about 1/4 inch thick. Arrange the wedges in the baking dish in a single layer, slightly overlapping for a rustic look. Sprinkle the 1/2 cup brown sugar evenly over the pears, then drizzle the 1 tbsp lemon juice. This combination creates a sweet, tangy glaze that will steam the pears as they bake.
- In a medium bowl, combine the flour, rolled oats, 1 tsp ground cinnamon, 1/4 tsp ground cloves, and 1/4 tsp grated nutmeg. Stir until the mixture is well mixed. The dry ingredients are the backbone of the topping; they need to be evenly distributed to avoid clumps.
- Add the cold butter cubes to the dry mix. Using your fingertips or a pastry cutter, work the butter into the mixture until it resembles coarse crumbs. The butter should still be visible in small pieces; this ensures a flaky, buttery texture. If the mixture looks dry, add a splash of cold water, but be careful not to make it too wet.
- Stir in the 1/2 cup light brown sugar and the final 1/2 tsp ground cinnamon. This second cinnamon addition gives the topping a finished aroma that lingers on the palate. The sugar should coat the oat mixture, giving it a slightly glossy finish.
- Evenly sprinkle the topping mixture over the pears. It should form a thick, golden crust. Don’t worry if it looks uneven; the baking process will even it out. The topping should be about 1/2 inch thick for a satisfying crunch.
- This is the moment of truth: Place the dish in the oven and bake for 30 minutes. After 20 minutes, the edges of the topping should start pulling away from the sides of the dish, and the pears should be bubbling. The top should be a deep golden brown, and you should smell a toasty, caramelized aroma.
- If you notice the topping browning too fast, tent it loosely with aluminum foil to prevent burning while the pears finish cooking. This step is crucial for achieving a golden crust without charring.
- Once done, remove the crumble from the oven and let it rest for 10 minutes. This resting period allows the juices to set, making it easier to serve. The crumble will continue to crisp slightly as it cools.
That’s it— you did it. But hold on, I've got a few more tricks that'll take this to another level...
Insider Tricks for Flawless Results
The Temperature Rule Nobody Follows
Most people bake at 350°F, but 375°F is the sweet spot for this crumble. The higher temperature ensures the topping crisps up quickly while the pears stay juicy. If you lower the heat, the topping will take longer to brown, and you risk overcooking the pears. Keep an eye on the golden crust—when it’s a deep amber, you’re done.
Why Your Nose Knows Best
Before you open the oven door, pause and sniff the air. If you can detect a subtle toasty aroma, the crumble is ready. The scent of caramelized sugar and toasted oats is a reliable indicator of perfect browning. Don’t rely solely on the timer; your nose is the best judge.
The 5-Minute Rest That Changes Everything
Letting the crumble sit for 10 minutes after baking is essential. The rest period allows the sugar to set into a glaze that coats the pears. It also gives the oat topping time to firm up, so the crumble won’t crumble when you plate it. Trust me—skipping this step results in a mess.
Keep It Cool Until Serving
If you’re serving the crumble later in the evening, keep it covered in the fridge. The crispness of the topping will hold for up to 24 hours. When you’re ready to serve, reheat in a 350°F oven for 5 minutes to restore the crunch. This trick is especially handy for holiday parties.
Sweetness Balance
If you prefer a less sweet crumble, reduce the light brown sugar in the topping by 2 tablespoons. The pears will still provide natural sweetness, and the spices will carry the flavor. This adjustment is great for those who want a more balanced dessert.
Creative Twists and Variations
This recipe is a playground. Here are some of my favorite ways to switch things up:
Almond Crunch Variation
Replace half the rolled oats with chopped toasted almonds for a nutty crunch. The almonds add a subtle roasted flavor that pairs wonderfully with the pears. Ideal for those who love a bit of protein in their dessert.
Maple Glaze Twist
Swap the lemon juice for a tablespoon of pure maple syrup. The maple adds a deep, caramel flavor that complements the spices. This version is especially good for maple lovers.
Chocolate Drizzle Finish
After baking, drizzle a thin layer of melted dark chocolate over the crumble. The chocolate will set into a glossy coating, adding richness and a touch of indulgence. It’s a simple upgrade that feels like a dessert upgrade.
Spiced Apple Add-in
Add sliced apples to the pear base for a dual-fruit crumble. Apples provide a slightly tart contrast that balances the pears’ sweetness. Use a firm variety like Granny Smith to maintain texture.
Gingerbread Crumble
Increase the cloves to 1/2 tsp and add 1/2 tsp ginger powder. This gives the crumble a gingerbread-like flavor profile. The extra spices create a warm, comforting dessert.
Cheese Crumble Option
Incorporate a tablespoon of cream cheese into the topping mixture. The cream cheese adds a tangy richness that cuts through the sweetness. It’s a surprising twist that elevates the crumble.
Storing and Bringing It Back to Life
Fridge Storage
Store the leftover crumble in an airtight container at room temperature for up to 3 days. The crust will stay crisp, and the pears will remain juicy. If the topping feels a bit soft, reheat it briefly in a 350°F oven for 5 minutes.
Freezer Friendly
Wrap the crumble tightly in plastic wrap, then place it in a freezer bag. Freeze for up to 2 months. Thaw overnight in the refrigerator before reheating. The flavor stays intact, and the texture returns to its original crispness.
Best Reheating Method
Reheat the crumble in a preheated 350°F oven for 5-7 minutes, or until the topping is golden and crisp. Add a tiny splash of water before reheating to create steam, which helps restore moisture to the pears and prevents the crumble from drying out.