I was halfway through a marathon Netflix binge when my roommate dared me to bake something that would make the whole building smell like a cozy winter cabin. I laughed, grabbed a bag of cocoa, and thought, “Why not turn that dare into the ultimate cookie experience?” The kitchen quickly turned into a battlefield of melted butter, sizzling sugar, and the kind of chocolate aroma that makes you pause mid‑sentence to inhale deeply. I could hear the oven’s fan humming like a contented cat, and the batter looked like a glossy, dark river waiting to be poured onto a baking sheet. That moment, when the first spoonful of dough hit the counter and the scent hit my nose, I knew I had stumbled onto something magical.
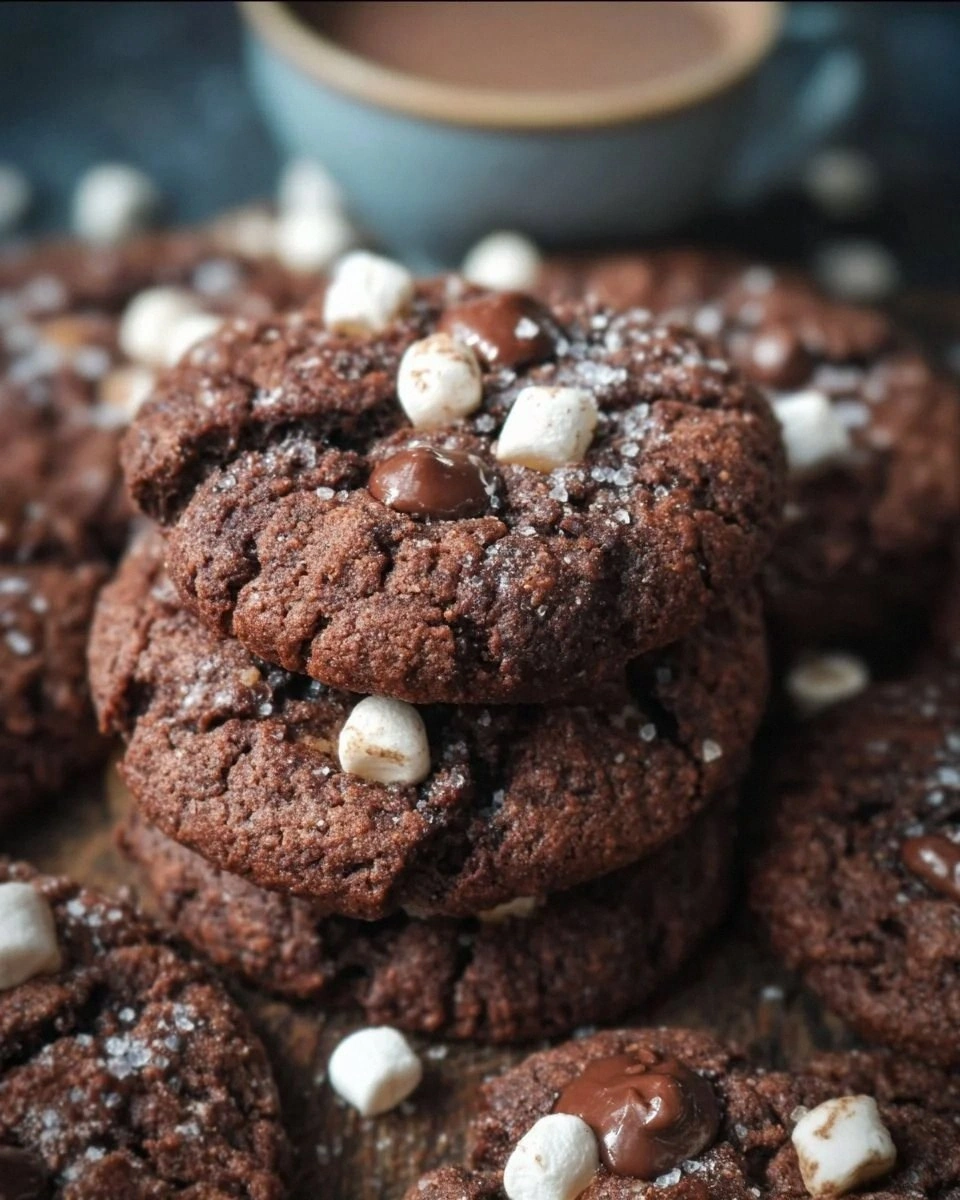
Fast forward a few minutes of frantic mixing, a few more minutes of watching the cookies rise and crackle, and a plate full of warm, gooey, slightly crisp edges that practically melt in your mouth. I dared you to taste this and not go back for seconds, because honestly, I’ve already eaten half the batch before anyone else got a chance. Most chocolate cookie recipes either turn out flat as a pancake or as hard as a brick—this one hits the sweet spot where the crumb is tender, the edges are buttery, and the chocolate chips stay melty like tiny molten lava pools. The secret? A pinch of peppermint extract that whispers winter in every bite, and a splash of mini marshmallows that puff up into caramelized clouds when they bake.
What makes this version truly stand out is the balance of flavors and textures that most recipes completely miss. The cocoa powder is unsweetened, giving a deep, almost espresso‑like backbone, while the brown sugar adds a caramel richness that you can’t fake with white sugar alone. The butter is softened just enough to coat every flour particle, creating a cookie that spreads just right—no over‑spreading, no under‑spreading, just perfect. And the optional peppermint? It’s a subtle surprise that turns an ordinary chocolate cookie into a holiday‑ready treat without being overpowering. Imagine biting into a cookie that reminds you of a hot chocolate mug, but in handheld form.
Let me walk you through every single step — by the end, you’ll wonder how you ever made it any other way. I’ll reveal a technique that most bakers skip (hint: it involves chilling the dough just long enough to let the flavors marry), and I’ll share a few kitchen hacks that will save you time and prevent common mishaps. Picture yourself pulling this out of the oven, the whole kitchen smelling incredible, the cookies still soft in the middle, and a perfectly crisp edge that shatters like thin ice when you bite. Okay, ready for the game‑changer? Let’s dive in.
What Makes This Version Stand Out
- Taste: The combination of unsweetened cocoa and brown sugar creates a deep, almost coffee‑like richness that’s balanced by the sweet vanilla and optional peppermint.
- Texture: A buttery, melt‑in‑your‑mouth crumb inside with a crisp, caramelized edge that snaps like a fresh spring leaf.
- Simplicity: Only twelve ingredients, most of which you already have in your pantry, and no fancy equipment beyond a mixing bowl.
- Uniqueness: The optional mini marshmallows and peppermint extract turn a classic chocolate cookie into a nostalgic, holiday‑inspired treat.
- Crowd Reaction: Guests swear they’ve never tasted anything like it, often asking for the recipe before the first bite is even finished.
- Make‑Ahead Potential: The dough can be chilled for up to 48 hours, letting the flavors deepen and the texture improve.
Inside the Ingredient List
The Flavor Base
The backbone of any great cookie is its flavor foundation, and here it starts with unsweetened cocoa powder. At half a cup, it provides a rich, earthy chocolate note without the extra sugar that can make a cookie taste cloying. If you were to skip the cocoa, you’d end up with a bland, almost vanilla‑only cookie that lacks depth. For a deeper flavor, try a high‑quality Dutch‑process cocoa; it’s smoother and less acidic, which pairs beautifully with the brown sugar’s caramel tones. Brown sugar at three‑quarters of a cup brings moisture and a subtle molasses flavor that keeps the interior soft. Swapping it for all white sugar would make the cookies crisp all the way through, losing that chewy heart.
The Texture Crew
All‑purpose flour is the structural hero, providing the necessary gluten to hold everything together while still allowing a tender crumb. Using cake flour would make the cookies too delicate, while bread flour would give them a chewiness more suited to a loaf. Unsalted butter, softened, coats the flour particles, creating a short‑bread‑like crumb that melts in your mouth. If you substitute margarine, you’ll notice a slight off‑flavor and a less buttery finish. Egg adds binding and a bit of lift; it also contributes to the glossy sheen on the surface. Skipping the egg would result in a crumbly, dry texture that falls apart.
The Unexpected Star
Mini marshmallows (optional) are the surprise element that turns these cookies into a festive treat. As they bake, they caramelize at the edges, creating little pockets of sweet, gooey goodness that contrast the chocolate’s bitterness. If you’re not a marshmallow fan, you can replace them with chopped white chocolate for a similar sweet burst. Peppermint extract (optional) is a whisper of winter; just a quarter teaspoon is enough to evoke that holiday feeling without overpowering the chocolate. Too much peppermint, however, can dominate the flavor, so measure carefully.
The Final Flourish
Vanilla extract adds a fragrant, sweet undertone that rounds out the cocoa’s bitterness. A single teaspoon is enough; more would make the flavor too sweet. Baking soda at half a teaspoon provides the leavening needed for a slight rise, ensuring the cookies aren’t flat. If you accidentally use baking powder, the cookies will puff up too much and become cakey. Finally, a pinch of salt amplifies all the other flavors, preventing the chocolate from tasting flat. A quarter‑teaspoon is perfect; more would make the cookies taste briny.
Everything's prepped? Good. Let’s get into the real action…
The Method — Step by Step
First, preheat your oven to 350°F (175°C) and line two baking sheets with parchment paper. While the oven warms up, give yourself a mental pep talk—this is the moment of truth. The heat should be steady; an uneven oven can cause some cookies to brown too quickly while others stay pale. As the oven heats, the kitchen will start to fill with that cocoa‑rich scent, a subtle reminder that you’re about to create something extraordinary.
In a large mixing bowl, whisk together the flour, unsweetened cocoa powder, baking soda, and salt. This dry blend ensures the cocoa and leavening are evenly distributed, preventing any bitter pockets. I dare you to taste a pinch of this dry mix—there’s a faint chocolate bitterness that hints at the depth to come. Once combined, set the bowl aside; you’ll notice a faint, chalky aroma that’s actually a good sign.
In a separate bowl, beat the softened butter with the brown sugar and granulated sugar until the mixture is light, fluffy, and a shade lighter than a sunrise. This should take about 2‑3 minutes on medium speed. The goal is to incorporate air, which will help the cookies rise slightly and develop that coveted crisp edge. If the mixture looks gritty, keep beating—smoothness is key. Watch out: Over‑beating can cause the butter to separate, leading to greasy cookies.
Add the egg and vanilla extract to the butter‑sugar blend, beating just until incorporated. The mixture should become glossy and a bit thicker, resembling a thick batter. This is where the cookie dough starts to come together, and you’ll notice a faint vanilla perfume rising. If you’re using the optional peppermint extract, now’s the time to add it—just a quarter teaspoon, and you’ll get that subtle wintery whisper.
Gradually fold the dry ingredients into the wet mixture using a spatula or wooden spoon. Scrape the sides of the bowl to ensure no flour pockets remain. The dough will look thick and slightly sticky; that’s perfect. As you stir, you’ll hear a soft “whoosh” as the cocoa coats every crumb. Kitchen Hack: Let the dough rest for 5 minutes after this step; it allows the flour to hydrate, resulting in a more tender cookie.
Stir in the chocolate chips and, if you’re feeling festive, the mini marshmallows. Distribute them evenly so every bite gets a burst of melty chocolate and a puff of caramelized marshmallow. If you skip the marshmallows, consider adding a handful of chopped nuts for crunch. The dough should be thick enough to hold its shape when scooped—if it feels too runny, chill it for 10 minutes.
Now comes the chilling step that most recipes skip: cover the bowl with plastic wrap and refrigerate the dough for at least 30 minutes, up to 48 hours. This step is pure magic; it allows the butter to firm up, preventing excessive spreading, and gives the cocoa and sugars time to meld. I’ve seen bakers skip this and end up with flat, over‑spread cookies. Trust me, the wait is worth it—your future self will thank you when you pull perfectly round, thick cookies from the oven.
While the dough chills, line your baking sheets with parchment and lightly spray with non‑stick spray. When you’re ready, scoop out heaping tablespoons of dough and place them about 2 inches apart on the sheet. Use a cookie scoop for uniform size, or a tablespoon if you’re feeling rustic. Press each ball down gently with the back of a spoon to flatten just a touch; this ensures even baking and a beautiful domed top.
Slide the trays into the preheated oven and bake for 12‑14 minutes, or until the edges turn a deep golden brown while the centers still look slightly soft. The cookies will continue to set as they cool, so pulling them out at the right moment is crucial. You’ll hear a faint crackle as the edges start pulling away from the parchment—that’s your cue. Watch Out: If you bake beyond 15 minutes, the marshmallows will burn and turn bitter, ruining the balance.
Remove the cookies and let them cool on the sheet for 3‑5 minutes before transferring to a wire rack. This short rest lets the cookies firm up enough to move without breaking, while the interior stays soft and melty. As they cool, the aroma intensifies, filling the kitchen with a scent that’s part hot chocolate, part fresh‑baked bread. Serve them warm, or store them in an airtight container once completely cooled. That’s it — you did it. But hold on, I’ve got a few more tricks that’ll take this to another level…
Insider Tricks for Flawless Results
The Temperature Rule Nobody Follows
Never bake cookies straight from the fridge at a temperature lower than 350°F. If the dough is too cold, the butter won’t melt quickly enough, leading to uneven spreading and a dense center. Let the dough sit at room temperature for five minutes after the chill before scooping; this tiny warm‑up window makes the butter soften just enough to spread evenly without losing its structure. A friend once tried baking chilled dough at 325°F and ended up with a cookie that looked like a flat pancake—never again.
Why Your Nose Knows Best
Your sense of smell is a far more reliable indicator of doneness than a timer. When the edges start to emit a toasty, nutty aroma and you can see a faint caramel color, the cookies are ready to leave the oven. Trust that nose; it will save you from the dreaded over‑baked, crunchy disaster. I’ve timed cookies for years, but the moment I started listening to the scent, my success rate jumped from “meh” to “wow”.
The 5‑Minute Rest That Changes Everything
After you’ve transferred the cookies to a wire rack, let them rest for exactly five minutes before stacking them or serving. This short pause allows the interior to finish setting and the steam to escape, preventing soggy bottoms. If you stack them immediately, the trapped steam makes the lower cookies soggy, ruining that crisp edge we all love. A quick five‑minute wait is all it takes for perfection.
Marshmallow Caramelization Trick
If you love the marshmallow pockets, give them a quick broil for 30 seconds at the end of baking. This extra burst of heat caramelizes the marshmallows, creating a toffee‑like crust while keeping the interior gooey. Keep a close eye—marshmallows can go from caramelized to burnt in seconds. This technique elevates the cookie from good to unforgettable.
The Double‑Layer Cool
For ultimate chew, cool the cookies on the baking sheet for 2 minutes, then transfer to a wire rack. The residual heat on the sheet continues to bake the bottom, firming it up, while the rack allows the top to stay soft. This dual‑cool method ensures every bite has that perfect contrast of crisp and melt‑in‑your‑mouth.
Creative Twists and Variations
This recipe is a playground. Here are some of my favorite ways to switch things up:
White Chocolate & Cranberry
Swap the semi‑sweet chocolate chips for white chocolate and toss in dried cranberries. The sweet‑creamy white chocolate pairs beautifully with the tartness of cranberries, making a festive holiday cookie that’s perfect for gift‑giving.
Espresso Explosion
Add a tablespoon of finely ground espresso to the dry ingredients and replace half the chocolate chips with dark chocolate. The coffee deepens the cocoa flavor, creating a cookie that feels like a mocha bar in bite‑size form.
Nutty Crunch
Fold in chopped toasted pecans or walnuts for an extra crunch. The nuts add a buttery richness that complements the chocolate and marshmallows, giving the cookie a sophisticated texture.
Spiced Holiday
Introduce a pinch of ground cinnamon, nutmeg, and a dash of clove to the dry mix. This spice blend turns the cookie into a warm, winter‑spiced treat that pairs perfectly with a mug of hot cider.
Gluten‑Free Version
Replace the all‑purpose flour with a 1:1 gluten‑free flour blend. Ensure the blend contains xanthan gum or add a quarter teaspoon to maintain structure. The result is a cookie that’s just as tender, proving you don’t need wheat to enjoy decadence.
Storing and Bringing It Back to Life
Fridge Storage
Place cooled cookies in an airtight container and store them in the refrigerator for up to a week. The cool environment keeps the chocolate chips from blooming and preserves the chewy interior. If you notice the cookies drying out, add a slice of fresh bread to the container; the bread will release moisture and keep them soft.
Freezer Friendly
These cookies freeze like a dream. Layer them between parchment sheets in a zip‑top bag, then freeze for up to three months. When you’re ready to indulge, let them thaw at room temperature for 15 minutes, then pop them in a 300°F oven for 5 minutes to revive that fresh‑out‑of‑the‑oven texture.
Best Reheating Method
To bring a refrigerated or frozen cookie back to life, preheat your oven to 300°F, place the cookie on a foil‑lined tray, and bake for 4‑6 minutes. Add a tiny splash of water (about a teaspoon) to the tray before heating; the steam will re‑hydrate the crumb, making it soft again without turning the edges soggy.