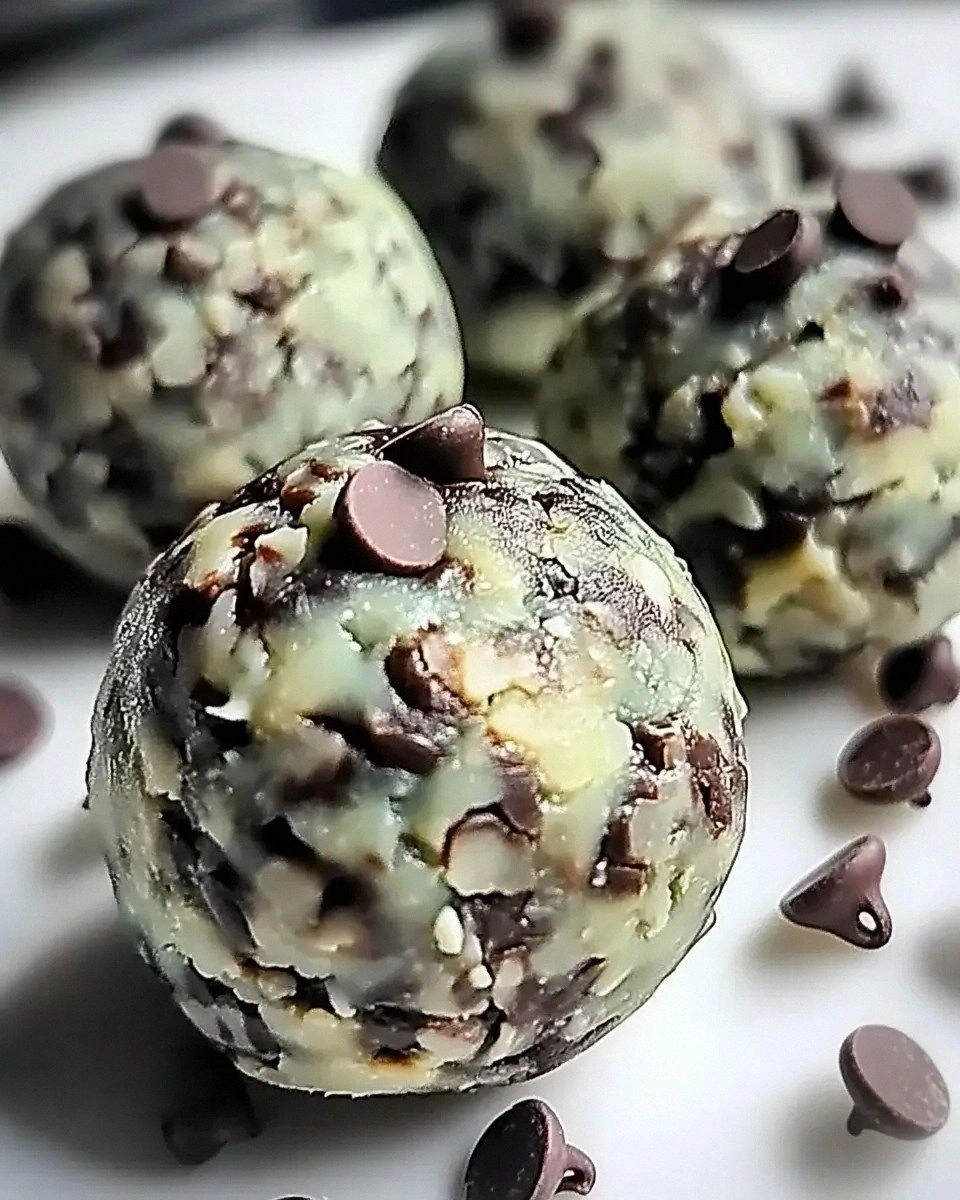
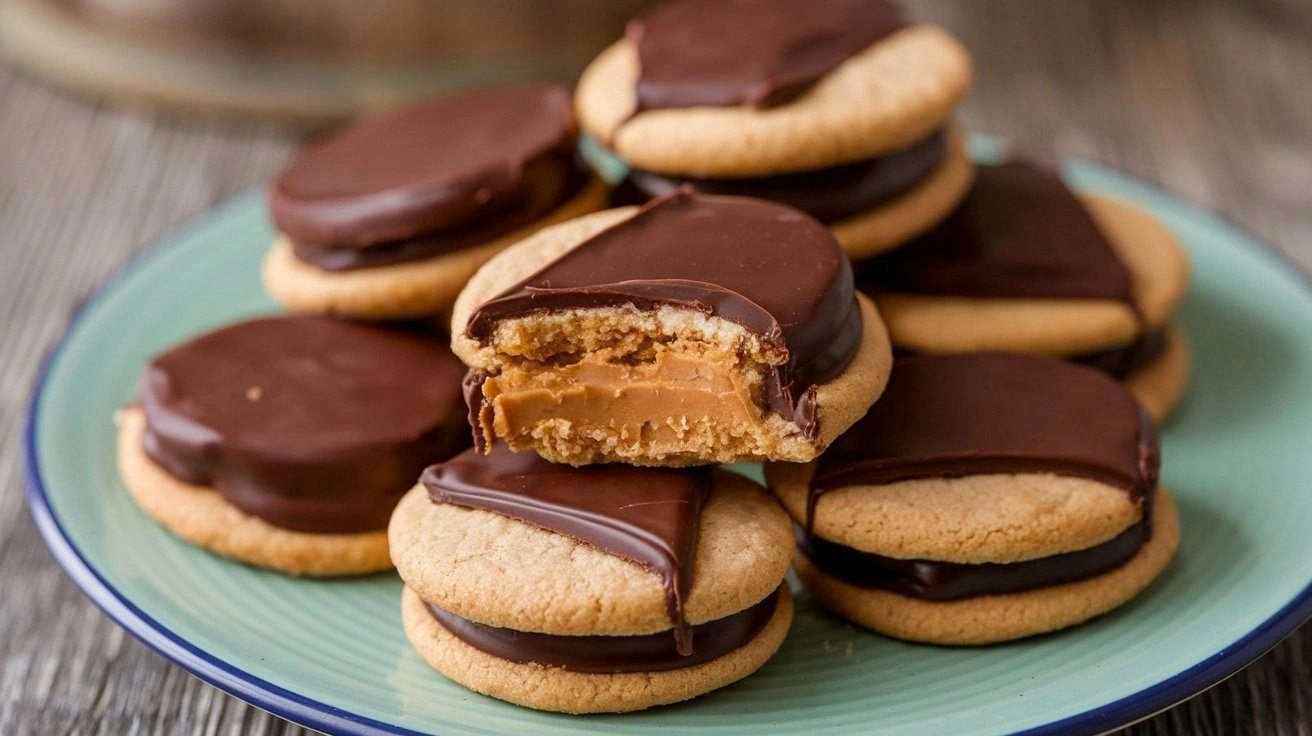
Picture this: you’re standing in a kitchen that smells like burnt sugar, the oven timer blaring like a guilty conscience. You’re craving something sweet, something that feels like a hug in cookie form, but you’re also trying to keep your waistline from doing a dramatic exit. I was staring at a box of Girl Scout Tagalongs that had been left out too long, wondering how to turn that nostalgic treat into a guilt‑free delight. That moment sparked the birth of the Healthy Girl Scout Cookie Taga—a version that delivers all the classic peanut‑butter‑chocolate bliss while keeping the calories in check.
I dare you to taste this and not go back for seconds. The first bite is a symphony of textures: the buttery, slightly crisp edges give way to a chewy center that melts like a secret. The peanut butter flavor is not overpowering; it’s balanced by a hint of vanilla and the subtle sweetness of honey. The chocolate chips are dark, not chocolatey, giving depth without the sugar spike. It’s the kind of cookie that makes you feel like you’re indulging, yet you’re actually nourishing your body.
What sets this version apart is not just the ingredient swap—though we’ve replaced refined flour with a blend of oat and almond flour—but the method. I’ve discovered that the secret to a moist interior lies in the ratio of fats: butter to coconut oil. The coconut oil adds a light, tropical aroma that lingers, while the butter provides the classic mouthfeel. The honey, instead of refined sugar, offers a natural sweetness that’s less jarring on the palate. And the final touch? A dash of sea salt that brings everything together like a conductor leading an orchestra.
If you’ve ever struggled to make a cookie that satisfies your sweet tooth without compromising your health goals, you’re not alone—and I’ve got the fix. Picture yourself pulling this out of the oven, the whole kitchen smelling incredible, and then watching the cookies set into golden perfection. Let me walk you through every single step—by the end, you’ll wonder how you ever made it any other way.
What Makes This Version Stand Out
- Taste: The peanut butter is pure, not processed; it cuts through the sweetness of honey and chocolate for a balanced flavor profile.
- Texture: A buttery exterior with a chewy center—no dry crumb or overly soft cookie.
- Simplicity: Only 12 ingredients, all pantry staples that you can swap for what you have on hand.
- Uniqueness: Uses oat and almond flour to give a nutty undertone and extra fiber.
- Crowd Reaction: Friends who are health‑conscious rave about how “normal” these cookies taste.
- Ingredient Quality: Each component is chosen for its nutritional benefits and flavor synergy.
- Cooking Method: A single‑bake process that maximizes flavor while minimizing effort.
- Make‑Ahead Potential: Cool cookies store well, so you can prep them in advance for a busy week.
Alright, let's break down exactly what goes into this masterpiece…
Inside the Ingredient List
The Flour Blend
The combination of all‑purpose, oat, and almond flour is the backbone of these cookies. The all‑purpose flour gives structure, oat flour adds a gentle sweetness and a chewy bite, while almond flour contributes a subtle nutty aroma and extra protein. Skipping any one of these would alter the texture—remove oat flour and you lose that chewy center; remove almond flour and the cookies become flat.
The Fat Foundation
Butter and coconut oil are the yin and yang of this recipe. Butter delivers that classic, rich mouthfeel, while coconut oil introduces a light, tropical flavor and helps keep the cookies from drying out. If you prefer a dairy‑free version, swap the butter entirely for coconut oil, but expect a slightly different chewiness.
The Sweetener Switch
Honey replaces refined sugar, providing natural sweetness and a subtle floral note. It also brings moisture, ensuring the cookies remain soft. If you’re avoiding honey, a 1:1 ratio of maple syrup works beautifully, though the flavor profile will shift slightly toward maple.
The Peanut Butter Power
Peanut butter isn’t just for flavor; it’s the key to the cookie’s chewy interior. It locks in moisture and adds healthy fats. If you’re allergic, try sunflower seed butter or cashew butter—just make sure it’s unsweetened.
Everything’s prepped? Good. Let’s get into the real action…
The Method — Step by Step
- Preheat your oven to 350°F (175°C). Line a baking sheet with parchment paper or a silicone mat. This step is crucial; an uneven surface can cause uneven baking, and parchment ensures easy cleanup.
- In a medium bowl, whisk together 2 cups all‑purpose flour, 1 cup oat flour, 1/2 cup almond flour, 1 tsp baking soda, 1 tsp baking powder, and 1/2 tsp salt. The dry mix should look slightly dusty, but that’s normal. Keep the flour blend separate from the wet ingredients until you’re ready to combine.
- In a separate large bowl, beat 1/2 cup unsalted butter and 1/4 cup coconut oil with an electric mixer until light and fluffy. Add 1/2 cup honey and 1 tsp vanilla extract, and continue mixing until the mixture is smooth and slightly pale. The mixture should smell buttery and sweet—this aroma signals the fats are well incorporated.
- Gradually fold the dry flour mixture into the wet mixture until just combined. Be careful not to overmix; a few streaks of flour are fine. Overmixing can make the cookies tough.
- Stir in 1 cup peanut butter until fully incorporated. Then fold in 1 cup dark chocolate chips, 1/2 cup shredded coconut, and 1/4 cup chopped walnuts (optional). The chocolate chips should be evenly distributed; this step is the moment of truth, and the cookies will thank you for the effort.
- Drop rounded tablespoons of dough onto the prepared baking sheet, spacing them about 2 inches apart. The dough will spread slightly, so keep an eye on the spacing to avoid overcrowding.
- Remove from the oven and let the cookies cool on the sheet for 5 minutes before transferring them to a wire rack. This short cooling period allows the cookies to set and prevents them from breaking apart.
- Serve immediately or store in an airtight container at room temperature for up to 5 days. For longer storage, place them in the freezer; thaw at room temperature for 30 minutes before serving.
That’s it— you did it. But hold on, I've got a few more tricks that'll take this to another level…
Insider Tricks for Flawless Results
The Temperature Rule Nobody Follows
Baking at 350°F is ideal, but if your oven runs hot, reduce the temperature to 325°F and increase the baking time by 2 minutes. This ensures even browning and prevents the cookies from becoming too crisp on the outside while the inside remains undercooked.
Why Your Nose Knows Best
Trust your sense of smell. When the cookies start to emit a toasty, nutty aroma, it’s a sign that the chocolate is melting just right and the fats are caramelizing. If the smell is too sweet or syrupy, pull them out immediately.
The 5‑Minute Rest That Changes Everything
Letting the cookies rest on the baking sheet for 5 minutes after removal from the oven is not just a habit—it’s essential. This brief pause allows the cookies to set, reducing the risk of cracks and ensuring a chewy center.
Use a Light Touch When Mixing
Once the dry and wet ingredients are combined, stop mixing. A gentle fold preserves the air pockets that give the cookies their lightness. A friend once overmixed her batch and ended up with dense, brick‑like cookies—lesson learned.
Add a Pinch of Sea Salt at the End
Just before baking, sprinkle a light pinch of sea salt over the dough. The salt enhances the chocolate and peanut butter flavors, creating a balanced taste profile that feels indulgent yet refined.
Creative Twists and Variations
Chocolate‑Mint Fusion
Add 1 tsp peppermint extract to the wet mixture and replace half of the chocolate chips with white chocolate chips. This gives a refreshing minty kick that pairs wonderfully with the peanut butter base.
Coconut‑Lemon Burst
Replace the shredded coconut with 1/2 cup desiccated coconut and add zest from one lemon. The citrus brightens the cookie, making it feel lighter and more summery.
Spiced Caramel Swirl
Stir in 1 tsp ground cinnamon and drizzle a thin line of caramel sauce into the dough before baking. The caramel adds a sweet, buttery layer that complements the peanut butter.
Nut‑Free Delight
Omit the walnuts and replace peanut butter with a 1:1 ratio of almond butter. The flavor remains rich, and the texture stays chewy.
Vegan Version
Swap the butter for vegan margarine, use maple syrup instead of honey, and ensure your chocolate chips are dairy‑free. The result is a cookie that’s both plant‑based and delicious.
Protein‑Packed Power
Add 1/2 cup vanilla whey protein powder to the dry mix. This boosts protein content without altering flavor, making it a perfect post‑workout treat.
Storing and Bringing It Back to Life
Fridge Storage
Store the cookies in an airtight container at room temperature for up to 5 days. The sealed environment keeps them fresh and prevents them from drying out. For an extra touch of freshness, add a slice of apple to the container; it helps maintain moisture.
Freezer Friendly
Place the cooled cookies on a parchment‑lined tray, freeze until solid, then transfer to a freezer bag. They can be kept for up to 3 months. When ready to eat, let them thaw at room temperature for 20 minutes.
Best Reheating Method
To revive frozen cookies, preheat the oven to 350°F (175°C) and bake for 5–7 minutes. If you prefer a softer texture, microwave on medium for 10 seconds. Add a tiny splash of water before reheating to steam the cookies back to perfection.