Picture this: it’s a Saturday night, the rain is tapping a lazy rhythm on the windows, and you’ve just burned the last batch of store‑bought chicken nuggets. The kitchen smells like smoke, the kids are whining, and you swear you’ll never attempt fried chicken again. I was there, standing over a blackened pan, feeling the weight of disappointment, when a sudden craving for something crispy, juicy, and downright addictive hit me like a bolt of lightning. I tossed a half‑hearted promise to my family that I’d make something “better” and, armed with a battered old skillet and a stubborn streak, I dove headfirst into the world of buttermilk brining.
The first whiff of the buttermilk soaking the chicken was pure alchemy – a tangy cloud that wrapped each piece like a cool, buttery blanket. As the mixture settled, the kitchen filled with a low, comforting hum, the kind you hear when a secret is about to be revealed. The next day, I experimented with spices, temperature, and timing until the crust formed a golden armor that cracked under the fork with the satisfying snap of thin ice on a winter pond. The meat inside stayed succulent, each bite releasing a burst of flavor that made my taste buds do a little happy dance.
Most fried chicken recipes either drown the meat in a greasy swamp or leave it dry and bland. This version, however, strikes a perfect balance: the buttermilk tenderizes while the spice blend adds depth, and the double‑dredge technique creates a crust that’s both airy and crunchy, like a cloud that refuses to dissolve. The secret? A dash of hot sauce in the brine that sneaks a subtle heat into the marrow, and a brief rest after coating that lets the flour adhere like a second skin. Trust me, I’ve tried the “no‑rest” shortcut – the result was a soggy disappointment that still haunts my dreams.
So, buckle up. I’m about to walk you through every single step – from picking the right chicken pieces to achieving that flawless crunch that makes you want to shout from the rooftop. By the end, you’ll wonder how you ever settled for anything less, and I dare you to taste this and not go back for seconds. Let me walk you through every single step — by the end, you'll wonder how you ever made it any other way.
What Makes This Version Stand Out
- Flavor Explosion: The buttermilk brine, spiked with hot sauce, infuses the meat with a tangy heat that penetrates deep, ensuring every bite bursts with layered taste.
- Crunchy Armor: A double‑dredge of seasoned flour creates a crust that’s feather‑light yet sturdy, cracking like thin ice when you bite in.
- Simplicity Meets Sophistication: Only pantry staples are needed, but the technique feels like a chef’s secret, making it perfect for both novices and seasoned cooks.
- Universal Appeal: Whether you’re feeding picky kids or spice‑loving adults, the balanced heat and crisp texture win over every palate.
- Ingredient Quality: Using fresh, bone‑in chicken pieces ensures juicy meat, while the buttermilk’s acidity tenderizes without over‑cooking.
- Cooking Method Mastery: The oil temperature is kept steady, preventing soggy spots and guaranteeing an even golden hue.
- Make‑Ahead Magic: The brined chicken can sit overnight, letting flavors meld, so you can fry fresh on demand for any gathering.
- Crowd Reaction: Expect a chorus of “more, please!” and the inevitable bragging rights at potlucks – this is hands down the best version you'll ever make at home.
Inside the Ingredient List
The Flavor Base
Buttermilk (2 cups): This tangy dairy product is the hero of the brine, its lactic acid gently breaking down muscle fibers for a melt‑in‑your‑mouth texture. Skipping it means missing out on that subtle creaminess that balances the heat. If you’re dairy‑free, substitute with a mixture of almond milk and a tablespoon of lemon juice, but expect a slightly different tang.
Hot Sauce (2 teaspoons): A modest splash that delivers a whisper of heat, it seeps into the chicken during the soak, ensuring the spice isn’t just surface‑level. You can swap for a few drops of your favorite hot sauce or even a pinch of smoked paprika for a milder profile.
The Texture Crew
All‑purpose Flour (2 cups): The backbone of the crust, flour creates the golden shell once fried. Using cake flour will yield a lighter, airier crunch, while adding a bit of cornstarch can make the coating extra crisp.
Paprika (1 tablespoon): This gives the crust its signature reddish hue and a subtle smoky undertone. For a deeper flavor, try smoked paprika or a blend of sweet and hot varieties.
Garlic Powder & Onion Powder (1 tsp each): These aromatics add depth without the moisture of fresh garlic or onion, keeping the coating dry and crisp.
The Unexpected Star
Black Pepper (½ tsp) & Cayenne Pepper (½ tsp): Together they bring a gentle warmth that builds on the hot sauce, creating a layered heat that doesn’t overwhelm. If you’re sensitive to spice, halve the cayenne; if you love fire, double it and watch the kitchen turn into a flavor fireworks show.
The Final Flourish
Salt (1 tsp): Essential for seasoning the meat and the coating, it amplifies all other flavors. Use kosher salt for better distribution; sea salt can add a slight crunch if sprinkled just before serving.
Chicken Pieces (3 pounds): Bone‑in, skinless cuts (thighs, drumsticks, breasts) provide the juiciest results. The bones retain moisture, while the skin‑less approach lets the crust cling directly to the meat. If you prefer boneless, cut larger pieces into bite‑size nuggets, but expect a slightly faster cooking time.
Vegetable Oil for Frying: A neutral oil with a high smoke point (like canola or peanut) ensures the crust fries at 350°F without burning. Too much oil leads to greasy bites; too little and you’ll get uneven browning.
Everything's prepped? Good. Let's get into the real action...
The Method — Step by Step
Start by gathering your chicken pieces and giving them a quick rinse under cold water. Pat them dry with paper towels – moisture is the enemy of a crisp crust. Place the chicken in a large bowl, then pour in the 2 cups of buttermilk and stir in the 2 teaspoons of hot sauce. Cover the bowl with plastic wrap and refrigerate for at least 2 hours, but for maximum tenderness, let it sit overnight. Pro tip: The longer the brine, the deeper the flavor infusion.
While the chicken marinates, prepare your seasoned flour mixture. In a shallow dish, whisk together 2 cups of all‑purpose flour, 1 tablespoon paprika, 1 teaspoon garlic powder, 1 teaspoon onion powder, 1 teaspoon salt, ½ teaspoon black pepper, and ½ teaspoon cayenne pepper. Watch Out: Over‑mixing can cause the flour to become gummy once it contacts the wet chicken, leading to a soggy crust.
When the brining time is up, remove the chicken and let the excess buttermilk drip off – you want a thin film, not a pool. Dredge each piece in the seasoned flour, pressing gently to ensure the coating adheres. Transfer the coated chicken onto a wire rack set over a baking sheet and let it rest for 10 minutes. This rest period is the game‑changer that locks the crust in place.
Kitchen Hack: Sprinkle a tiny pinch of baking powder into the flour mixture; it creates tiny air pockets that make the crust extra airy.Heat a deep, heavy‑bottomed skillet or Dutch oven with enough vegetable oil to reach a depth of about 1‑1½ inches. Using a thermometer, bring the oil to 350°F (175°C). If you don’t have a thermometer, drop a breadcrumb in – it should sizzle and turn golden within 30 seconds. Maintaining this temperature is crucial; too hot and the crust burns before the meat cooks, too cool and the chicken absorbs oil.
Carefully lower a few pieces of chicken into the hot oil, making sure not to overcrowd the pan. Overcrowding drops the oil temperature dramatically, leading to greasy results. Fry each batch for 6‑8 minutes per side, or until the internal temperature reaches 165°F (74°C) and the crust is a deep, buttery gold. You’ll hear that satisfying sizzle that signals perfection.
Using a slotted spoon, lift the chicken onto a clean wire rack set over a fresh baking sheet. This allows excess oil to drip away, preserving crunch. While the pieces rest, keep the oil at 325°F for the next batch – a slight temperature dip helps maintain an even crust across all pieces.
Once all the chicken is fried, let it sit on the rack for an additional 5 minutes. This final rest lets the juices redistribute, preventing a dry bite. If you’re impatient (like me), resist the urge to dig in immediately – the crust will soften as steam escapes.
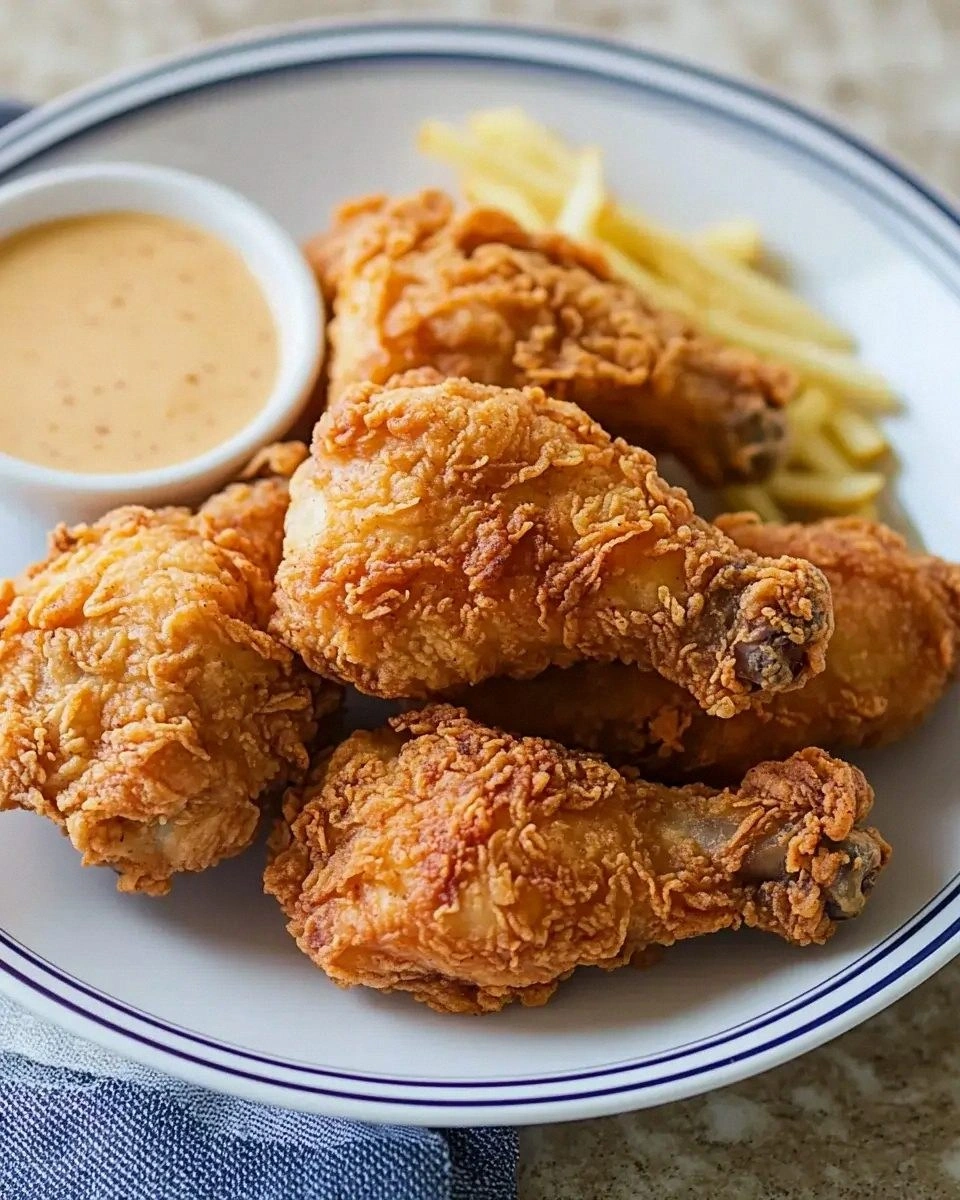
Serve the chicken hot, with a side of buttery biscuits or a crisp coleslaw. The aroma that fills the kitchen at this moment is pure comfort – a scent that says “home” louder than any word. And remember, I’ll be honest — I ate half the batch before anyone else got to try it, because it was that good.
That's it — you did it. But hold on, I've got a few more tricks that'll take this to another level...
Insider Tricks for Flawless Results
The Temperature Rule Nobody Follows
Most home cooks set the oil and then forget about it, letting it fluctuate wildly. Keep a deep‑fat thermometer handy and adjust the burner every few minutes to stay within 350‑360°F. The difference between a perfectly crisp crust and a greasy mess is often just 10 degrees.
Why Your Nose Knows Best
Before you flip the chicken, trust your sense of smell. When the oil begins to emit a faint nutty aroma, that’s the cue that the crust is forming. If you smell burnt sugar, you’ve overshot the temperature – pull the pieces out and let the oil cool a bit.
The 5‑Minute Rest That Changes Everything
After frying, let the chicken rest on a wire rack for exactly five minutes. This short pause allows the steam trapped inside the meat to escape, preventing soggy interiors. I once skipped this step in a rush; the result was a soggy middle that made me question my life choices.
Seasoning the Oil – A Secret Weapon
Throw a sprig of rosemary or a few garlic cloves into the oil while it heats. They infuse a subtle background flavor that makes the crust taste richer without overpowering the spice blend. Just remember to fish them out before the first batch hits the pan.
Double Dredge, Double Delight
For an ultra‑light crust, dip the chicken back into the buttermilk after the first flour coating, then roll it in the flour again. This creates a micro‑layer that puffs up when fried, delivering a texture that’s almost like a savory doughnut.
Creative Twists and Variations
This recipe is a playground. Here are some of my favorite ways to switch things up:
Spicy Korean Gochujang Glaze
After frying, brush each piece with a mixture of gochujang, honey, and a splash of rice vinegar. The glaze adds a sticky, sweet‑heat layer that pairs beautifully with the crisp crust.
Herb‑Infused Parmesan Crust
Mix grated Parmesan, dried oregano, and thyme into the flour blend. The cheese melts slightly during frying, giving the crust a nutty depth that’s perfect for a Mediterranean twist.
Southern Sweet Tea Brine
Replace half of the buttermilk with chilled sweet tea and add a pinch of brown sugar to the brine. The subtle sweetness balances the heat and adds a nostalgic Southern flavor.
Garlic‑Lemon Zest Finish
Once the chicken is out of the oil, toss it with minced garlic and fresh lemon zest. The bright citrus lifts the richness, while the garlic adds an aromatic punch.
Plant‑Based Crunch
Swap the chicken for cauliflower florets, using the same brine and coating. Fry until golden, and you’ve got a vegetarian crowd‑pleaser that still delivers that coveted crunch.
Storing and Bringing It Back to Life
Fridge Storage
Allow the fried chicken to cool to room temperature, then place it in an airtight container lined with paper towels to absorb excess oil. It will keep fresh for up to 3 days in the refrigerator. When ready to eat, reheat in a preheated 375°F oven for 10‑12 minutes.
Freezer Friendly
Wrap each piece tightly in parchment paper, then seal them in a freezer‑grade zip bag. The chicken freezes beautifully for up to 2 months. To revive, bake straight from frozen at 400°F for 20‑25 minutes, adding a splash of water to the pan to create steam that restores moisture.
Best Reheating Method
For ultimate crispness, use a wire rack on a baking sheet and heat in a 425°F oven for 8‑10 minutes. Add a tiny splash of water to the bottom of the pan; the steam will prevent the crust from drying out while the high heat revives the crunch.