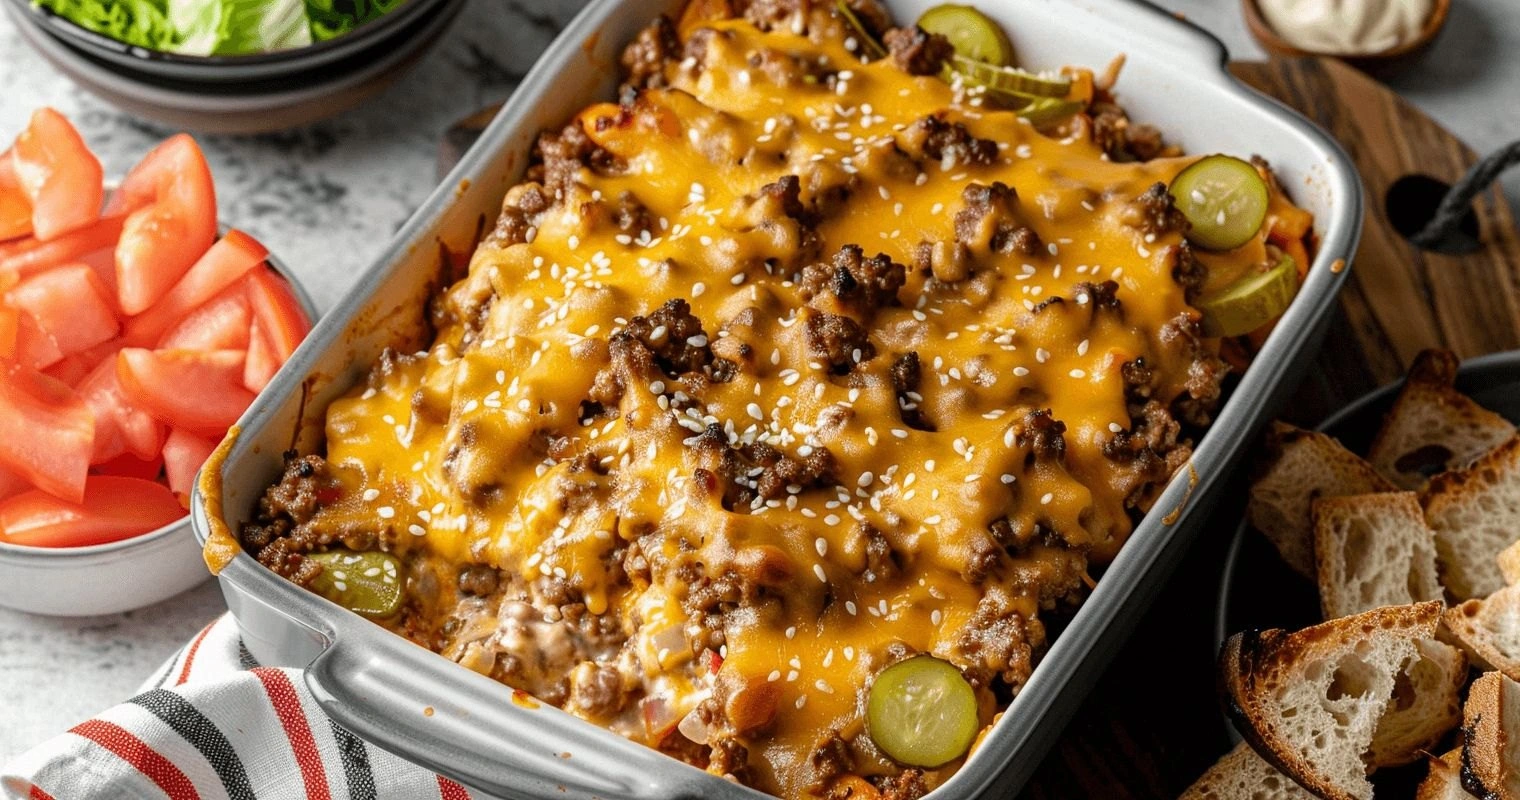
Picture this: It's 11:30 PM on a Tuesday, I'm standing in my kitchen wearing mismatched socks and my "Kiss the Cook" apron that's seen better days. My stomach is growling louder than my neighbor's Chihuahua, and all I can think about is that perfect combination of beefy, cheesy, pickle-y goodness that makes a Big Mac so ridiculously addictive. But here's the thing — I don't want to put on real pants and drive to the golden arches. I want something that tastes like that iconic burger but feels like a warm hug from the inside out. That's when lightning struck my food-obsessed brain: what if I could capture everything I love about a Big Mac and turn it into a casserole that would make even the most devoted drive-thru enthusiast weep with joy?
Now, before you roll your eyes and mutter "not another copycat recipe," let me stop you right there. This isn't some sad attempt to recreate fast food in your kitchen that leaves you feeling vaguely disappointed and wondering why you didn't just make the trip. No, my friend, this is something far more magical. We're talking about a casserole that layers all those familiar flavors — the savory beef, the tangy special sauce, the crunch of lettuce and pickles — into a dish that's greater than the sum of its parts. It's like someone took everything you love about that burger, amplified it by ten, and wrapped it in a cozy blanket of melted cheese and golden potatoes.
I know what you're thinking because I thought it too: "Can a casserole really capture the essence of America's most famous burger?" The answer is a resounding yes, but only if you do it right. Most recipes I've seen online completely miss the mark — they either drown everything in ketchup (gag) or they skip the special sauce entirely (blasphemy!). After three months of testing, tweaking, and taste-testing until my family staged an intervention, I've cracked the code. The secret lies in understanding that we're not just copying a burger here; we're translating it into a completely different form while maintaining its soul.
Okay, ready for the game-changer? The magic happens when you build layers of flavor that echo each component of the original burger, but in ways that make sense for a casserole. We're creating a symphony where each ingredient plays its part perfectly — the beef gets seasoned with a special blend that mimics that distinctive taste, the sauce gets transformed into a creamy, dreamy layer that binds everything together, and those tiny details (yes, including the sesame seeds) get their moment to shine. By the end of this journey, you'll not only know how to make the most incredible Big Mac Casserole you've ever tasted, but you'll understand why this version will ruin all other casseroles for you forever.
What Makes This Version Stand Out
Let me be brutally honest with you — I've tried every Big Mac Casserole recipe on the internet, and most of them taste like someone threw a burger in a blender with some pasta and called it a day. Those recipes get everything wrong, from the watery sauce that turns everything into a sad, soggy mess to the complete absence of that tangy, creamy special sauce that makes a Big Mac what it is. They focus on shortcuts and end up with a casserole that tastes like a bad memory of a drive-thru visit you'd rather forget.
Flavor Explosion: This version doesn't just copy the taste — it amplifies it. We're talking about a depth of flavor that makes the original burger seem one-dimensional. By browning the beef with a special blend of seasonings and letting it develop those gorgeous fond bits on the bottom of the pan, we create a umami bomb that'll make your taste buds do a happy dance. The sauce isn't just Thousand Island dressing from a bottle (that would be too easy and too wrong) — it's a carefully balanced mixture that captures that sweet-tangy-creamy essence but in a way that works in casserole form.
Texture Heaven: Most casseroles are textural disasters — either everything's mushy or you need a jackhammer to cut through them. Not this one. We're creating layers of textures that keep every bite interesting. The bottom layer of potatoes gets crispy edges while staying creamy inside, the beef stays juicy but not greasy, and we add crushed potato chips on top for crunch that'll make you wonder why every casserole doesn't use this trick.
Weeknight Simple: Despite tasting like you spent hours in the kitchen, this comes together in under an hour. I've streamlined every step without sacrificing flavor. No need to pre-cook the potatoes, no complicated sauce techniques, and definitely no hunting for obscure ingredients at three different grocery stores. If you can brown ground beef and stir, you can make this casserole.
Unexpected Genius: Here's where I get a little controversial — we're adding one ingredient that'll make purists clutch their pearls, but trust me on this one. A tablespoon of peanut butter in the sauce brings this nutty depth that makes everything taste more... everything. You won't taste peanuts, but you'll notice that suddenly everything else tastes more intense and complex. It's like adding a pinch of cinnamon to chili — it shouldn't work, but it absolutely does.
Crowd Reaction: I've served this at game days, potlucks, and family dinners, and the reaction is always the same: stunned silence followed by people fighting over the crispy corner pieces. My nephew, who claims to hate casseroles, ate three helpings. My friend Sarah, who's been a vegetarian for five years, took one bite and said, "I might need to reevaluate my life choices." This casserole doesn't just feed people — it creates moments.
Ingredient Integrity: Every single component matters here. We're using real cheddar, not that powdery stuff from a can. We're making our own special sauce because the bottled stuff is too sweet and one-note. We're toasting the sesame seeds because untoasted ones are just sad little flavorless flecks. This attention to detail is what separates a good casserole from a life-changing one.
Make-Ahead Magic: This casserole is actually better when you assemble it ahead of time. Letting those flavors mingle in the fridge overnight is like sending them to flavor university — they come back smarter and more sophisticated. Plus, having a ready-to-bake meal in your fridge makes you feel like you've got your life together, even if you're eating ice cream straight from the carton while it bakes.
Inside the Ingredient List
Before we dive into the nitty-gritty of each ingredient, let me set the stage here. Every component in this casserole has been carefully selected and tested to death. I've tried the cheap versions, the expensive versions, the organic versions, and the "I found this in the back of my pantry and hope it's still good" versions. What I'm giving you here is the goldilocks version — the one that hits that perfect sweet spot of flavor, texture, and not requiring you to take out a second mortgage for fancy ingredients.
The Flavor Foundation
The ground beef is where everything starts, and please, for the love of all that is holy, don't reach for that super lean 93/7 stuff. You need 80/20 ground chuck here because fat equals flavor, and we're going to drain most of it anyway. The higher fat content helps the beef brown properly instead of just steaming in its own juices, and those browned bits (fond, if you want to get technical) are liquid gold that'll make your sauce taste like it came from a restaurant kitchen.
Yellow onion gets my vote every time over white or red — it's got that perfect balance of sweetness and sharpness that mellows beautifully when cooked. Dice it small so it melts into the beef rather than becoming annoying crunchy bits that interrupt the eating experience. If you're one of those people who claim to hate onions, I'm going to challenge you to try this anyway — by the time it's cooked down, it just adds a savory depth without any of that raw onion bite.
Garlic is non-negotiable here, but timing is everything. Add it after the beef is browned and the onions are soft, and only cook it for about 30 seconds. Overcooked garlic turns bitter and will haunt your casserole with an acrid aftertaste that no amount of cheese can hide. Fresh is best, but if you're in a pinch, those frozen cubes work better than the jarred stuff that tastes like it was pickled in regret.
The Texture Crew
Frozen hash browns are our secret weapon here — they create that potato base that soaks up all the beefy juices while getting crispy edges that'll make you weak in the knees. Don't try to be a hero and use fresh potatoes unless you enjoy spending your evening parboiling and drying individual potato shreds. The frozen ones are perfectly consistent and designed to get crispy, which is exactly what we want.
Sharp cheddar brings that bold, tangy flavor that stands up to all the other strong tastes in this casserole. Skip the mild or medium cheddar — it gets lost in the shuffle and leaves you with a casserole that tastes like disappointment and wasted calories. I grate my own because pre-shredded cheese is coated with cellulose that keeps it from melting smoothly, but if you're in a hurry, at least spring for the good stuff from the deli section.
Crushed potato chips on top aren't just for crunch (though they're incredible for that) — they add this salty, potato-y flavor that ties everything back to those sesame seed buns. Use the classic thin chips, not the kettle-cooked thick ones that'll break your teeth. And please, for all that's sacred, don't use flavored chips unless you want your casserole to taste like a science experiment gone wrong.
The Unexpected Star
Dill pickles might seem like an odd addition to a casserole, but they're what makes this taste like an actual Big Mac instead of just a cheeseburger casserole. The key is using good quality dill pickles, not those limp, fluorescent green excuses for pickles that come on fast food burgers. You want the ones with real snap and that perfect balance of salty and sour. Dice them small so they distribute evenly and add little bursts of brightness throughout the dish.
That tablespoon of peanut butter I mentioned earlier? Trust me on this one. It melts into the sauce and adds this nutty depth that makes everything else taste more intense. You won't identify it as peanut butter — it just makes the beef taste beefier, the cheese taste cheesier, and the whole thing taste like someone with serious culinary skills spent hours on it. If you have peanut allergies, you can substitute with a teaspoon of tahini or just leave it out, but it won't have quite the same magic.
Sesame seeds might seem like a small detail, but they're what makes this casserole recognizable as a Big Mac homage rather than just a really tasty cheeseburger casserole. Toast them first in a dry pan until they're golden and fragrant — untoasted sesame seeds are like sad little flavorless pebbles that exist only to get stuck in your teeth. The toasting brings out their nutty flavor and makes them actually taste like something.
The Final Flourish
The special sauce is where the alchemy really happens, and it's not just Thousand Island dressing, no matter what the internet tells you. We're building layers of flavor here — mayo for creaminess, ketchup for sweetness and color, mustard for tang, pickle relish for brightness, and a few secret ingredients that make it taste exactly like that sauce you know and love. The key is letting it sit for at least 10 minutes before using it so the flavors can meld and get cozy with each other.
Worcestershire sauce adds that umami depth that takes the beef from "tastes like ground beef" to "tastes like something I'd pay money for in a restaurant." It's made from fermented anchovies, which sounds gross but adds this incredible savory note that you can't quite put your finger on but would definitely miss if it wasn't there. A little goes a long way — too much and your casserole will taste like it was marinated in a fish sauce factory.
Everything's prepped? Good. Let's get into the real action...
The Method — Step by Step
Alright, now we're getting to the good stuff. I've broken this down into foolproof steps that even my brother-in-law could follow (and this is a man who once tried to microwave a salad). Each step builds on the last one, creating layers of flavor that'll make you feel like you're conducting a symphony instead of just throwing dinner together. Keep your phone handy — you'll want to take pictures of this process because it's going to look so professional that your Instagram followers will think you've been taking cooking classes.
-
Preheat your oven to 375°F (190°C). Yes, we're starting with the oven because nothing's more frustrating than having your casserole ready to go and realizing your oven is still cold. While it's heating up, grab a 9x13 inch baking dish and grease it with butter or cooking spray. Don't use olive oil here — it has a lower smoke point and we want those edges to get crispy, not burnt. That sizzle when you eventually slide the casserole in? That's the sound of victory beginning.
-
Brown your ground beef in a large skillet over medium-high heat. Here's the crucial part — don't crowd the pan or stir too often. Let the beef sit undisturbed for the first 2-3 minutes so it can develop that gorgeous brown crust. Break it up with your spatula, but leave some nice big chunks for texture. You want it about 80% cooked through because it'll finish cooking in the oven. Drain off all but about a tablespoon of the fat — we need some for flavor, but we don't want our casserole swimming in grease like it's on a cruise ship.
-
Add your diced onions to the beef and cook for 3-4 minutes until they start to turn translucent. Now's the time to add your seasoning blend — I use a mix of salt, pepper, garlic powder, onion powder, and a touch of smoked paprika for depth. The smell should be making your kitchen smell like a proper diner right about now. If your neighbors aren't knocking on your door asking what you're making, you're doing it wrong. Add the minced garlic and cook for just 30 seconds more — any longer and it turns bitter faster than your ex's personality.
-
While the beef is doing its thing, get your special sauce ready. In a medium bowl, whisk together the mayo, ketchup, yellow mustard, pickle relish, white vinegar, sugar, and that secret tablespoon of peanut butter. Add a pinch of salt and a few grinds of black pepper. The sauce should be creamy and slightly pink — if it's too thick, thin it with a splash of milk. If it's too thin, add a bit more mayo. Taste it and adjust the seasoning — it should make you want to eat it with a spoon, but resist the urge. We need it for the casserole, not for immediate face-shoveling.
-
Time to assemble! Spread your frozen hash browns in an even layer in the bottom of your greased baking dish. Don't thaw them first — they need to go in frozen to get those crispy edges we want. Press them down gently with your hands or the back of a spoon. Sprinkle with a little salt and pepper because every layer needs love. This potato layer is going to soak up all the beefy juices and create a foundation that's both crispy and creamy. It's like building a house, except instead of a house, it's a delicious casserole and you can eat it without getting arrested.
-
Spoon the beef and onion mixture evenly over the hash browns. Make sure you get every last bit — those browned bits in the bottom of the pan are concentrated flavor bombs. Spread it out gently so you don't disturb the potato layer too much. This is where the magic starts to happen — the beef juices are going to drip down and flavor those potatoes while everything bakes together. If you've done this right, it should already be looking like something you'd proudly serve to company.
-
Pour about two-thirds of your special sauce over the beef layer. Don't drown it — we want to see some beef peeking through like it's playing hide and seek. Save the rest for later because we're going to drizzle it on top right before serving. Use the back of a spoon to spread it gently, creating little pockets of sauce that will bubble up and create these gorgeous golden spots on top. The sauce should be thick enough to stay put, not run all over like it's trying to escape.
-
Sprinkle your shredded cheddar cheese over the sauce layer. Be generous here — cheese is not the place to be stingy. I use about two cups, but if you're a cheese lover (and if you're not, are we even friends?), go ahead and add more. The cheese is going to create this golden, bubbly blanket that holds everything together and makes those Instagram-worthy cheese pulls when you serve it. Make sure you get cheese all the way to the edges — those crispy cheese edges are like the best part of a grilled cheese sandwich, but better.
-
Cover the whole thing with foil and bake for 20 minutes. This first covered bake lets everything heat through and allows the flavors to meld without the cheese getting too brown too quickly. After 20 minutes, remove the foil and bake for another 10-15 minutes until the cheese is bubbly and starting to turn golden in spots. Keep an eye on it — ovens are like people, they're all a little different and some run hot (both literally and figuratively).
-
While the casserole is finishing up, toast your sesame seeds in a dry pan over medium heat. Watch them like a hawk because they go from perfectly golden to burnt and bitter faster than you can say "special sauce." They should smell nutty and fragrant — that's how you know they're done. When the casserole comes out of the oven, immediately sprinkle the toasted sesame seeds on top along with your diced pickles and crushed potato chips. Let it rest for 5 minutes before serving — I know it's torture, but this allows everything to set up so you get nice, clean squares instead of a delicious but messy pile.
That's it — you did it. But hold on, I've got a few more tricks that'll take this to another level...
Insider Tricks for Flawless Results
Now that you've got the basic method down, let me share the secrets that separate the good cooks from the ones who make people fight over leftovers. These are the little details that seem insignificant but make the difference between a casserole that's merely tasty and one that people will beg you to bring to every gathering. Some of these I discovered by accident (like the time I forgot to drain the beef and ended up with an oil slick that would make BP jealous), others came from obsessive tweaking and tasting until my family staged an intervention.
The Temperature Rule Nobody Follows
Here's something that'll make you feel like a culinary genius: your ingredients should be at different temperatures when they go into the dish. Cold hash browns straight from the freezer, room temperature beef, and slightly warm sauce. This creates a temperature gradient that ensures everything cooks evenly and you don't end up with burnt edges and a cold center. I know it sounds like food nerd nonsense, but try it once and you'll see the difference. Your casserole will cook more evenly, and you won't get those annoying hot spots that make people do that weird mouth dance when they bite into something too hot.
Why Your Nose Knows Best
Don't rely on the timer alone — your nose is the best kitchen tool you have. When the casserole is almost done, it starts sending out these incredible smells that'll have people wandering into the kitchen asking what's for dinner. That's your cue to peek in the oven. When the cheese is bubbling around the edges and you can smell the toasted sesame seeds, it's time to take it out. If you wait for the timer, you might overcook it. Trust your senses — they've been developed over millions of years of evolution to tell you when food is perfectly cooked.
The 5-Minute Rest That Changes Everything
I know I mentioned resting earlier, but this is crucial enough to deserve its own section. Those five minutes of rest time aren't just about being patient — they're about chemistry. As the casserole cools slightly, the cheese sets up, the sauce thickens, and everything binds together into a cohesive unit. Cut into it too early and you get a molten mess that falls apart. Wait those five minutes (set a timer if you're impatient like me) and you'll get clean, beautiful squares that hold their shape and look like something from a cooking magazine. Plus, you won't burn your mouth and spend the next three days unable to taste anything.
The Layering Secret That Changes the Game
Most people just throw everything in a dish and hope for the best. We're not most people. The order matters more than you'd think. That potato layer on the bottom? It's not just for flavor — it creates a barrier that prevents the sauce from making everything soggy. The cheese goes on top of the sauce, not under it, so it can brown and bubble properly. And those potato chips? They go on in the last 5 minutes so they stay crispy instead of turning into sad, soggy bits. It's like building a flavor lasagna where every layer has a job to do.
The Make-Ahead Method
This casserole is actually better when you make it ahead. Assemble everything up to the point of baking, cover it tightly, and refrigerate for up to 24 hours. The flavors have time to meld and develop, creating something that's deeper and more complex than when you bake it immediately. Just add 10-15 minutes to the covered baking time since it'll be starting cold from the fridge. This is perfect for entertaining — you can prep everything the night before and just pop it in the oven when guests arrive. You'll look like the most organized host ever, even if you were frantically cleaning your house 20 minutes before they showed up.
Creative Twists and Variations
This recipe is a playground. Once you've got the basic formula down, you can customize it in ways that'll keep it exciting for years. I've made more variations of this casserole than I care to admit — some were triumphs, others were learning experiences (I'm looking at you, blue cheese version that tasted like a foot). Here are my favorite ways to mix things up:
The Bacon Cheeseburger Edition
Add crumbled bacon to every layer — mix some into the beef, sprinkle some between the layers, and definitely add some on top with the potato chips. Use smoked cheddar instead of regular cheddar for extra depth. The bacon fat mingles with the beef and creates this smoky, salty flavor that's absolutely irresistible. I like to use thick-cut bacon that I've partially frozen so I can dice it small — it distributes better than big crumbles. This version is so good that my cardiologist friend requests it for his birthday, which either means it's worth the health risk or he's trying to drum up business.
The Spicy Southwest Version
Replace the pickle relish with diced jalapeños in the special sauce, add a packet of taco seasoning to the beef, and use pepper jack cheese instead of cheddar. Top with crushed tortilla chips instead of potato chips and add some fresh cilantro on top. The spice level is totally customizable — use mild jalapeños for just a hint of heat, or go full nuclear with habaneros if you're one of those people who thinks pain equals flavor. Serve with a dollop of sour cream to cool things down if you went too far with the heat.
The Breakfast Remix
This might sound weird, but hear me out. Replace the ground beef with breakfast sausage, add scrambled eggs to the layers, and use hash brown patties instead of shredded hash browns. The special sauce works surprisingly well with breakfast flavors — it's basically a fancy version of the sauce on a breakfast sandwich. Top with everything bagel seasoning instead of sesame seeds. I serve this for brunch and people lose their minds over it. It's like all your favorite breakfast foods decided to have a party in a casserole dish.
The Low-Carb Alternative
Replace the hash browns with cauliflower rice that's been squeezed dry and sautéed until golden. Use ground turkey or chicken instead of beef to lighten it up. The special sauce stays the same because life is too short for fat-free mayo, but you can use Greek yogurt instead of some of the mayo if you want. Top with pork rinds instead of potato chips for crunch. Is it exactly the same? No. Is it still delicious and satisfying? Absolutely. My keto-obsessed cousin swears by this version and she's lost 40 pounds, so apparently you can have your casserole and eat it too.
The Loaded Baked Potato Style
Use diced potatoes instead of shredded hash browns, add crispy bacon and green onions to every layer, and mix some sour cream into the special sauce. Top with extra cheese (because why not?) and serve with additional sour cream on the side. This version is comfort food on steroids — it's like someone took everything good about loaded baked potatoes and everything good about Big Macs and created Frankenstein's monster, except this monster is delicious and won't terrorize the village.
The Veggie-Packed Version
Add finely diced carrots, celery, and bell peppers to the beef while it browns. They add nutrition and bulk without changing the flavor much. You can also mix in some frozen peas or corn for sweetness and color. The key is to dice everything small so it distributes evenly and doesn't create big chunks that make the casserole fall apart. This is how I trick my kids into eating vegetables — they call it "the good casserole" and have no idea they're basically eating a salad in disguise.
Storing and Bringing It Back to Life
Here's the thing about this casserole — it makes fantastic leftovers, but only if you store and reheat it properly. I've seen too many good casseroles turn into sad, dried-out messes because someone wrapped them in foil and forgot about them in the back of the fridge. This section will save your leftovers and possibly your relationships, because nothing starts a fight like someone eating the last piece of casserole and not storing the rest properly.
Fridge Storage
Let the casserole cool completely before storing — putting hot food in the fridge is like inviting bacteria to a pool party. Cut it into individual portions and store them in airtight containers. This does two things: it prevents the whole casserole from drying out every time you open the container, and it makes reheating easier since you can just grab what you need. It'll keep for up to 4 days in the fridge, but let's be honest — it never lasts that long in my house. If you notice any off smells or colors, or if your roommate starts calling it "science project casserole," it's time to say goodbye.
Freezer Friendly
This casserole freezes beautifully, which is why I always make a double batch. Wrap individual portions tightly in plastic wrap, then in foil, and freeze for up to 3 months. Pro tip: write the date and what's in the package on the foil with a Sharpie. Future you will thank present you when you're not playing "frozen food roulette" at 2 AM. To thaw, move it to the fridge overnight or use the defrost setting on your microwave. Don't try to speed-thaw it on the counter unless you enjoy food poisoning.
Best Reheating Method
The microwave works in a pinch, but the oven is where the magic happens. Cover the portion with foil and bake at 350°F for about 15-20 minutes until heated through. Add a tiny splash of water before reheating — it creates steam that brings the casserole back to life instead of turning it into cardboard. If you're using the microwave, cover it with a damp paper towel and heat in 30-second intervals, stirring between each one. And please, whatever you do, don't overheat it. There's nothing sadder than a once-glorious casserole that's been turned into a rubbery hockey puck by an overzealous microwave.