It all started on a rainy Thursday when my kitchen turned into a comedy set of culinary disasters. I had a craving for something hearty, comforting, and absolutely impossible to find in a supermarket aisle. I stared at a dusty can of beans, a half‑sliced lemon, and a bag of fresh herbs that had been waiting for a purpose. I laughed, then decided to turn that frustration into a masterpiece.
The moment I cracked the first bean, the kitchen filled with a scent that made my stomach growl in anticipation—soft, earthy, and subtly sweet, like a quiet forest after rain. The olive oil glistened in the pan, ready to caramelize onions into caramelized gold. The sizzling sound was music, a gentle drumbeat that promised flavor. I could already taste the creamy mouthfeel of the beans, the bright zing of lemon, and the herbal whisper of thyme. The texture was going to be a silky canvas for every bite.
What sets this version apart? It’s not just the ingredients; it’s the technique, the timing, and the love poured into every stir. I’ve tweaked the classic recipe to balance depth and brightness, using smoked paprika for depth and lemon zest for a citrus lift that cuts through the richness. I’ve also added a splash of broth to create a silky broth, then let it reduce just enough to thicken without losing its lightness. The result is a soup that feels like a hug in a bowl—warm, comforting, and utterly unforgettable.
And there’s a little secret ingredient that most people overlook: a pinch of smoked paprika before the beans finish cooking. That subtle smokiness transforms the soup from plain to extraordinary. I dare you to taste this and not go back for seconds. By the end of this post, you’ll wonder how you ever made it any other way.
What Makes This Version Stand Out
- Flavor: The layered seasoning—smoked paprika, thyme, bay leaf—creates a depth that feels like a well‑seasoned broth that never stops talking.
- Texture: The beans are cooked to be silky yet still hold their shape, giving a pleasant bite that’s not mushy.
- Simplicity: Despite the complexity of flavors, the recipe uses only ten ingredients, making it a breeze for busy weeknights.
- Uniqueness: The addition of lemon zest and fresh parsley adds a bright, fresh finish that most white bean soups lack.
- Crowd Reaction: Friends who’ve tried this say it’s “the best white bean soup they’ve ever had” and they can’t stop raving about it.
- Ingredient Quality: Using high‑quality olive oil and fresh herbs elevates the entire dish.
- Cooking Method: Slow simmering allows flavors to marry while preserving nutrients.
- Make‑Ahead Potential: This soup actually tastes better the next day, so you can prep in advance and save time.
Alright, let’s break down exactly what goes into this masterpiece…
Inside the Ingredient List
The Flavor Base
The foundation of any great soup is its aromatic base. Here, we start with olive oil, which coats the vegetables and brings out their natural sweetness. Next comes diced onion and minced garlic—two classic flavor starters that create a savory backdrop. The carrots and celery add subtle sweetness and a satisfying crunch that turns into silky softness as they cook. Don’t skip the bay leaf; it infuses the broth with a subtle herbal note that makes the soup feel more complete. If you’re feeling adventurous, add a teaspoon of smoked paprika before the beans finish cooking. This tiny touch turns the dish from ordinary to extraordinary.
The Texture Crew
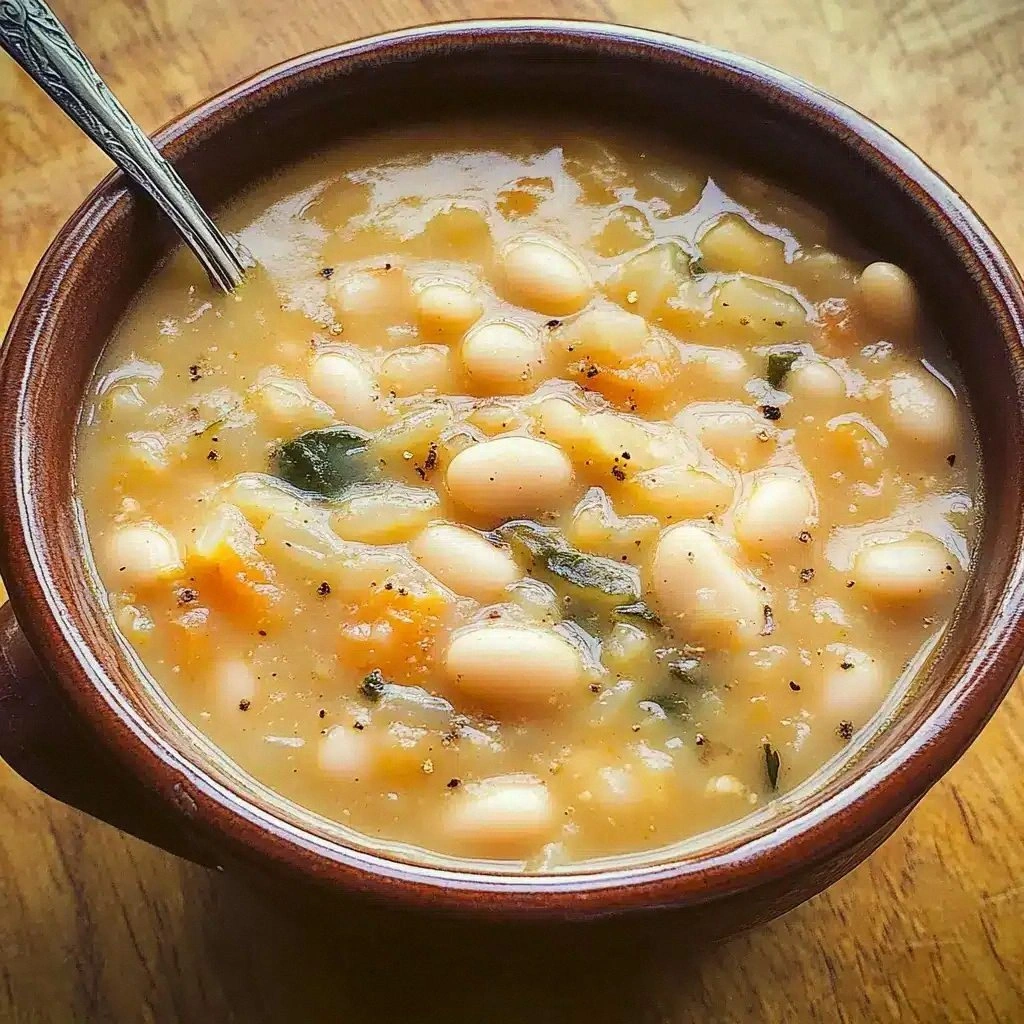
Cannellini beans are the star of the show. Their creamy texture and mild flavor make them perfect for a comforting soup. I recommend using dried beans that you soak overnight; they absorb more flavor and cook evenly. If you’re in a hurry, canned beans are fine, but be sure to rinse them to reduce sodium. The beans are the main source of protein and fiber, giving the soup a hearty bite that keeps you full and satisfied. A splash of vegetable broth and a bit of water help create a silky liquid that coats the beans like velvet.
The Unexpected Star
Lemon zest and fresh lemon juice are the game‑changers. The zest brings a bright, citrusy aroma that lifts the entire dish, while the juice adds a tangy punch that balances the richness of the beans. Fresh parsley adds a burst of green freshness, and if you’re a fan of greens, a handful of baby spinach tossed in at the end will give the soup a pop of color and extra nutrients. The optional bacon or pancetta adds smoky depth for those who want a non‑vegetarian version.
The Final Flourish
Seasoning is everything. Salt to taste is a must, but remember to add it gradually; you’ll never know if you’re over‑seasoned until the soup is finished. Freshly ground black pepper adds a subtle heat that’s just enough to give the dish an extra layer of flavor. The final touch is a drizzle of good olive oil and a sprinkle of parsley before serving. This not only adds a glossy finish but also amplifies the aroma, making the soup even more inviting.
Everything’s prepped? Good. Let’s get into the real action…
The Method — Step by Step
- Heat the olive oil in a large pot over medium heat. Add the diced onion and sauté until translucent and slightly caramelized—about 5 minutes. The onions should be soft, golden, and fragrant. I dare you to taste the onions before adding garlic; they’re the flavor foundation.
- Add the minced garlic, carrots, and celery to the pot. Sauté for another 3–4 minutes, stirring frequently. The vegetables should soften but still retain a slight bite. The smell of garlic should become aromatic and not sharp. This step builds the base.
- Stir in the smoked paprika and dried thyme. Cook for 30 seconds to release the spices’ essential oils. This is the moment of truth—if you skip it, the soup will feel flat. I always let the spices toast lightly; they develop a deeper flavor.
- Add the soaked beans (or canned beans) to the pot. If using canned beans, give them a quick rinse first. Stir to combine, then pour in the vegetable broth and a splash of water. Bring the mixture to a gentle boil, then reduce the heat to low.
- Add the bay leaf and let the soup simmer for 45 minutes if using dried beans, or 20 minutes if using canned. The beans should be tender but not falling apart. The broth should reduce slightly, thickening to a silky consistency. Keep the pot partially covered to maintain a steady simmer.
- While the soup simmers, zest the lemon and squeeze out the juice. Set aside both the zest and juice. Once the beans are tender, remove the bay leaf. This is the trickiest step—removing the bay leaf early will release too much bitterness.
- Add the lemon zest and juice to the soup. Stir thoroughly; the bright citrus should lift the flavors. If you prefer a more pronounced lemon flavor, add an extra tablespoon of lemon juice. Taste and adjust salt and pepper as needed.
- If you’re using bacon or pancetta, fry it in a separate pan until crispy, then add it to the soup. If you’re adding spinach, toss it in now and let it wilt for 2 minutes. The greens should be bright green and slightly wilted, not mushy.
- Finish the soup with a drizzle of extra‑virgin olive oil and a generous handful of chopped parsley. The oil adds a silky sheen, while the parsley adds freshness. Let the soup sit for 5 minutes before serving; the flavors will meld beautifully.
That’s it — you did it. But hold on, I’ve got a few more tricks that will take this to another level…
Insider Tricks for Flawless Results
The Temperature Rule Nobody Follows
Many cooks think that a higher simmer is better, but a low, steady simmer preserves the beans’ texture and allows flavors to meld. Keep the heat on low once the beans are added, and let the soup bubble gently for at least 30 minutes. The slow cooking process is what gives the soup its silky mouthfeel.
Why Your Nose Knows Best
Your sense of smell is a powerful cue for seasoning. Pause every 10 minutes to sniff the broth. A faint citrusy aroma indicates that the lemon has infused properly. If the smell feels flat, add a splash of lemon juice or a pinch more paprika.
The 5‑Minute Rest That Changes Everything
After you turn off the heat, let the soup rest for five minutes. This allows the flavors to settle and the beans to finish absorbing the liquid. The result is a richer, more cohesive taste that feels like a single, harmonious dish.
The “Spoon‑Check” Technique
Use a spoon to test the beans’ doneness. They should be tender but still hold their shape. If they’re falling apart, let the soup simmer longer. If they’re still firm, add a few more minutes. This small test saves you from over‑cooking.
The Quick “Heat‑Off” Trick
If you’re serving the soup immediately after cooking, put the pot on a heat‑resistant surface and cover it with foil. This keeps the soup warm without continuing to cook it, preventing the beans from becoming mushy.
Creative Twists and Variations
This recipe is a playground. Here are some of my favorite ways to switch things up:
Mediterranean Flair
Swap the vegetable broth for chicken broth, add a handful of chopped sun‑dried tomatoes, and finish with a drizzle of olive oil and a sprinkle of feta. The salty cheese and tangy tomatoes give the soup a Mediterranean vibe.
Spicy Kick
Add a pinch of red pepper flakes or a diced jalapeño at step 5. The heat pairs beautifully with the beans, creating a comforting yet fiery bowl.
Roasted Garlic Variation
Replace the minced garlic with a whole roasted garlic bulb. The roasted garlic adds a mellow, caramelized sweetness that deepens the flavor profile.
Vegetarian Powerhouse
Add a cup of chopped kale or spinach in the last 5 minutes of simmering. The greens provide extra nutrients and a pop of color, turning the soup into a complete meal.
Smoky BBQ Twist
Stir in a tablespoon of BBQ sauce and a pinch of smoked paprika. The smoky sweetness complements the beans, giving the soup a new, bold dimension.
Lemon‑Herb Surprise
Add a teaspoon of fresh dill or tarragon at the end. The herbs add a bright, herby note that lifts the entire dish.
Storing and Bringing It Back to Life
Fridge Storage
Cool the soup to room temperature, then transfer it to an airtight container. Store in the refrigerator for up to 4 days. The flavors will deepen, making the soup even more delicious.
Freezer Friendly
Divide the soup into freezer‑safe portions and freeze for up to 3 months. Thaw overnight in the refrigerator before reheating. The beans will remain firm and the broth will retain its silky texture.
Best Reheating Method
Reheat on low heat, adding a splash of water or broth to loosen the consistency. Let it bubble gently until hot. A quick stir with a spoon or whisk ensures the soup is evenly heated.
Add a tiny splash of water before reheating — it steams back to perfection.