Picture this: you’re halfway through a marathon Netflix binge, the night is quiet, and suddenly a craving hits you harder than a plot twist. It’s not just any craving—it’s the deep, chocolatey yearning that makes you stare at the pantry like it’s a treasure chest. I tried to satisfy it with a store‑bought brownie, but the sugar crash that followed felt like a bad sequel. I dared myself to create a version that would give me the indulgent feel of a classic brownie while keeping the calories low enough to stay on track with my health goals. Spoiler alert: I succeeded, and I’m about to spill the beans (and the cocoa).
The moment I mixed the first spoonful of Greek yogurt into the batter, the kitchen was filled with a scent that could coax even the most disciplined dieter out of their seat. The aroma was a buttery, chocolatey cloud that wrapped around the room like a warm hug, while the glossy swirl of honey caught the light like liquid amber. You could hear the faint crackle of the coconut oil as it melted, and the texture of the batter felt like a silky promise of what was to come. My taste buds were already doing a little happy dance, and my mind was racing with the thought, “What if this is the ultimate guilt‑free brownie?”
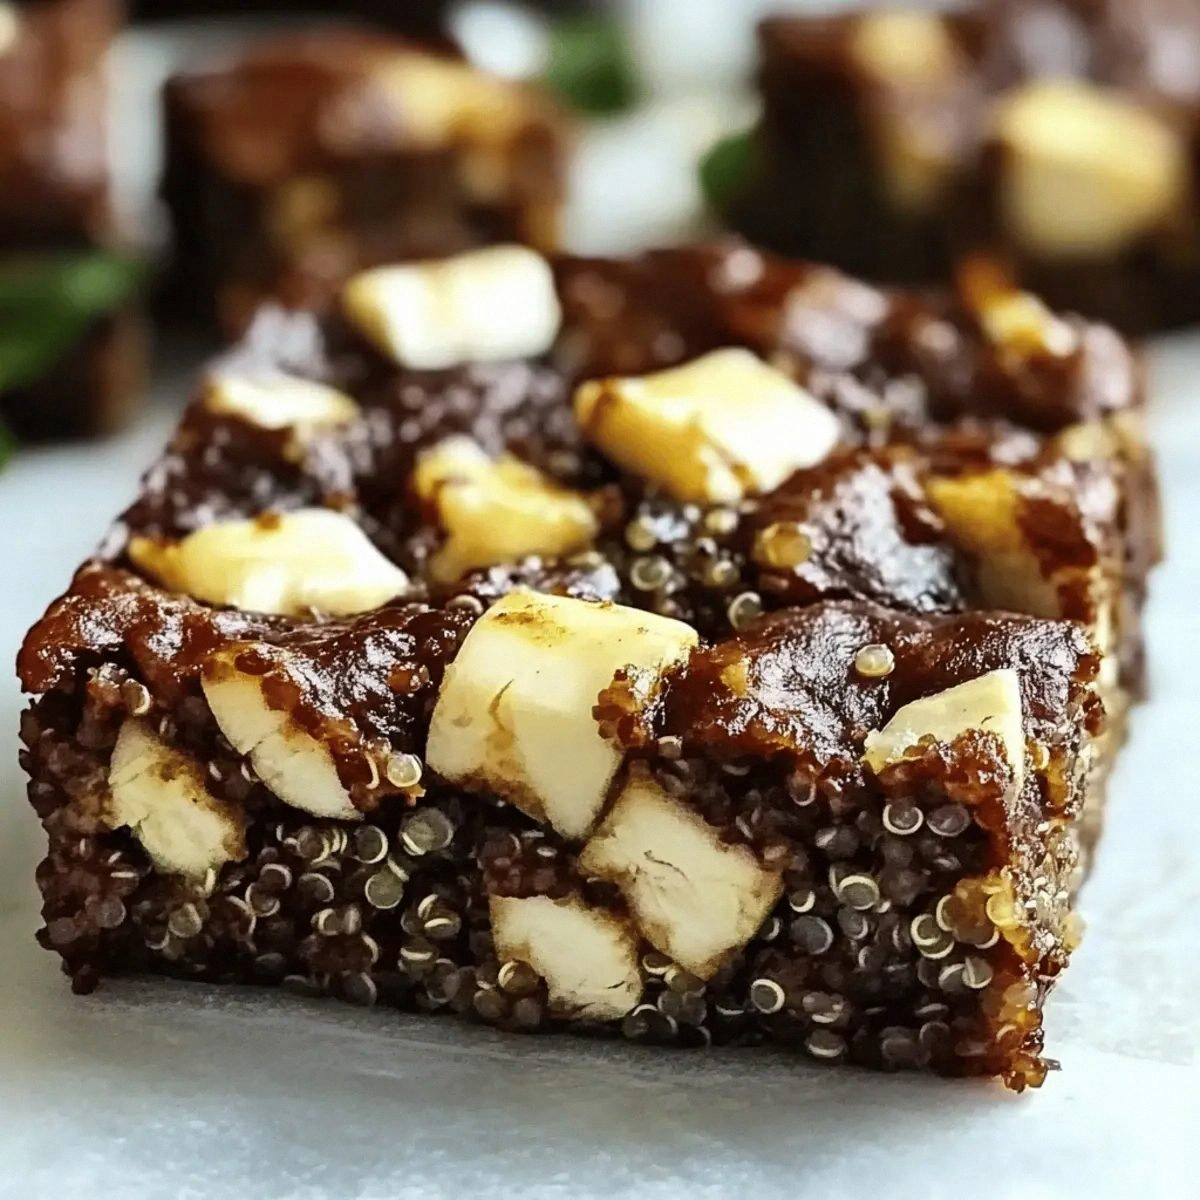
Most low‑calorie brownie recipes either sacrifice flavor or end up dry and crumbly—think cardboard with a hint of cocoa. This version flips that script by using Greek yogurt as a moisture powerhouse, almond flour for a buttery crumb, and just enough honey to sweeten without the sugar overload. The dark chocolate chips melt into pockets of richness that make each bite feel like a decadent secret you’re sharing with yourself. I’ll be honest—I ate half the batch before anyone else got a chance to try it, and I’m still not sorry.
But here’s the kicker: there’s a technique hidden in plain sight that takes these brownies from good to legendary. It involves a quick “bloom” of cocoa powder in hot coconut oil, a step most recipes skip, yet it unlocks a depth of flavor that’s nothing short of magical. Okay, ready for the game‑changer? Let me walk you through every single step — by the end, you’ll wonder how you ever made it any other way.
What Makes This Version Stand Out
- Flavor: The combination of Greek yogurt and honey creates a natural sweetness that lets the cocoa shine without being overpowered.
- Texture: Almond flour gives a tender, slightly crumbly interior while the chocolate chips provide a gooey, melt‑in‑your‑mouth contrast.
- Simplicity: Fewer than ten ingredients and a single bowl mean you spend more time eating and less time cleaning.
- Uniqueness: Blooming cocoa in coconut oil extracts hidden aromatic compounds, delivering a depth you won’t find in typical mixes.
- Crowd Reaction: Even the kids at my house can’t tell these are “healthy” brownies, and they keep asking for seconds.
- Ingredient Quality: Using full‑fat Greek yogurt ensures a rich mouthfeel while keeping the protein punch high.
- Cooking Method: Baking at a moderate temperature preserves moisture, preventing the dreaded dry edges.
- Make‑Ahead Potential: These brownies keep beautifully in the fridge for up to five days, making them perfect for meal‑prep or a quick snack.
Inside the Ingredient List
The Flavor Base
Greek Yogurt (1 cup): This is the secret sauce that keeps the brownies moist and adds a subtle tang that balances the chocolate. It also pumps up the protein content, turning a dessert into a post‑workout treat. If you skip it, you’ll end up with a dry, crumbly texture that no amount of oil can fix. Swap: Use plain kefir for a lighter texture, but expect a milder flavor.
Honey (1/2 cup): Honey provides natural sweetness and a hint of floral aroma that sugar can’t match. Its viscosity helps bind the batter, giving the brownies that coveted fudgy center. Too much honey, however, can make the batter too runny, so measure carefully. Swap: Maple syrup works well for a different flavor profile, though it adds a slightly thinner consistency.
The Texture Crew
Almond Flour (1 cup): Almond flour brings a buttery crumb and a low‑carb foundation that keeps the brownies tender. It also adds a pleasant nutty undertone that complements the chocolate beautifully. Skipping it for regular flour will raise the carb count and change the texture to more cake‑like. Swap: Use a 1:1 blend of coconut flour and oat flour for a gluten‑free alternative, but reduce the amount by a third to avoid dryness.
Coconut Oil (1/4 cup): Melted coconut oil is the fat that carries the cocoa flavor and adds a subtle tropical note. When combined with hot cocoa, it helps bloom the chocolate, unlocking deeper flavors. If you use butter instead, you’ll lose the crisp, clean finish that coconut oil provides. Swap: Avocado oil works for a neutral taste, though it won’t add the same aromatic boost.
The Unexpected Star
Cocoa Powder (1/2 cup): The unsweetened cocoa is the heart of any brownie, delivering that intense chocolate punch. Blooming it in hot coconut oil releases hidden flavor compounds, making the chocolate taste richer and more complex. Skipping the bloom step will result in a flatter, more one‑dimensional chocolate flavor. Swap: Use Dutch‑process cocoa for a smoother, less acidic taste, but keep the bloom step.
The Final Flourish
Vanilla Extract (1 tsp): A splash of vanilla rounds out the bitterness of cocoa and adds aromatic depth. It’s the subtle background singer that makes the main chocolate solo shine. Forgetting it will make the brownies taste a bit flat. Swap: Use almond extract for a nutty twist, but halve the amount as it’s stronger.
Dark Chocolate Chips (1/2 cup): These melt into pockets of pure decadence, creating that gooey texture we all crave. They also add a slight crunch as they solidify on the surface. If you leave them out, you’ll miss the luxurious melt‑in‑your‑mouth moments. Swap: Use chopped dark chocolate for larger pockets, or white chocolate chips for a sweeter contrast.
Everything's prepped? Good. Let's get into the real action...
The Method — Step by Step
Preheat your oven to 350°F (175°C) and line an 8×8‑inch baking pan with parchment paper, letting the edges hang over for easy removal. While the oven warms, take a small saucepan and melt the coconut oil over low heat. As soon as it’s shimmering, sprinkle in the cocoa powder, stirring constantly until a glossy, fragrant paste forms—this is the bloom that will give your brownies a depth you never knew possible. Watch out: If the mixture starts to smoke, reduce the heat; burnt cocoa will turn bitter.
Kitchen Hack: Use a silicone whisk for the bloom; it prevents lumps and makes the paste smoother.In a large mixing bowl, combine the Greek yogurt and honey. Whisk them together until the mixture is light, airy, and slightly frothy—think of a thin, sweetened cream. This step is where the magic begins; the yogurt’s tang balances the honey’s sweetness, creating a flavor base that’s both bright and comforting. I dare you to taste this and not go back for seconds.
Add the vanilla extract to the yogurt‑honey blend, then pour in the bloomed cocoa‑oil mixture. Stir gently until the batter turns a deep, velvety brown, with no streaks of cocoa visible. The aroma at this point is intoxicating—like a chocolate bakery on a quiet morning. Let the batter rest for two minutes; this allows the almond flour to hydrate, ensuring a tender crumb.
Gradually fold in the almond flour, using a rubber spatula to incorporate it without over‑mixing. Over‑mixing would develop the almond’s natural oils too much, leading to a gritty texture. The batter should look thick but spreadable, holding its shape when lifted. If it feels too stiff, add a splash of milk (dairy or plant‑based) to loosen it.
Stir in the dark chocolate chips, reserving a handful to sprinkle on top later. The chips should be evenly distributed, creating pockets of molten chocolate that will burst as the brownies bake. This is the moment of truth—if you see clumps, gently break them up; you want a uniform distribution for consistent bites.
Transfer the batter into the prepared pan, smoothing the top with the back of a spoon. Sprinkle the remaining chocolate chips over the surface; they’ll form a glossy, crackly crust as they melt and re‑solidify. The edges should start pulling away from the pan walls—this is your visual cue that the brownies are nearing perfection.
Slide the pan into the preheated oven and bake for 20‑25 minutes. The center should be set but still slightly soft; a toothpick inserted should come out with a few moist crumbs, not wet batter. The kitchen will fill with a warm, chocolatey perfume that makes you want to peek inside the oven—resist the urge, the brownies need that final set.
Watch Out: Opening the oven door too early can cause the brownies to collapse; trust the timer.Once baked, remove the pan and let the brownies cool in the pan for 10 minutes. This short cooling period allows the edges to firm up while the center remains fudgy. Then, using the parchment overhang, lift the whole slab onto a cutting board. Slice into four generous squares with a hot, wet knife—this prevents sticking and gives clean edges.
Serve the brownies warm, perhaps with a dollop of extra Greek yogurt or a drizzle of honey for an added touch of elegance. Picture yourself pulling this out of the oven, the whole kitchen smelling incredible, and the first bite melting on your tongue with just the right balance of sweet, bitter, and creamy. That sizzle when it hits the pan? Absolute perfection. And now the fun part—store any leftovers as described below.
That's it — you did it. But hold on, I've got a few more tricks that'll take this to another level...
Insider Tricks for Flawless Results
The Temperature Rule Nobody Follows
Most home bakers bake brownies at 375°F, assuming a higher heat will give a crispier crust. In reality, that temperature can dry out the interior before the edges set. Keep it at 350°F for a gentle, even bake that preserves moisture. I once tried 400°F and ended up with a burnt top and a gummy center—lesson learned.
Why Your Nose Knows Best
Don’t rely solely on a timer—use your sense of smell as a guide. When the brownies start releasing that deep chocolate aroma and the edges begin to pull away, you’re at the perfect point. If you’re the type who trusts the clock too much, you might end up with a dry crumb. Trust your nose; it’s the most reliable indicator of doneness.
The 5‑Minute Rest That Changes Everything
After removing the brownies from the oven, let them rest for exactly five minutes before cutting. This short pause allows the internal steam to redistribute, creating that coveted fudgy center. Skipping this step leads to crumbly squares that fall apart. I’ve seen friends cut immediately and end up with a mess—don’t be that person.
Chocolate Chip Placement Precision
Sprinkling the final handful of chocolate chips on top right before baking creates a glossy, crackly top layer that looks professional. If you fold them all in, you lose that visual appeal. The contrast between the dark chips and the matte brownie surface is what makes the plate pop.
Measuring Almond Flour the Right Way
Almond flour is notorious for packing down in measuring cups, leading to denser brownies. Lightly spoon the flour into the cup and level it off with a straight edge. This technique ensures you’re not adding extra calories or altering the texture unintentionally.
Creative Twists and Variations
This recipe is a playground. Here are some of my favorite ways to switch things up:
Berry Burst
Fold in ½ cup of fresh raspberries or blueberries before baking. The fruit adds a subtle tartness that cuts through the richness, and the burst of color makes the brownies look festive.
Nutty Crunch
Replace half of the almond flour with finely chopped walnuts or pecans. The nuts add a satisfying crunch and an extra layer of nutty flavor that pairs beautifully with chocolate.
Spiced Delight
Stir in a pinch of cinnamon and a dash of cayenne pepper for a warm, slightly spicy twist. The heat amplifies the chocolate’s depth and gives the brownies a cozy, autumnal feel.
Mocha Madness
Swap half of the honey for brewed espresso and add a teaspoon of instant coffee granules. The coffee intensifies the chocolate flavor, creating a sophisticated mocha brownie.
White Chocolate Dream
Use white chocolate chips instead of dark for a sweeter, creamier bite. Pair with a sprinkle of toasted coconut flakes on top for a tropical finish.
Protein Power
Add a scoop of vanilla whey protein powder (about ¼ cup) to the batter. This boosts the protein content without compromising texture, making the brownies perfect for a post‑workout snack.
Storing and Bringing It Back to Life
Fridge Storage
Allow the brownies to cool completely, then place them in an airtight container. They’ll stay fresh for up to five days in the refrigerator. For an extra moisture boost, place a damp paper towel on top of the brownies before sealing the container.
Freezer Friendly
Wrap each brownie individually in plastic wrap, then place them in a zip‑top freezer bag. They’ll keep for up to three months. When you’re ready to enjoy one, let it thaw at room temperature for 20 minutes.
Best Reheating Method
To revive that just‑baked feel, microwave a brownie for 10‑15 seconds, adding a tiny splash of water to the plate before heating. The steam created restores the fudgy interior while keeping the top slightly crisp.