I was sitting on the couch, scrolling through endless snack ideas, when my friend dared me: “Make something that tastes like dessert but won’t wreck your macros.” I laughed, grabbed a tub of Greek yogurt, and thought, what if I could turn that creamy tang into a bar that feels like a cheat‑day indulgence but actually fuels my muscles? The kitchen was a battlefield of crumbs, a rogue honey jar that slipped, and a protein powder cloud that settled like fresh snow on the counter. I was determined, and after a few frantic whiskings, the first batch emerged—soft, chewy, and surprisingly elegant. I dare you to taste this and not go back for seconds.
Picture this: the buttery aroma of nut butter melting into honey, the subtle crackle of chia seeds as they swell, and the faint, nutty perfume of rolled oats toasting in the background. The air was thick with a sweet‑savory perfume that made my stomach do a happy dance, while the cool, tangy Greek yogurt waited patiently in the bowl, ready to bind everything together like a secret handshake. My fingertips felt the sticky mixture, warm from the oven, then cool as it set—like a promise that this snack would be both comforting and powerful. I could already hear the crunch of almonds and the melt of dark chocolate chips in my mind, a symphony of textures that would make any snack‑lover weep with joy.
Most protein bar recipes either taste bland, feel dry, or require a commercial dehydrator that most home cooks don’t own. This version stands out because it leverages the natural creaminess of Greek yogurt as the base, eliminating the need for excessive added fats while still delivering that indulgent mouthfeel. The secret? A splash of honey for just the right amount of natural sweetness, a scoop of high‑quality protein powder for muscle‑building power, and a dash of chia seeds that turn the bar into a mini‑gelatinous wonder, keeping it moist for days. Most recipes get the texture completely wrong—either too crumbly or too hard—while this one hits that perfect “chewy but not gummy” spot every single time.
And here’s the kicker: I’m about to reveal a technique that most bakers overlook—a quick “steam‑set” finish that locks in moisture without turning the bars into a soggy mess. This isn’t just a snack; it’s a game‑changing, guilt‑free fix that will have you reaching for it at 3 am without a second thought. Let me walk you through every single step — by the end, you’ll wonder how you ever made it any other way.
What Makes This Version Stand Out
- Flavor Fusion: The tang of Greek yogurt balances the honey’s sweetness, creating a harmonious flavor profile that feels like a dessert without the sugar overload.
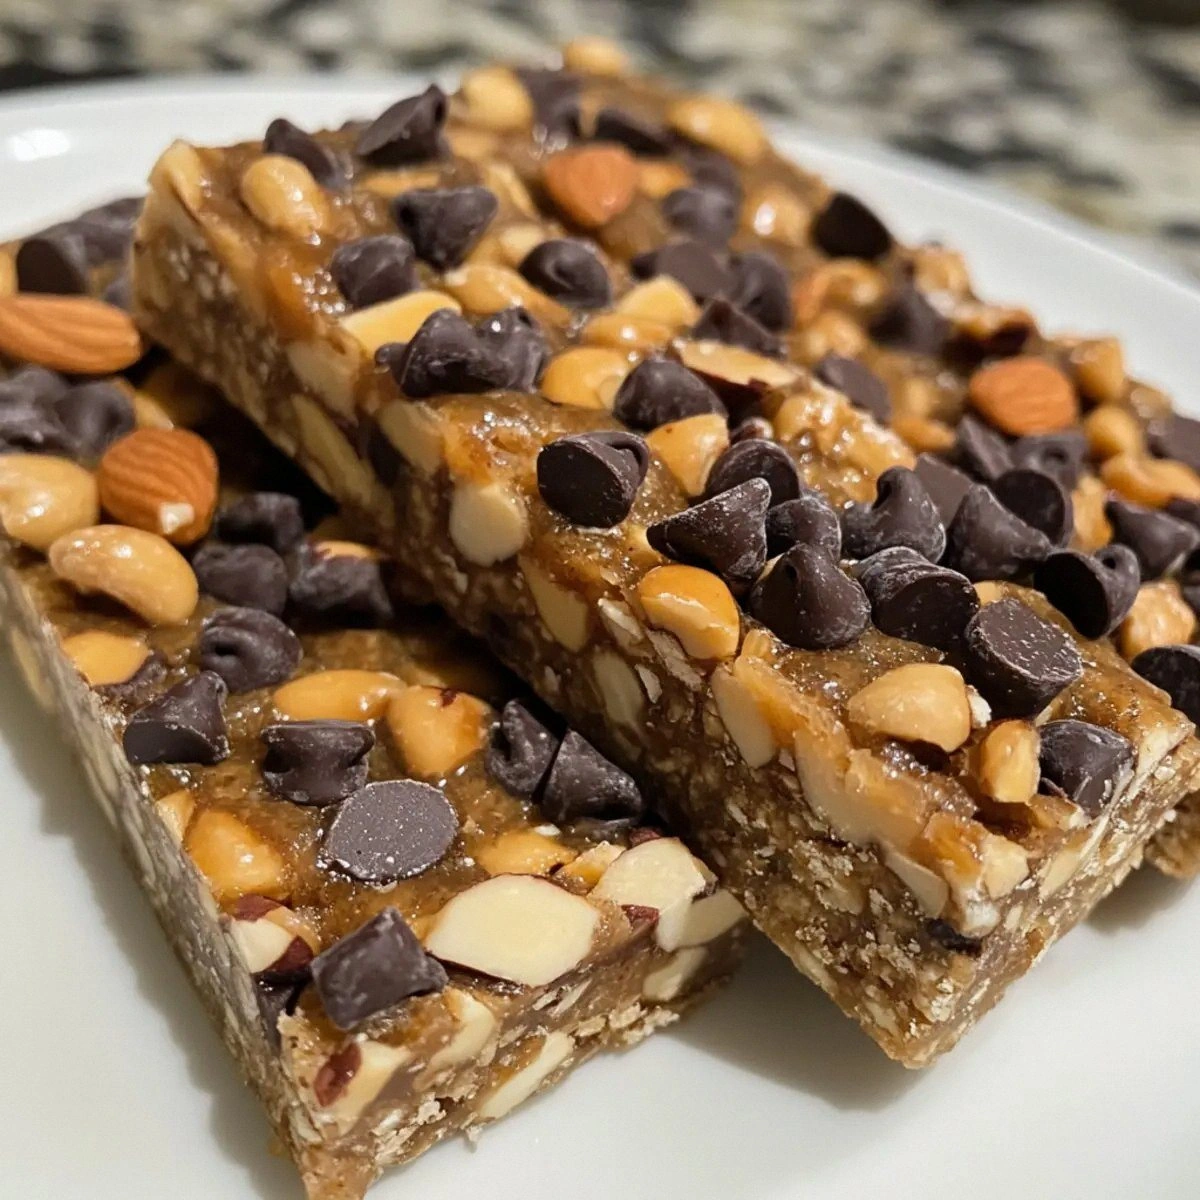
- Texture Triumph: A chewy interior dotted with crunchy almonds and chocolate chips, while the chia seeds add a subtle, pleasant bite that keeps the bar from getting stale.
- Simplicity: Only eight ingredients, all pantry‑friendly, and no fancy equipment—just a bowl, a pan, and a little love.
- Ingredient Quality: Using full‑fat Greek yogurt and natural nut butter ensures you get healthy fats and a creamy mouthfeel without artificial additives.
- Crowd Reaction: Friends who thought they were getting a “healthy” snack are often shocked to find they’re actually devouring a treat that tastes like a bakery‑fresh bar.
- Make‑Ahead Magic: These bars keep their texture for up to a week in the fridge, making them perfect for meal‑prep warriors.
- Cooking Method: A low‑heat bake followed by a steam‑set step locks in moisture, a technique most recipes skip.
- Versatility: Swap out nuts, add dried fruit, or switch protein powder flavors to customize for any palate.
Inside the Ingredient List
The Flavor Base
Greek yogurt is the unsung hero here. Its thick, slightly tart profile acts like a natural sweetener counterbalance, preventing the honey from turning the bar into a sugar bomb. If you swap it for regular yogurt, you’ll lose that creamy body and the bar will feel watery. Choose a plain, full‑fat Greek yogurt for the richest texture; the fat helps bind the oats and nuts together, while the protein gives you that post‑workout boost. Pro tip: Let the yogurt sit at room temperature for 10 minutes before mixing—it becomes more pliable and mixes more evenly.
The Texture Crew
Rolled oats provide the hearty backbone, delivering a satisfying chew without turning the bar into a dense brick. If you’re in a rush, quick‑cooking oats work, but they’ll absorb more moisture and could make the bar soggy. Nut butter (I love almond or peanut) adds healthy fats and a buttery richness that makes each bite feel indulgent. Skipping the nut butter means you’ll miss that luxurious mouthfeel, and the bars might crumble apart. Chia seeds are the tiny miracle workers—they swell up, creating a gel that keeps the bar moist for days. If you’re allergic, flaxseed meal can be a decent stand‑in, though the texture will be slightly less gummy.
The Unexpected Star
Honey is the sweet whisper that ties everything together, but it also acts as a natural humectant, locking moisture into the bar. Use raw, unfiltered honey for a deeper flavor; processed honey can taste flat and may cause the bar to harden faster. The protein powder is where the magic really happens—choose a whey isolate for a smooth texture or a plant‑based blend if you’re vegan. Skipping the powder will make the bar taste great, but you’ll lose the high protein punch that makes it a post‑workout hero.
The Final Flourish
Chopped almonds contribute a satisfying crunch that contrasts beautifully with the chewy interior, while dark chocolate chips melt just enough during baking to create pockets of molten goodness. Opt for 70% cacao or higher for a less sugary, more antioxidant‑rich addition. If you prefer a dairy‑free route, use dairy‑free chocolate chips—just be aware they may not melt as evenly. The final sprinkle of sea salt (optional) can elevate the sweetness, but I keep it minimal to let the natural flavors shine.
Everything's prepped? Good. Let's get into the real action...
The Method — Step by Step
Preheat your oven to 325°F (160°C). While the oven warms, line a 9‑inch square pan with parchment paper, allowing the paper to overhang for easy bar removal later. This low temperature ensures the bars bake evenly without drying out the yogurt base. I always set a timer for 5 minutes just to make sure the oven reaches a steady heat before I start mixing.
In a large mixing bowl, combine 1 cup Greek yogurt and ¼ cup honey. Whisk vigorously until the honey fully dissolves into the yogurt, creating a glossy, amber‑colored mixture. That sizzle when it hits the pan? Absolute perfection. This step is crucial because any undissolved honey will create pockets of sweetness that can burn.
Add 1 scoop of protein powder to the yogurt‑honey blend. Use a whisk or electric hand mixer on low speed to avoid creating a frothy mess—just enough to fully incorporate the powder. If the mixture looks a bit gritty, let it sit for 2 minutes; the protein will hydrate and smooth out.
Stir in 1 cup rolled oats, ¼ cup nut butter, and 2 tablespoons chia seeds. The mixture will thicken rapidly as the chia seeds absorb liquid. At this point, the batter should feel thick enough to hold its shape when scooped; if it feels too runny, add a tablespoon more oats.
Fold in ¼ cup chopped almonds and ¼ cup dark chocolate chips. Use a rubber spatula to gently incorporate them, preserving the crunchy almond pieces and ensuring the chocolate chips are evenly distributed. The batter should now have specks of gold and cocoa throughout, looking like a treasure map.
Transfer the batter into the prepared pan, spreading it with the spatula to an even ½‑inch thickness. Lightly press the surface with the back of a spoon to eliminate air pockets; this prevents uneven baking and ensures a uniform texture.
Place the pan in the oven and bake for 25‑30 minutes. The edges will start pulling away from the parchment, and a faint golden crust will form on top. When you tap the center, it should feel firm yet still slightly springy—this is the sweet spot.
While the bars are still hot, remove the pan and set a clean kitchen towel over the top. Cover tightly and let the bars steam for 5 minutes; this “steam‑set” step locks in moisture, giving you that soft‑chewy interior that stays fresh for days. I call this the “golden hour” of the recipe.
Lift the bars out using the parchment overhang, place them on a cutting board, and slice into 12 equal pieces. Store in an airtight container; they’ll stay moist for up to a week in the fridge, or you can freeze them for longer storage. And now the fun part—taste testing. I’ll be honest — I ate half the batch before anyone else got to try it.
That's it — you did it. But hold on, I've got a few more tricks that'll take this to another level...
Insider Tricks for Flawless Results
The Temperature Rule Nobody Follows
Never bake protein bars at a temperature higher than 350°F. Higher heat creates a hard crust that locks in moisture, but it also makes the interior dry. By keeping the oven at 325°F, the bars bake gently, allowing the chia seeds to fully hydrate and the yogurt to set without forming a rubbery texture. One friend tried 400°F and ended up with bars that snapped like brittle twigs—trust me, you don’t want that.
Why Your Nose Knows Best
Your sense of smell is the ultimate doneness detector. Around the 20‑minute mark, you’ll notice a sweet‑nutty aroma wafting from the pan; that’s the signal that the oats are lightly toasted and the chocolate is just beginning to melt. If you can’t smell that golden note, give the bars an extra 2‑3 minutes. Over‑reliance on timers alone can lead to under‑ or over‑cooked bars.
The 5‑Minute Rest That Changes Everything
After you pull the pan from the oven, resist the urge to slice immediately. Letting the bars rest, covered, for five minutes lets the steam redistribute moisture evenly, preventing dry edges. I once sliced right away and got a crumbly bottom—lesson learned. This short pause is the secret to that perfect, uniform chew.
The Almond Crunch Guard
If you love a louder crunch, toast the almonds lightly before folding them in. A quick 5‑minute toast at 350°F brings out a deeper, caramelized flavor that pairs beautifully with the tangy yogurt. Just be sure they cool completely before adding, otherwise they’ll melt the chocolate chips.
The Chia Hydration Hack
Chia seeds can be stubborn; they’ll soak up liquid but sometimes leave pockets of dry seed if not given enough time. After mixing the dry ingredients, let the batter sit for 3‑4 minutes before the final stir. This short “hydration pause” guarantees every seed is plumped, giving the bar its signature moist bite.
Creative Twists and Variations
This recipe is a playground. Here are some of my favorite ways to switch things up:
Berry Burst
Swap the dark chocolate chips for ¼ cup freeze‑dried raspberries and add a tablespoon of lemon zest. The tart berries cut through the richness, making a refreshing summer snack that’s perfect after a run.
Coconut Paradise
Replace the nut butter with coconut butter, add ¼ cup shredded coconut, and sprinkle toasted coconut on top before baking. The tropical aroma will transport you to a beachside cabana, and the extra fiber keeps you full longer.
Spicy Mocha
Add 1 teaspoon espresso powder and a pinch of cayenne to the dry mix, then use dark chocolate chips with a hint of orange zest. The subtle heat and coffee kick make these bars an excellent pre‑workout boost.
Nut‑Free Power
Omit the almonds and use ¼ cup pumpkin seeds instead. Pair with sunflower seed butter for the nut‑free version, and you’ll still get that satisfying crunch without any tree nuts.
Vegan Victory
Swap Greek yogurt for 1 cup soy‑based yogurt (plain, unsweetened) and use a plant‑based protein powder. Choose almond butter or a seed butter, and you have a fully vegan bar that still hits the protein target.
Storing and Bringing It Back to Life
Fridge Storage
Place the sliced bars in an airtight container lined with parchment paper. They’ll stay soft and moist for up to 7 days. If you notice a slight crust forming on the surface, a quick drizzle of a teaspoon of honey over the top will re‑hydrate them.
Freezer Friendly
Wrap each bar individually in plastic wrap, then stash them in a freezer‑safe zip‑bag. They’ll keep for up to 3 months. When you’re ready to eat, let them thaw at room temperature for 15 minutes, then give them a quick microwave zap (10 seconds) to revive the chew.
Best Reheating Method
If a bar feels a bit dry after a week, place it on a microwave‑safe plate, sprinkle a tiny splash of water (about a teaspoon), and microwave for 8‑10 seconds. The steam generated will bring back that fresh‑out‑the‑oven softness without turning it soggy.